21
Proprietary Information: Not for use or disclosure except by written agreement with Calix.
© Calix. All Rights Reserved.
Grounding the Chassis
The Calix E7-2 ground system can be connected to a Common Bonding Network (CBN) or
Isolated Bonding Network (IBN).
Note: For environments that employ an IBN scheme, the low voltage and frame grounds on
the E7-2 shelf are isolated from the input power DC-return.
The installation kit includes a 12-foot (3.66-meter) ground cable, plus hardware to attach it to
the E7-2 frame ground.
ESD ALERT! Beware of electrostatic discharge. Follow standard ESD
precautions. Always wear a grounded ESD wristband to avoid damaging the
electronic equipment.
To ground the E7-2 chassis
1. Get the ground cable and supplied hardware (pair of 10-32 Keps nuts and washers) from
the installation kit.
Note: The Calix-supplied ground cable uses UL-listed ground compression lugs (p/n
615-0001). If you use a ground cable other than the one supplied by Calix, be sure to coat
the bare conductor with an appropriate antioxidant compound before making any crimp
connections
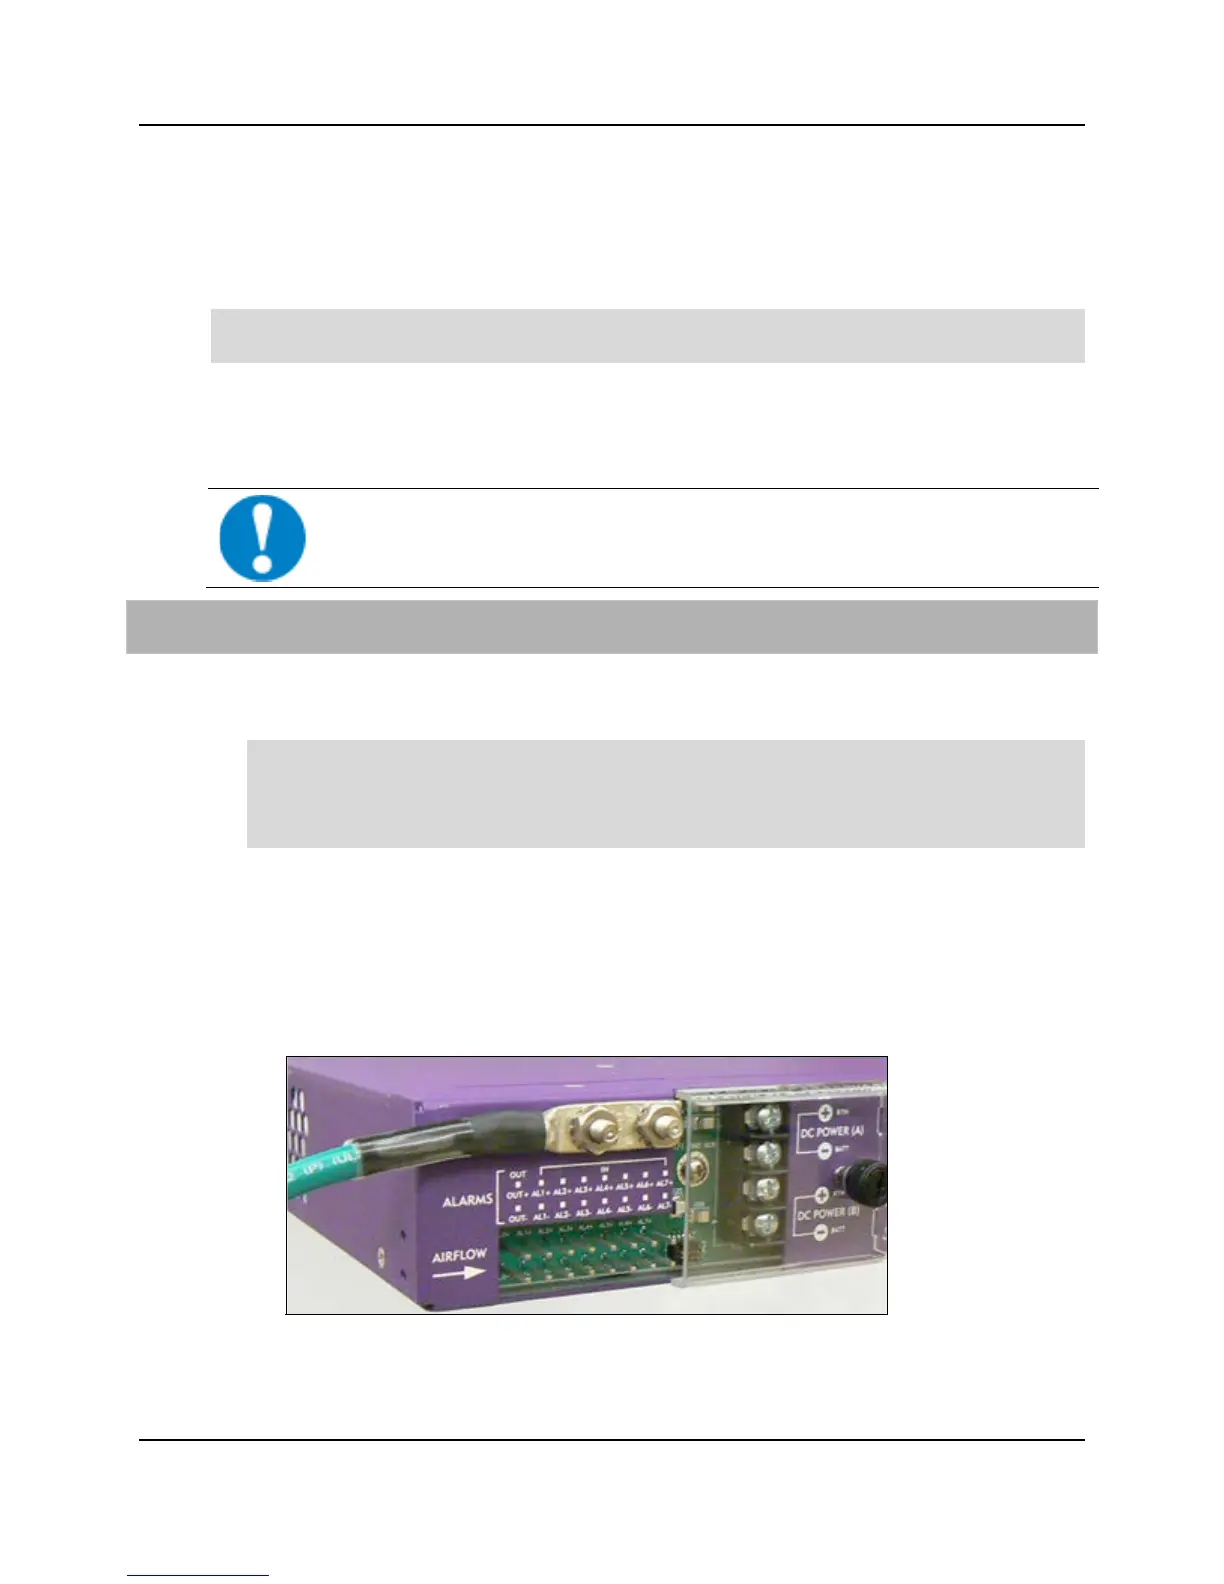
2. Connect the ground cable to the E7-2 chassis as follows:
a. Install (2) star washers and then the ground cable's 2-hole lug onto the dual-post
Frame Ground terminal (located on the rear of the chassis).
b. Install (2) 10-32 Keps nuts onto the Frame Ground posts to secure the lug in place.
Tighten to 27 in-lbs. of torque.
 Loading...