30
When you turn on he power for the first time or if the date/ ime has been reset, the
Date/Time setting screen will appear. Follow steps 3 and 4 to set he date/time.
Note that the date/time appended to recorded images will be based
on this date/time setting. Be sure to set the correct date/time.
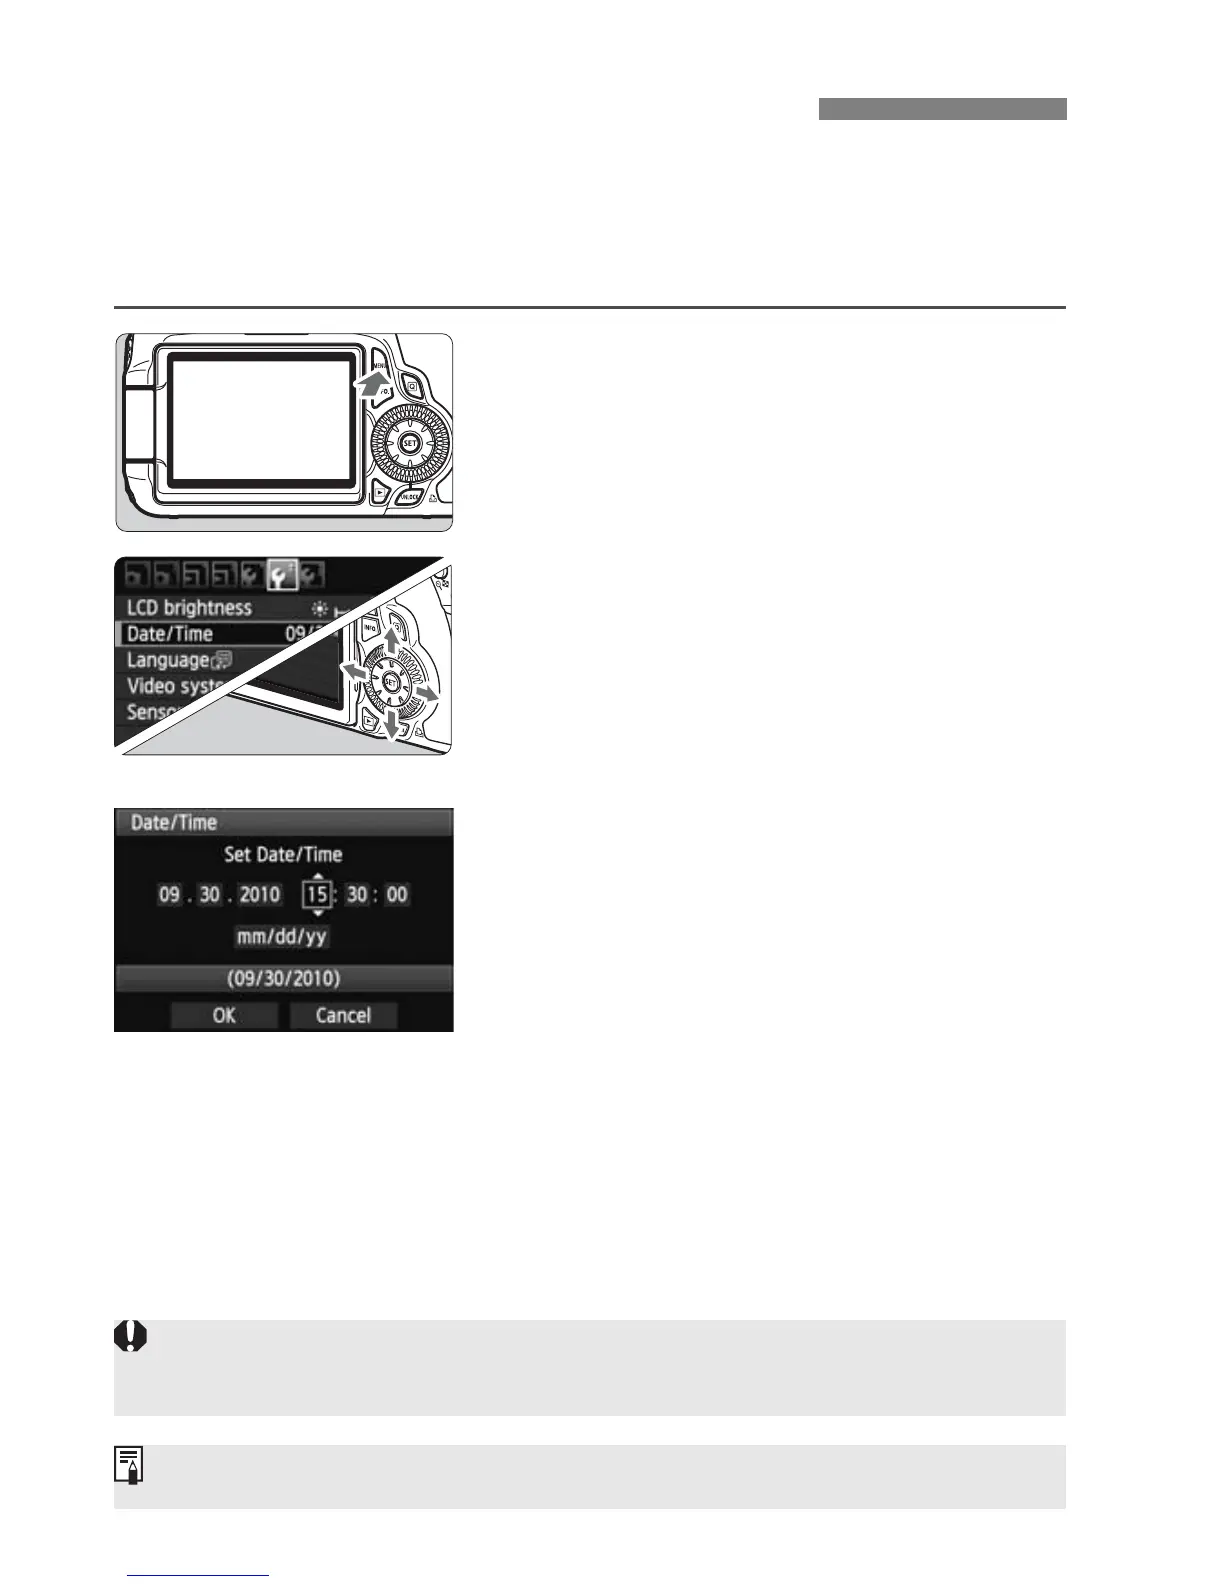
1
Display the menu.
Press the <M> button to display
the menu.
2
Under the [6] tab, select [Date/
Time].
Press the <U> key on the <9> to
select the [6] tab.
Press the <V> key on the <9> to
select [Date/Time], then press <0>.
3
Set the date and time.
Press the <U> key on the <9> to
select the date or time number.
Press <0> so <r> is displayed.
Press the <V> key on the <9> to
set the number, then press <0>.
(Returns to s.)
4
Exit the setting.
Press the <U> key on the <9> to
select [OK], then press <0>.
X The date/time will be set and the
menu will reappear.
3 Setting the Date and Time
If you store the camera without the battery or if the camera’s battery becomes
exhausted, the date/time might be reset. If this happens, set he date/time again.
The date/time set will start from when you press <0> in step 4.





 To Next Page