10
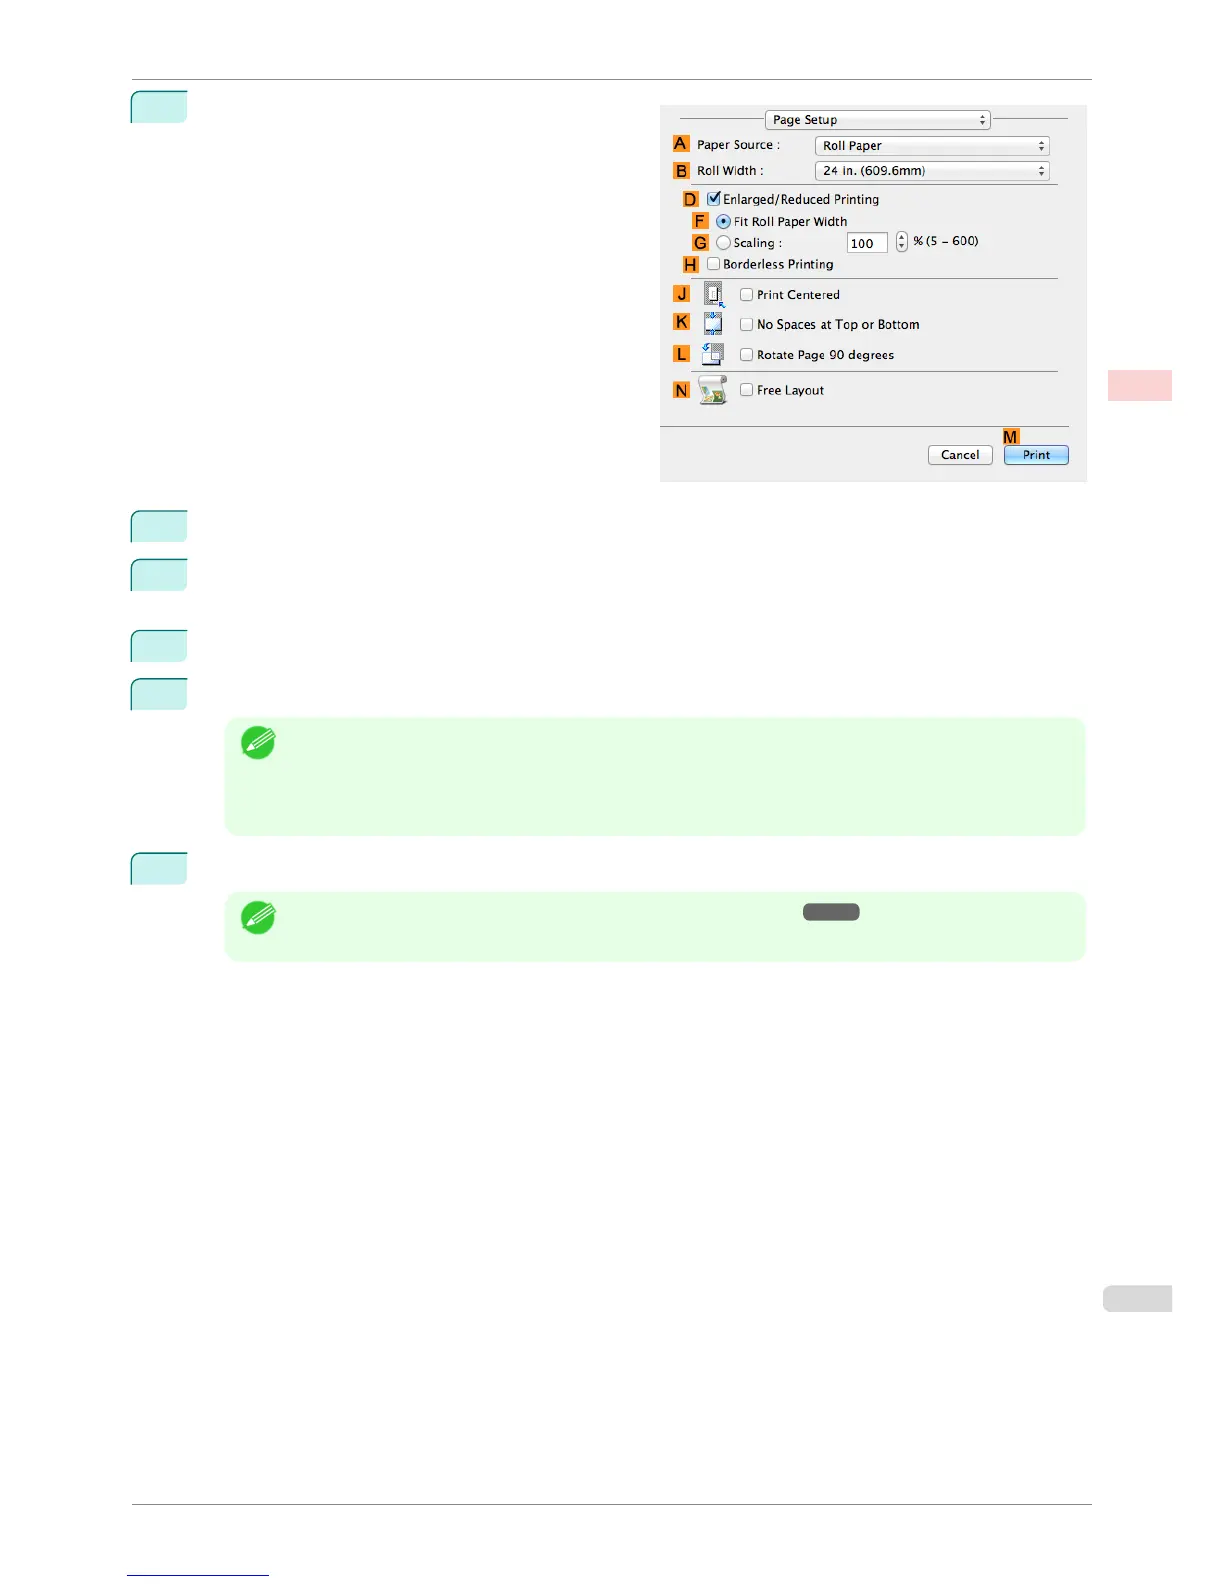
Access the Page Setup pane.
11
Select and click a roll paper in the A Paper Source list.
12
Select the paper width of the roll loaded in the printer for B Roll Width. In this case, ISO A2/A3 (420.0mm)
is selected.
13
Select the DEnlarged/Reduced Printing check box.
14
Click GScaling and enter 120.
Note
• You can specify enlargement that exceeds the paper size, but in this case, the portion off the edge of the
paper will not be printed.
• If the original size after enlargement or reduction is smaller than the paper size, the original is printed in
the upper-left corner. In this case, you can center originals by selecting the J Print Centered check box.
15
Confirm the print settings, and then click MPrint to start printing.
Note
• For tips on confirming print settings, see "Confirming Print Settings ." ➔ P.250
iPF780
Resizing Originals by Entering a Scaling Value (Mac OS)
User's Guide
Enhanced Printing Options Printing enlargements or reductions
69

 Loading...