Configure the IPsec settings in the Océ controller
Before you begin
You must be logged as a System Administrator or a Power user.
To benefit from the full IPsec mechanism, the DHCP protocol must not be used. On the
Configuration - Connectivity page, disable all the network settings that require the DHCP.
Activate and configure IPsec in the system controller
Procedure
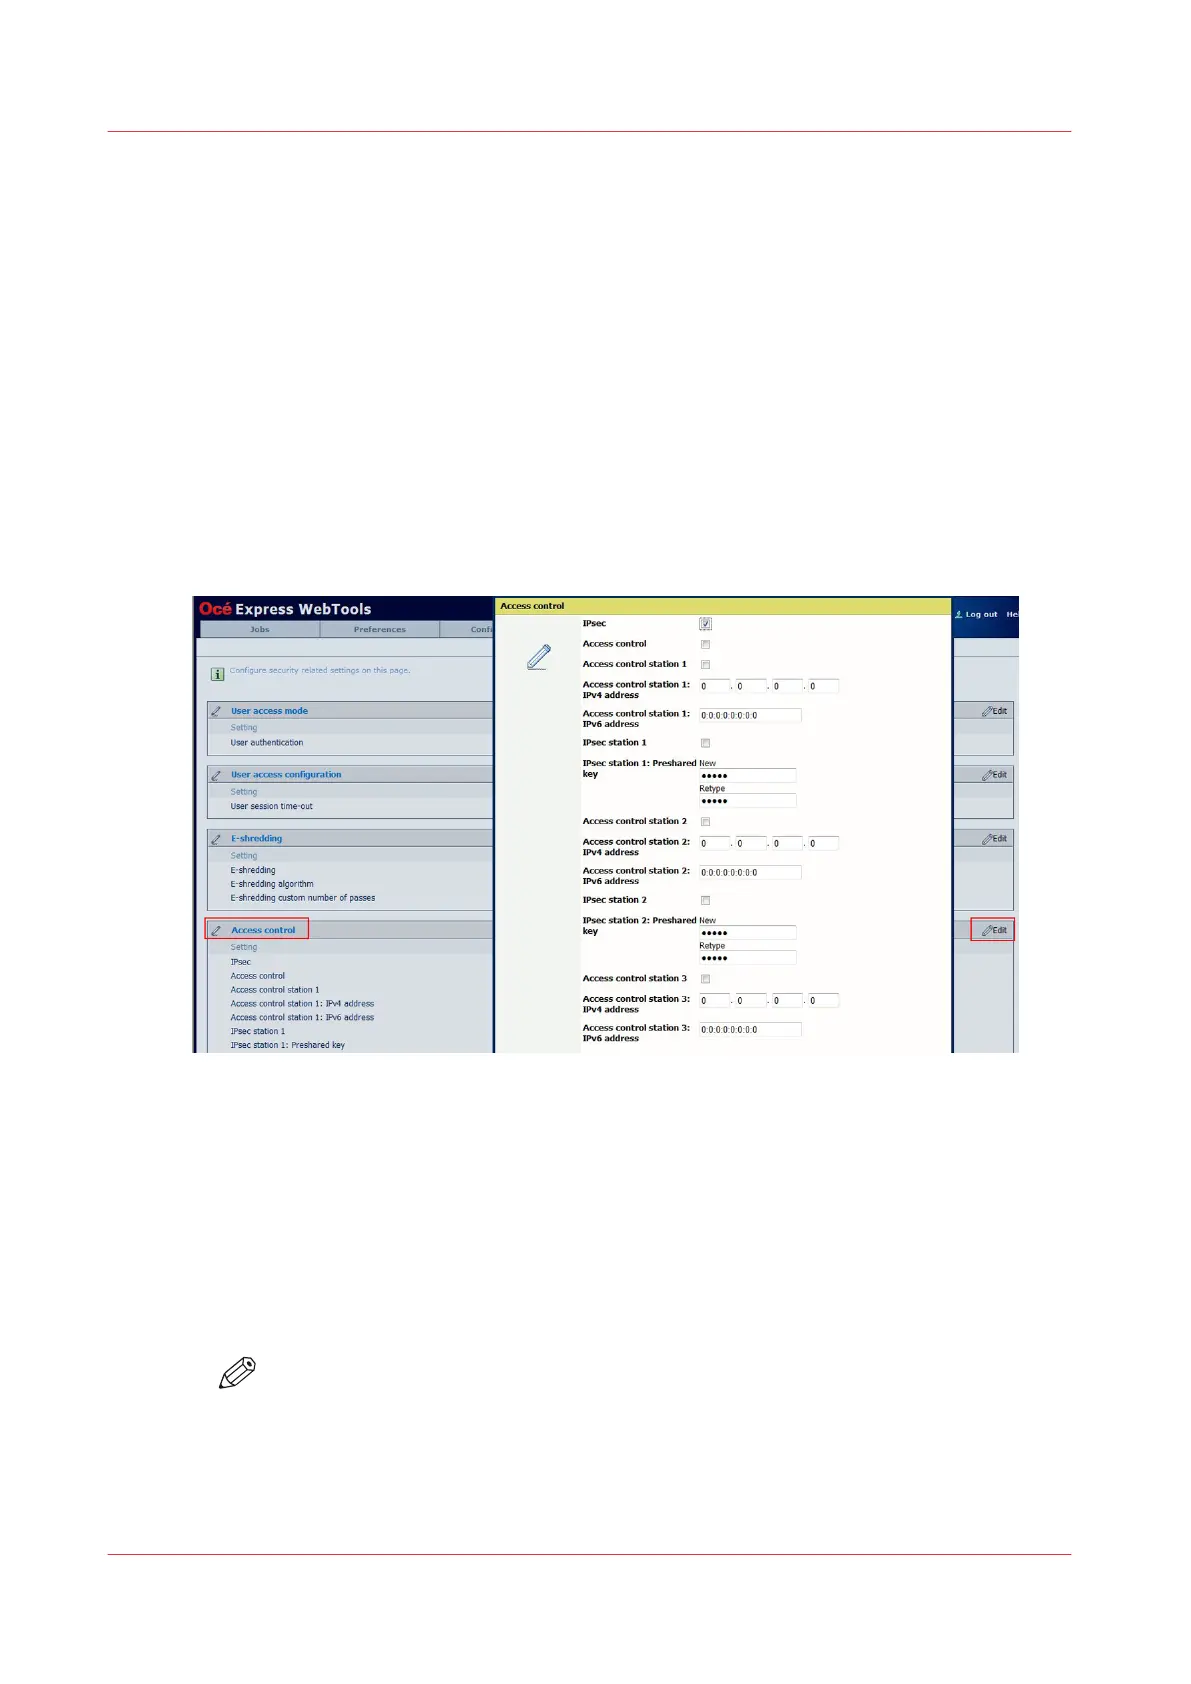
1.
Open a web browser and enter the system URL: https://<hostname>, to open the Océ Express
WebTools.
2.
Open the 'Security' - 'Configuration' page.
3.
In the 'Access control' section, click on the general 'Edit':
4.
Check the 'IPsec' box to enable it.
You can also activate the 'Access control' (see the combinations of IPsec and Access Control in
IPsec and Access control behaviour
on page 118)
5.
Enable 'IPsec station 1'
Tip: When you enable Access control, it is recommended to declare the workstation from which
you remotely configure the system, at least during the configuration time (IPsec is not needed).
6.
Enter the IPsec preshared key or keep it empty to use the default preshared key. The 'IPsec default
preshared key' setting is available at the bottom of the 'Access control' section.
• 256 characters maximum
• Any MS character
NOTE
Write down this preshared key. It will be required during the IPsec configuration on the
workstation.
7.
Click OK
Note: The settings are applied as soon as 'OK' is validated (and before the restart). You may lose
the remote connection to the system when your workstation is not part of the configured stations.
Configure the IPsec settings in the Océ controller
206
Chapter 4 - Security on Océ PlotWave 345/365 and Océ PlotWave 450/550