49
Batch Transfer
4
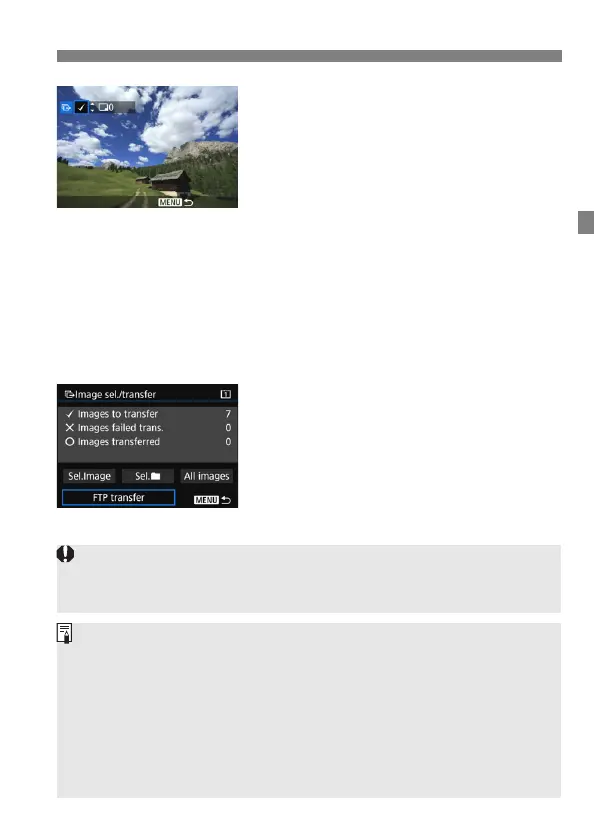
Select images to transfer.
Turn the <5> dial to select the
image to be transferred, then press
<0>.
Turn the <5> dial to display the [X]
on the screen’s upper left, then press
<0>.
If you press the <u> button and turn
the <6> dial counterclockwise, you
can select an image from a three-
image display. To return to the single-
image display, turn the <6> dial
clockwise.
To select other images to be
transferred, repeat step 4.
5
Transfer the image.
Select [FTP transfer], then press
<0>.
Select [OK] on the confirmation
dialog to transfer the image.
Images selected with [Sel.n] and
[All images] can also be transferred
in this way.
If you set the Live View shooting/Movie shooting switch to <k> during the
image transfer of captured images, the image transfer will be temporarily
cancelled. Set it to <A> to resume the image transfer.
You can also transfer shot movies. However, when the Live View
shooting/Movie shooting switch is set to <k>, images cannot be
transferred. Set it to <A> and transfer them.
When [Sel.Image] is selected, you can check the transfer history on the
upper left of the screen: No mark: Not selected. X: Selected for transfer.
l: Transfer failed. k: Transfer succeeded.
The procedures for [RAW+JPEG transfer] (p.51) and above steps 1 to 4
can also be performed even while the camera is not connected to an
FTP server.