Notice that we add the PegPrompt 25 pixels lower than the height of promptRect. This
spaces the PegPrompts out so they are not drawn on top of each other. The following
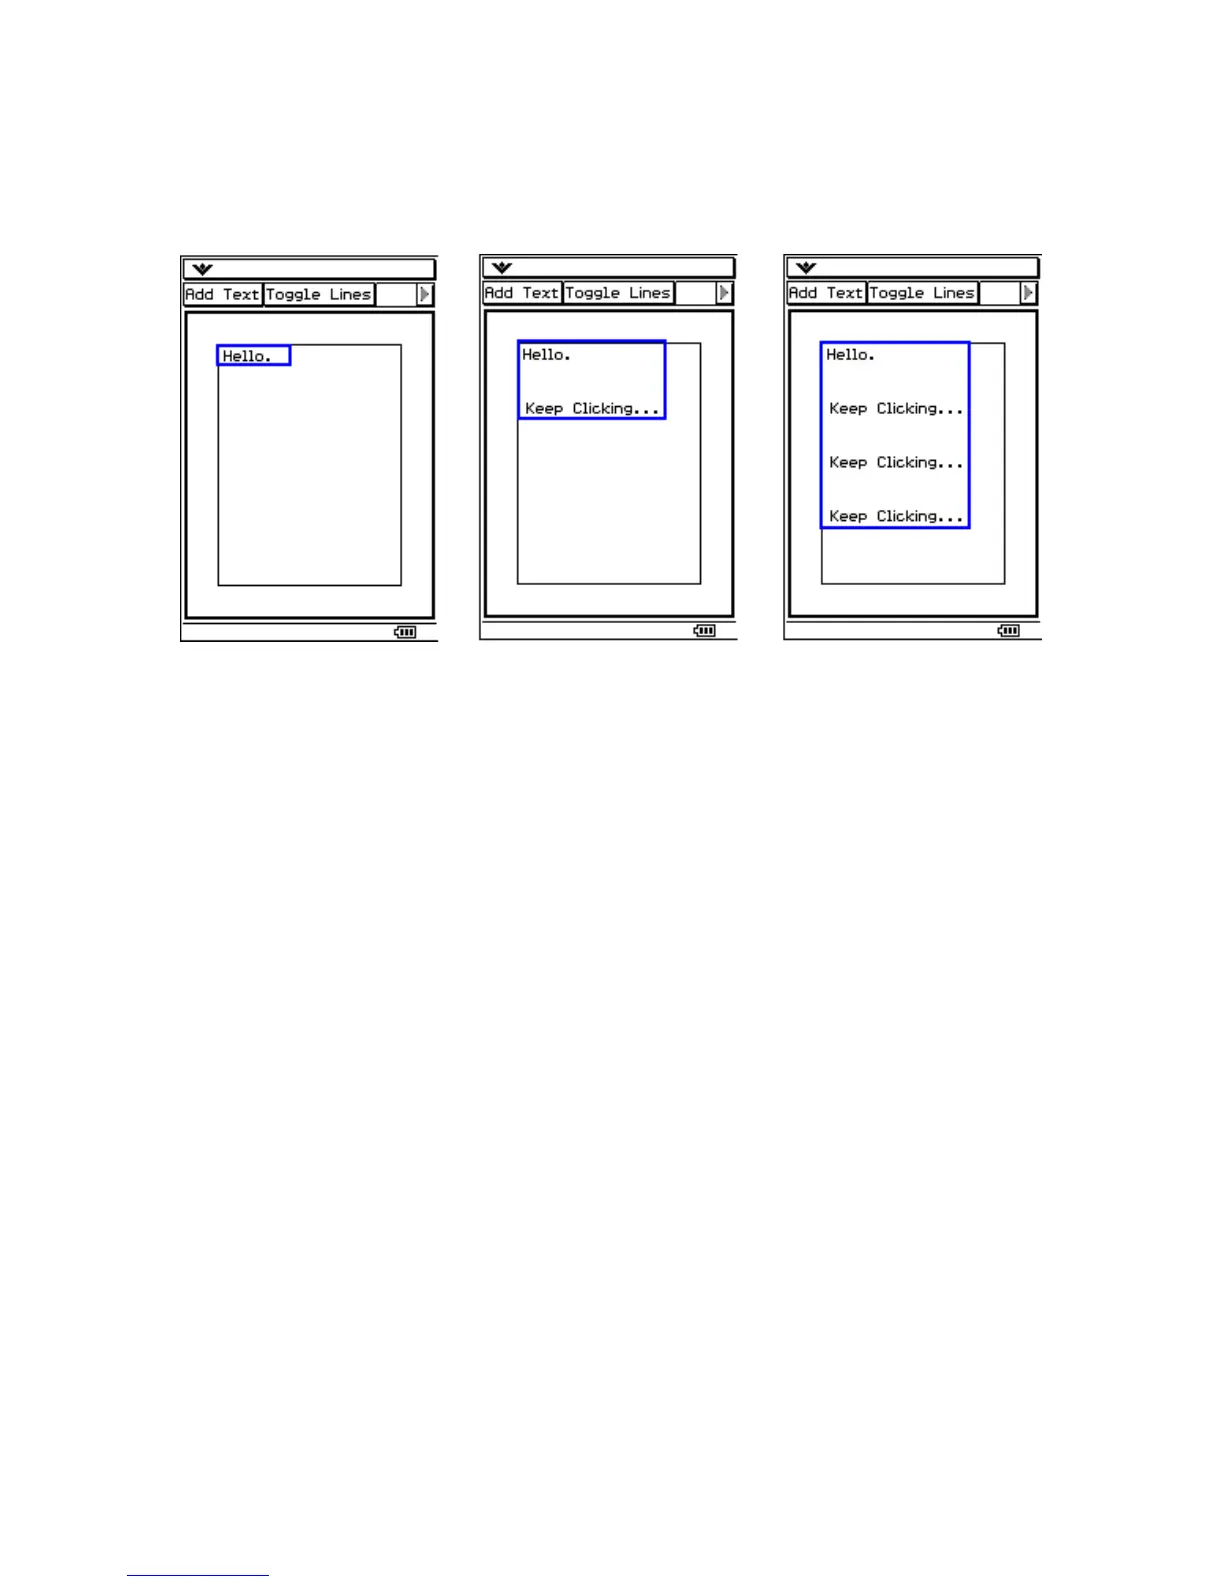
figure will give you an idea of how promptRect grows as a PegPrompt is added:
A rough idea of what promptRect’s boundary, drawn in blue, looks like on startup and after adding a
couple of new PegPrompts
In a couple more clicks, the height of promptRect will grow larger than PanWindow’s
mClient height. When this happens, there will be nowhere to put the next PegPrompt and
we will have to resize PanWindow.
To resize PanWindow, we need to create a rectangle that will be the new size of the
window and pass it to the Resize() function. Here is the code to do this:
if(promptRect.Height() + 25 > mReal.Height())
{
text = new PegPrompt(4, promptRect.Height()+25,
(PEGCHAR*)"Window Resized!");
promptRect |= text->mReal;
AddR(text);
BeginDraw();
PegRect new_rect = mReal;
new_rect.wBottom += ( 25 + text->mReal.Height());
Resize(new_rect);
// Calling Resize with the same size is used as a "trick" to
// force the parent to check for and add or remove scrollbars
Parent()->Resize(Parent()->mReal);
Parent()->Draw();
EndDraw();
}
First, we create a new rectangle and set it equal to PanWindow’s mReal. We then add
the height of the PegPrompt plus the 25 pixels of spacing to the bottom of it. This
39