CASIO ClassPad 330 and ClassPad Manager Software Version 3.04
Copyright © 2009 CASIO COMPUTER CO., LTD. All Rights Reserved.
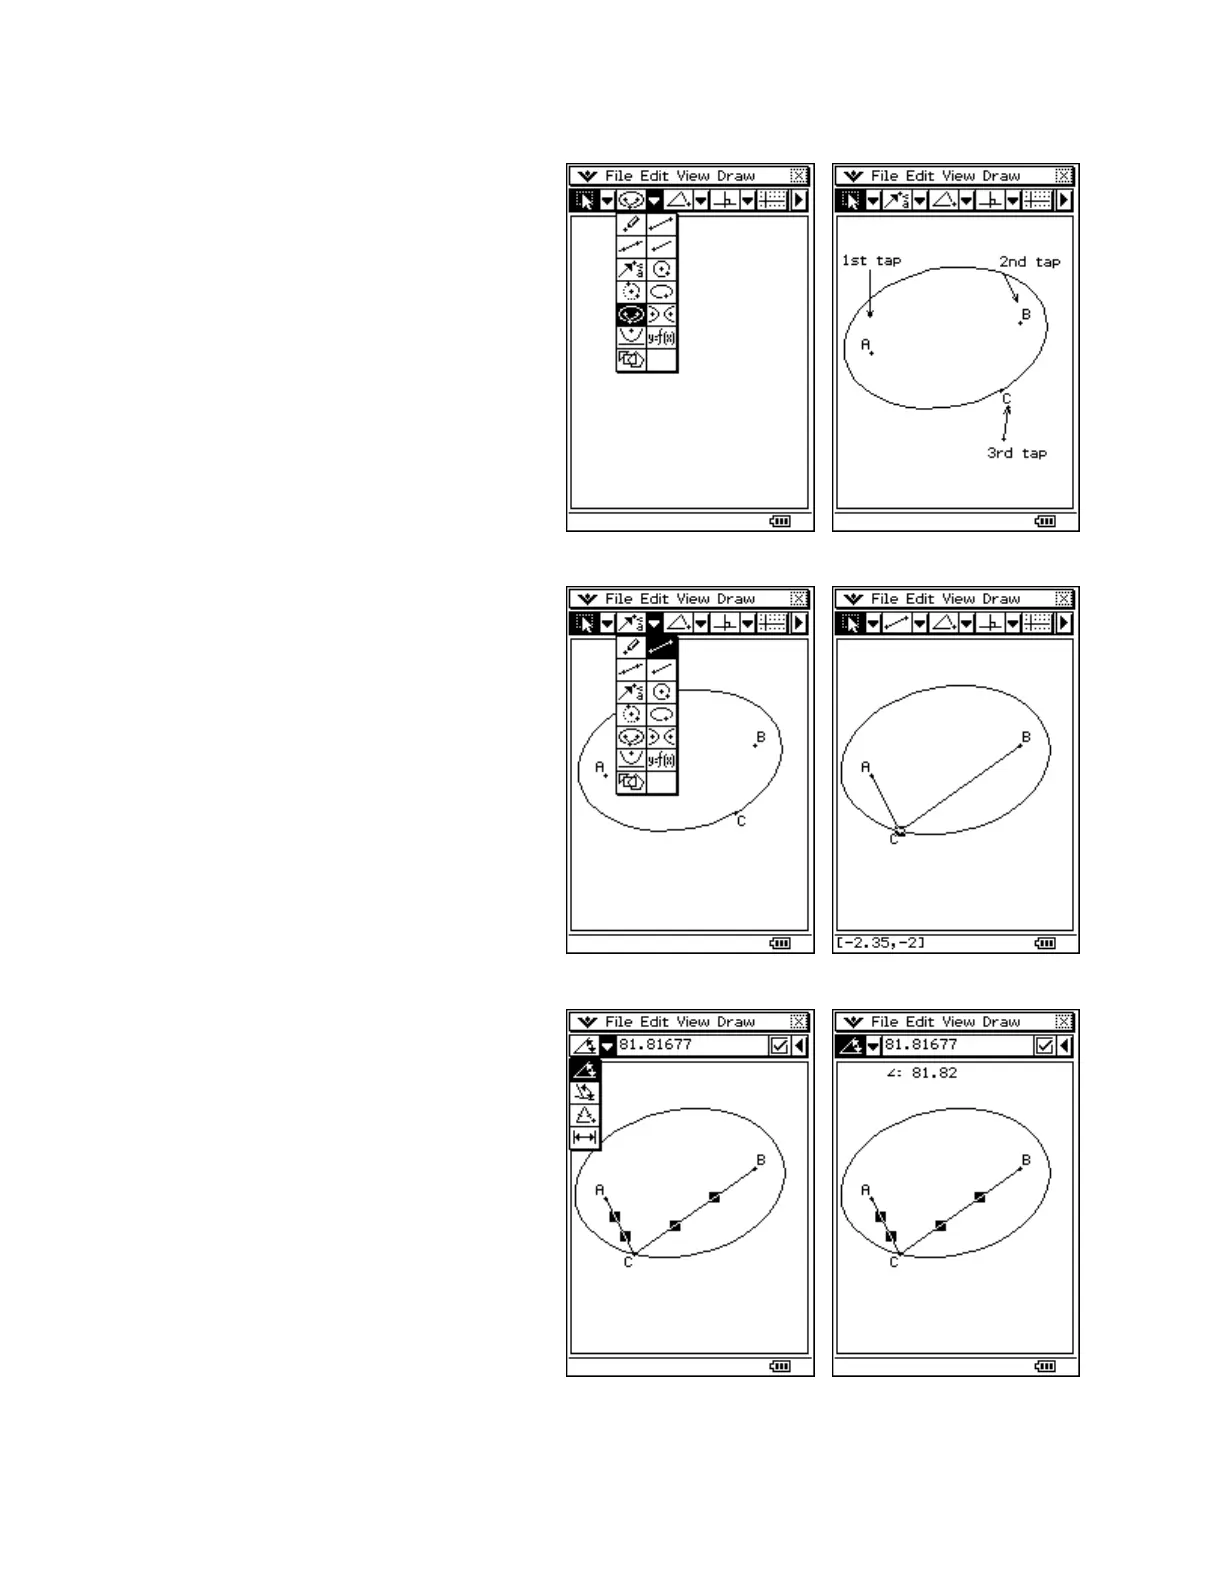
Using the Geometry Application
Drawing an Ellipse with Foci
a. Tap m and then G
b. Tap the 2
nd
n and select the ellipse
with foci icon
c. Tap twice (about 1 inch apart)
d. Tap a third time and drag until you
are happy
Adding Segments and Selecting
a. Tap the 2
nd
n and select the segment
icon
b. Tap point A and then point C
c. Tap point B and then point C (Notice
the status bar as you tap!)
d. Select the 1
st
toolbar button (G) to
change to select mode
e. Tap point C, let go, and then press on
C and drag to move it
a. Tap the right most u to discover the
Measurement Box
b. Tap in any white space to deselect C
c. Tap segment AC to select it
d. Tap segment BC to select it
e. Tap n and select Q (if needed)
f. Tap Q to put the angle value in the
Geometry window
g. Select point C and drag – your angle
measure updates as you move