16 Introduction
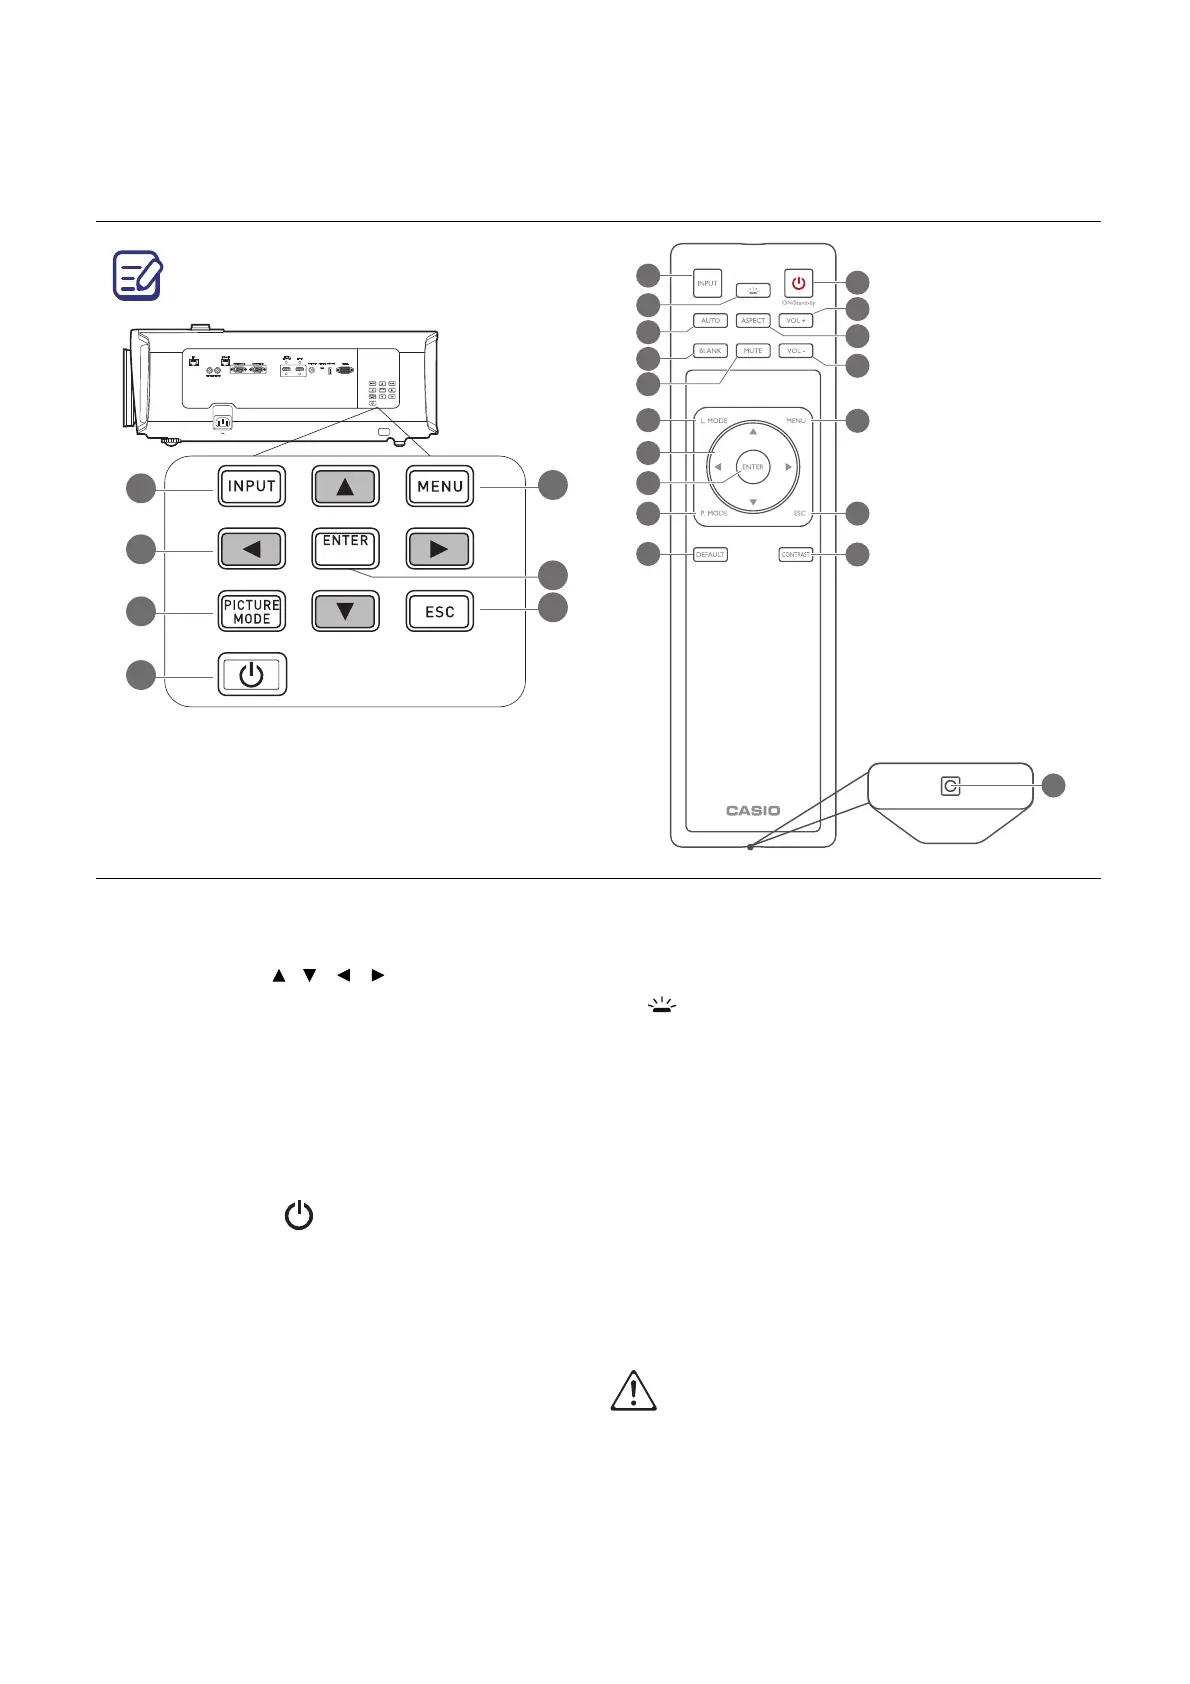
Controls and functions
Projector & Remote control
1. INPUT
Displays the input selection bar.
2. Arrow keys ( , , , )
When the On-Screen Display (OSD) menu
is activated, these keys are used as
directional arrows to select the desired
menu items and to make adjustments.
3. PICTURE MODE
Selects an available picture setup mode.
4. ON/Stand-by
Toggles the projector between standby
mode and on.
5. MENU
Turns on the On-Screen Display (OSD)
menu.
6. ENTER
Confirms the selected On-Screen Display
(OSD) menu item.
7. ESC
Goes back to previous OSD menu, exits
and saves menu settings.
8. KEY LIGHT
Turns on the remote control back light for a
few seconds. To keep the back light on,
press any other key while the back light is
on. Press the key again to turn the back
light off.
9. AUTO
Automatically determines the best picture
timings for the displayed image.
10. BLANK
Used to hide the screen picture.
Do not block the projection lens from projecting
as this could cause the blocking object to
become heated and deformed or even cause a
fire.
All the key presses described in this
document are available on the remote control
or projector.
1
12
3
2
6
8
11
4
5
7
17
15
14
16
9
10
13
1212
18

 Loading...