Sect. 3 - Installation and Operator’s Controls of the Bench Saw
•
CEDIMA
®
• Technical Documentation • All rights reserved as per DIN 34 • „Subject to modifications due to progressive development“ •
Page 15
Bench Saw CTS•81, L, XL
Operating Manual 70 9998 0329 / UK 003
3. Installation and Operator’s Controls of the Bench Saw
Note:
Read operating instructions carefully!
You are not ready to operate the Bench Saw if
you have not read and understood the operating
and safety instructions.
3.1 Notes relating to the installation of
the Bench Saw
• Plug the four feet from below into the frame
and secure the feet using the wing screws.
Firmly tighten the wing screws to ensure that
the plug-in feet are properly fastened.
• The Bench Saw must always be placed level on
firm ground.
• While installing the Bench Saw, make sure to
avoid any hazard/nuisance to other persons or
obstacles impeding the proper operation of the
machine.
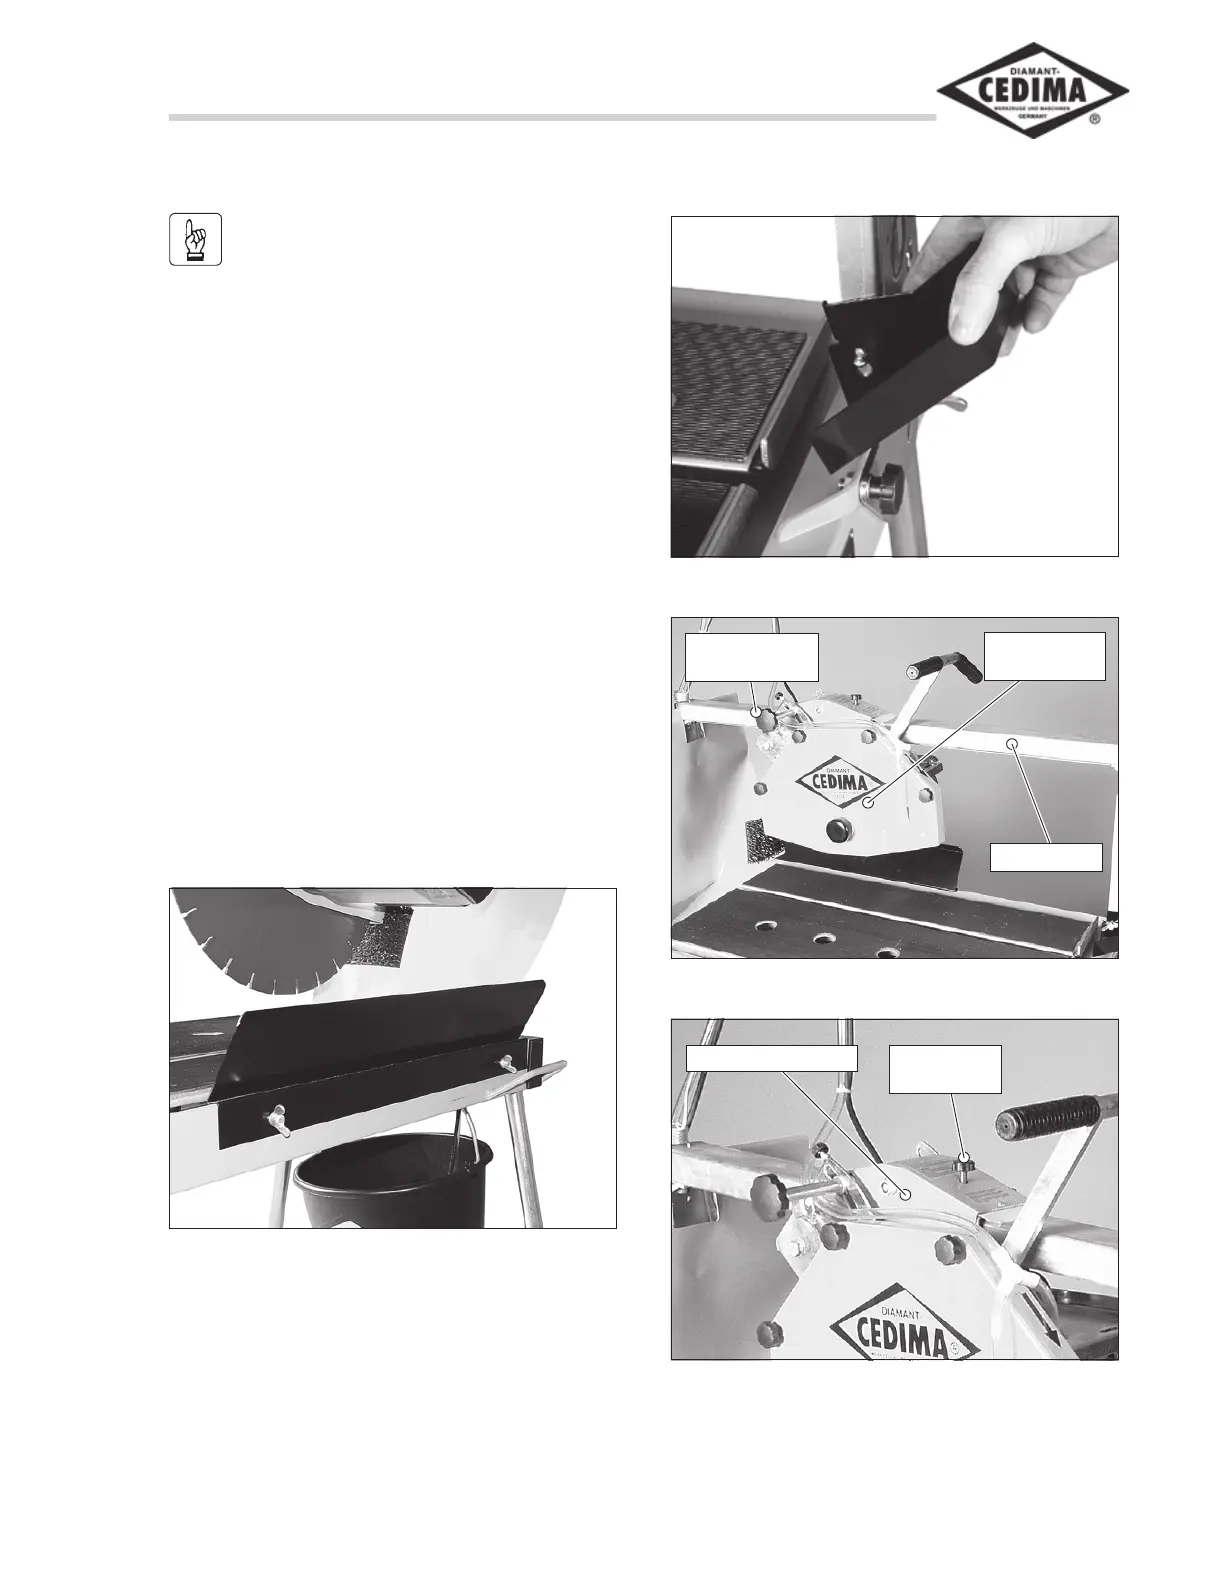
• Install the lateral splash guard as shown in fig.
3.1. Use the wing screws to fasten the guard to
the frame.
Fig. 3.1 Lateral splash guard
• Hook in the front splash guard as shown in fig.
3.2.
Fig. 3.2 Installing the front splash guard
• Verify that the swivel-joint cutting head is free
to move. For that purpose, loosen the quick-re-
lease handle at the cutting head (fig. 3.3) and
move the cutting head up and down.
Fig. 3.3 Swivel-joint cutting head
Swivel-joint
cutting head
Guide rail
Quick-release
handle
Fig. 3.4 Guide block with fixing screw
Guide block
Fixing
screw