Page 20 •
CEDIMA
®
• Technical Documentation • All rights reserved as per DIN 34 • „Subject to modifications due to progressive development“ •
Sect. 3 - Installation and Operator’s Controls of the Bench Saw
Bench Saw CTS•81, L, XL
Operating Manual 70 9998 0329 / UK 003
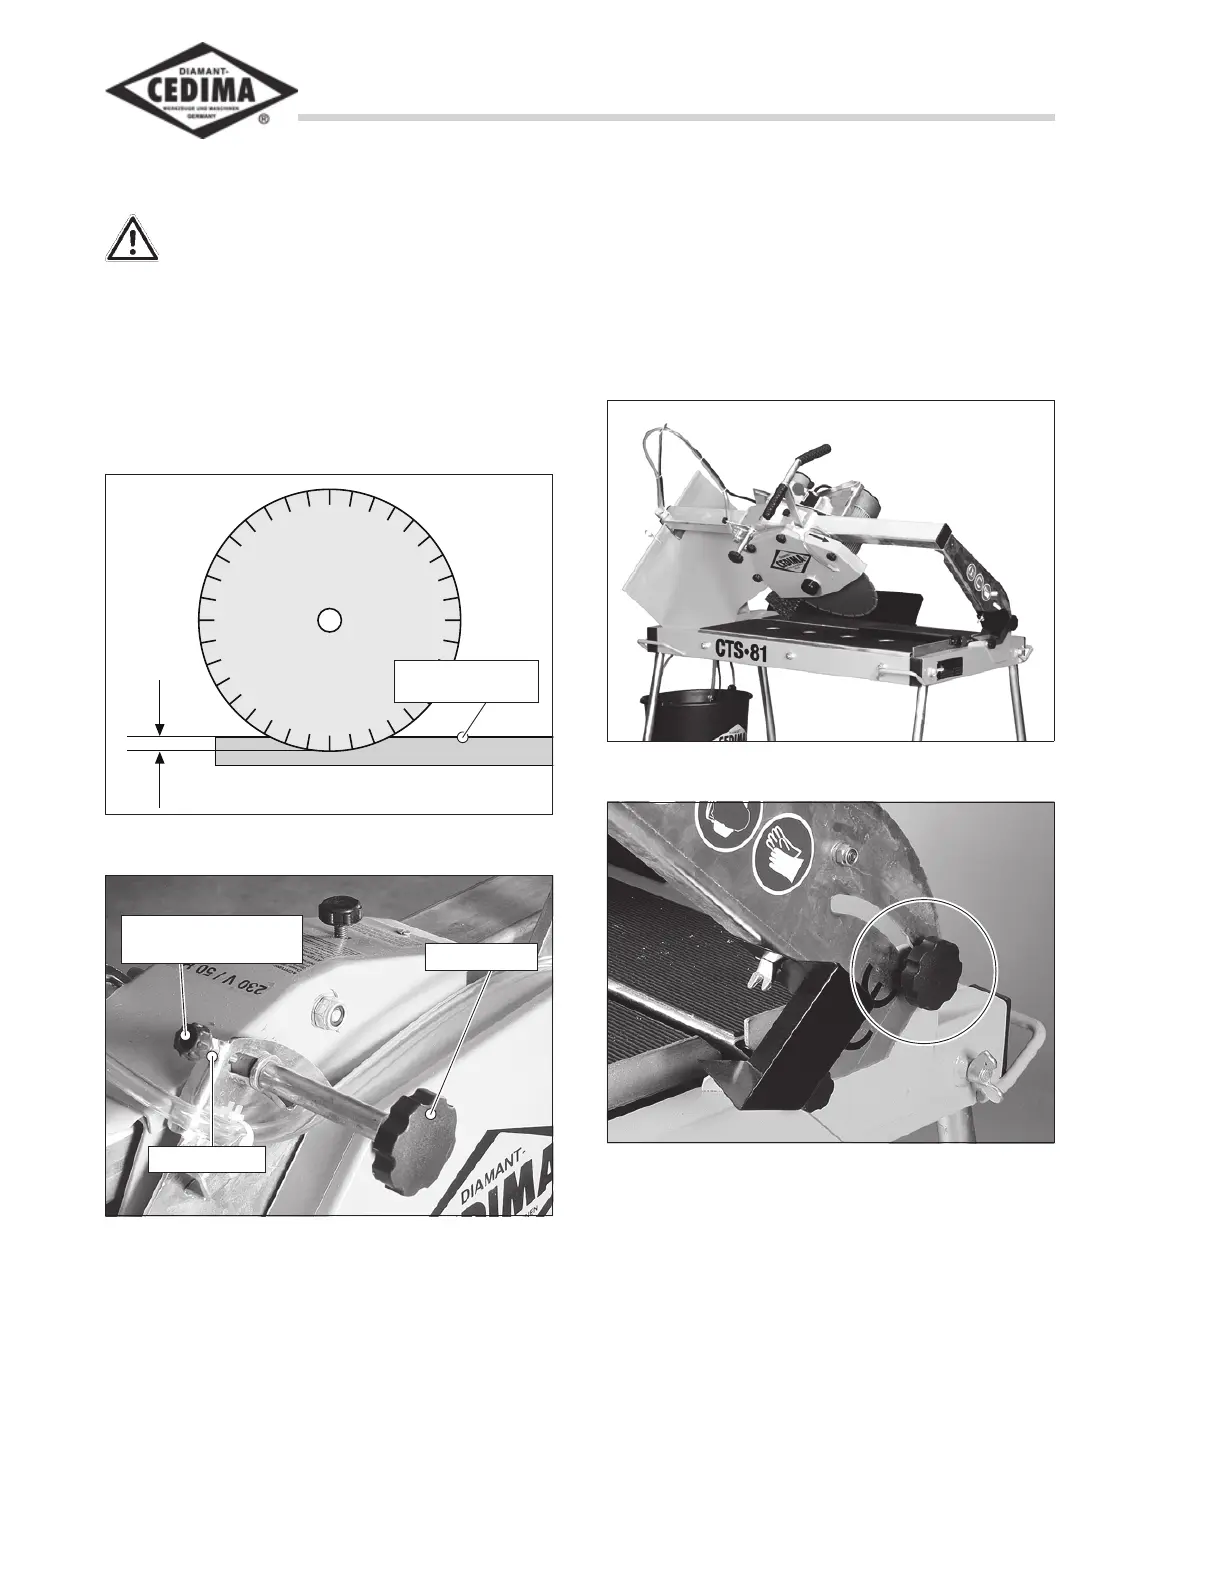
3.7 The depth stop
Attention:
Set the depth stop to 3 mm!
Before the cutting operation is initiated, the depth
stop must be set in such a way that the diamond
saw blade penetrates approx. 3 mm into the table
(measured from the top face of the table, see fig.
3.16), in order to prevent damage to the table or
saw blade during operation.
Fig. 3.16 Setting the saw blade to the required depth
approx.
3 mm
Top face of the
table
Fig. 3.17 Setting the depth stop
Setting screw for
depth stop
Locknut
Palm grip
To set the depth stop, proceed as follows:
1. Loosen the palm grip (fig. 3.17) at the
swivel-joint cutting arm.
2. Lower the cutting head to the desired depth
setting and re-tighten the palm grip.
3. Use the setting screw and locknut (fig. 3.17)
to secure the depth stop.
3.8 Mitre cuts adjuster
The Bench Saw CTS•81 is equipped with a
hinged guide rail (fig. 3.18) that allows the user
to make accurate mitre cuts (angled cuts).
Fig. 3.18 45-degree mitre cut
Fig. 3.19 Front-side palm grip
To pivot the guide rail, lightly loosen the palm
grips at both front sides of the saw (fig. 3.19) and
set the rail to the desired angle. Firmly re-tighten
the palm grips after setting the guide rail.