12
Hardware Installation
Cable Connections
1. Plug the power cord of the power conditioner into the appropriate electrical outlet. Turn the power conditioner
on, conrming it is working by the green light on the front of the conditioner.
2. If using a SMART 6 for moisture analysis, rst refer to the SMART 6 Operations Manual for installation and
setup of the SMART 6.
3. Once installed, plug the SMART 6 power cord into the power conditioner. Wait until connecting all ORACLE
cables to connect the SMART 6 to the ORACLE processor box via the supplied green Ethernet cable, then pro-
ceed with powering the SMART 6 on.
4. Following steps 5-16, carefully connect each cable provided in the cable kit and accessory kit. Ensure that
each cable is connected properly. Use caution to prevent bending or damaging the pins of the connectors.
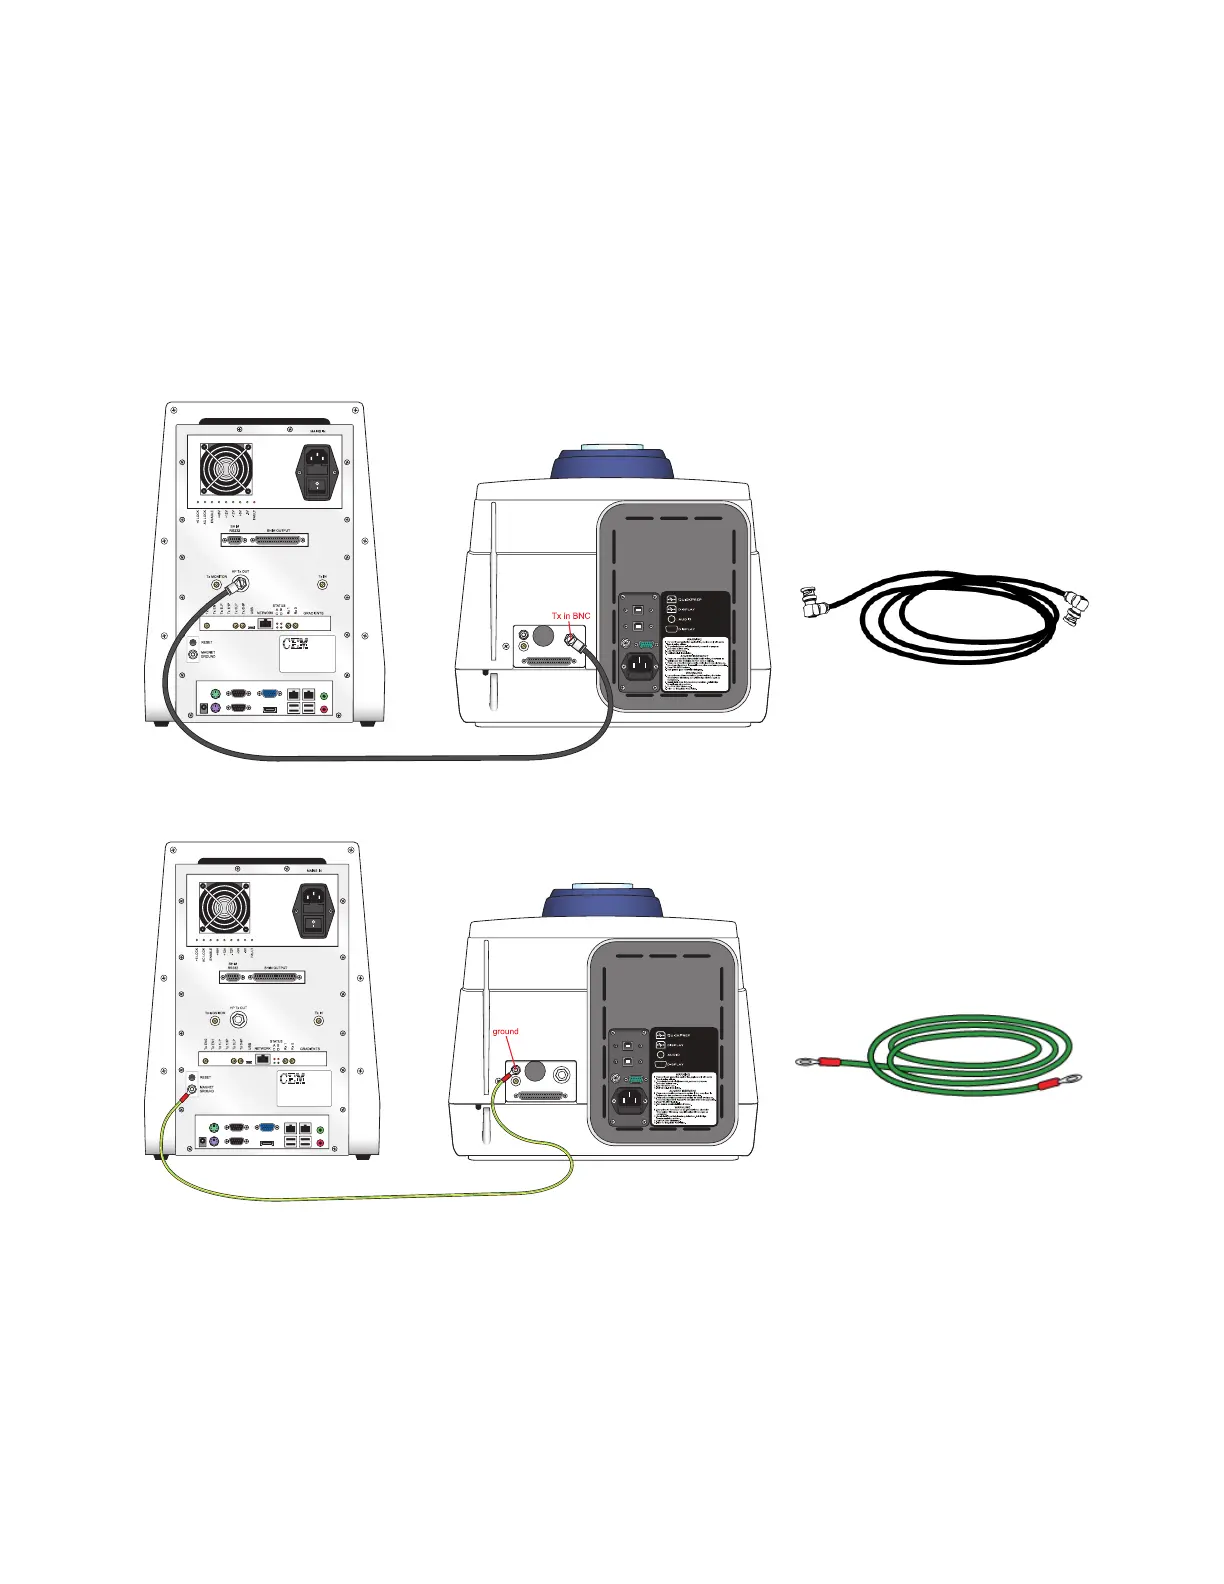
5. Connect the BNC cable to the processor box and magnet.
6. Connect the ground cable to the processor box and the magnet as illustrated. Ensure all washers are placed
back on the screw prior to adding the nut.

 Loading...