page 38 www.CentSys.com
SECTION 10
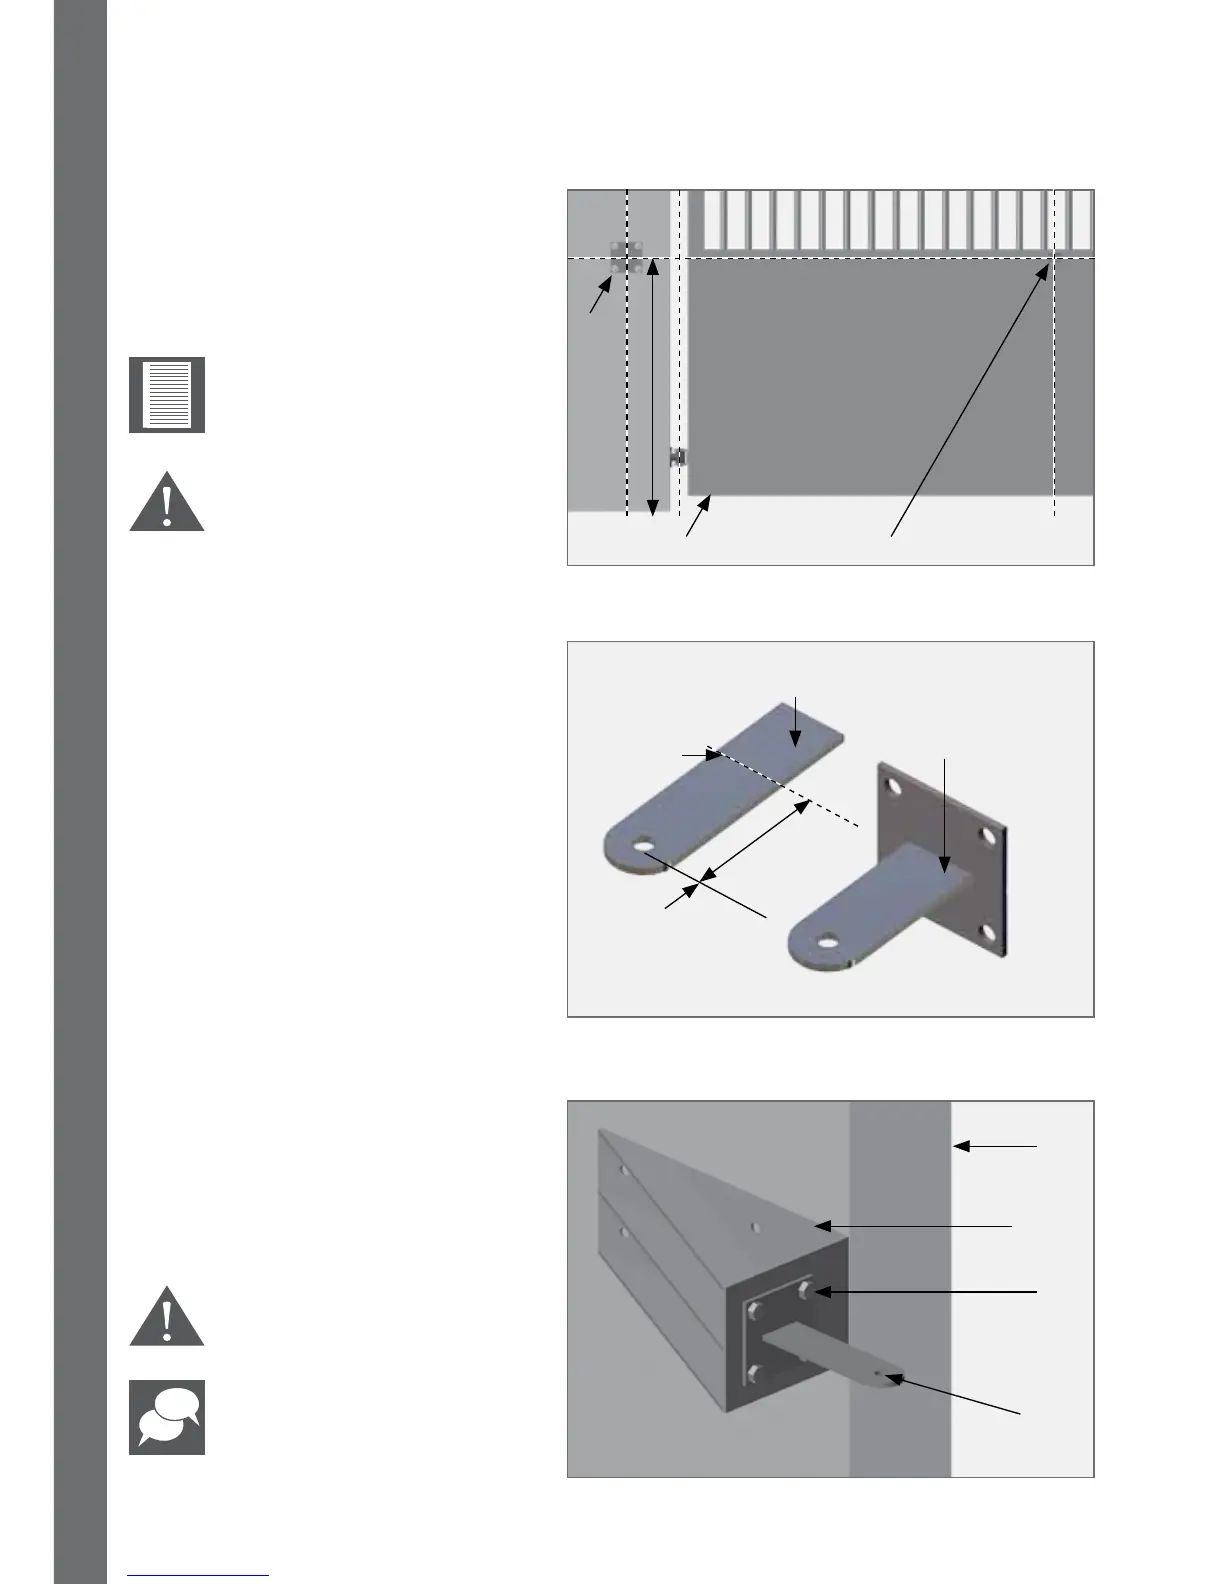
10.2. Step 2
Determine a suitable height for the
Wall Bracket.
Ensure that this mounting
height will allow the Gate
Bracket to be securely
mounted to the Gate Leaf.
Take care to make sure
the operator is mounted
level.
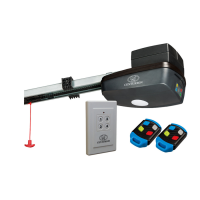
FIGURE 31
FIGURE 29. BRACKET HEIGHT
Wall
Mounting
bolt
Wall
Bracket
Sturdy
Custom
bracket
Wall Bracket
Minimum 125mm
Gate
Gate Bracket Position
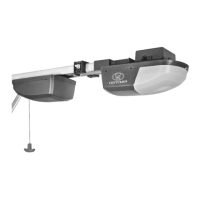
FIGURE 30. CUT AND WELD WALL BRACKET
Mark length
on bracket
Weld plates
together
Cut o
excess length
Wall Bracket
length
10.3. Step 3
Mark the determined length on the
Wall Bracket.
Cut o the excess length.
Insert the Wall Bracket into the
mounting plate.
Weld the brackets together.
10.4. Step 4
Mount the Wall Bracket according to
the A- and B-Values obtained in
Step 1 on page 36.
It is critical that
the Wall Bracket is
securely mounted and is
adequately rigid.
See page 18 for site
considerations.
OPERATOR INSTALLATION - OUTWARD OPENING GATES