3 Installation
3.1 Unpacking
Unpack the A1 power amplifier and store the packaging for future transportation. Be careful when lifting the A1 as the unit is
heavy (over 40kg). Get someone to help you if necessary. When unpacking and installing the A1, take care not to damage the
high quality surface treatments.
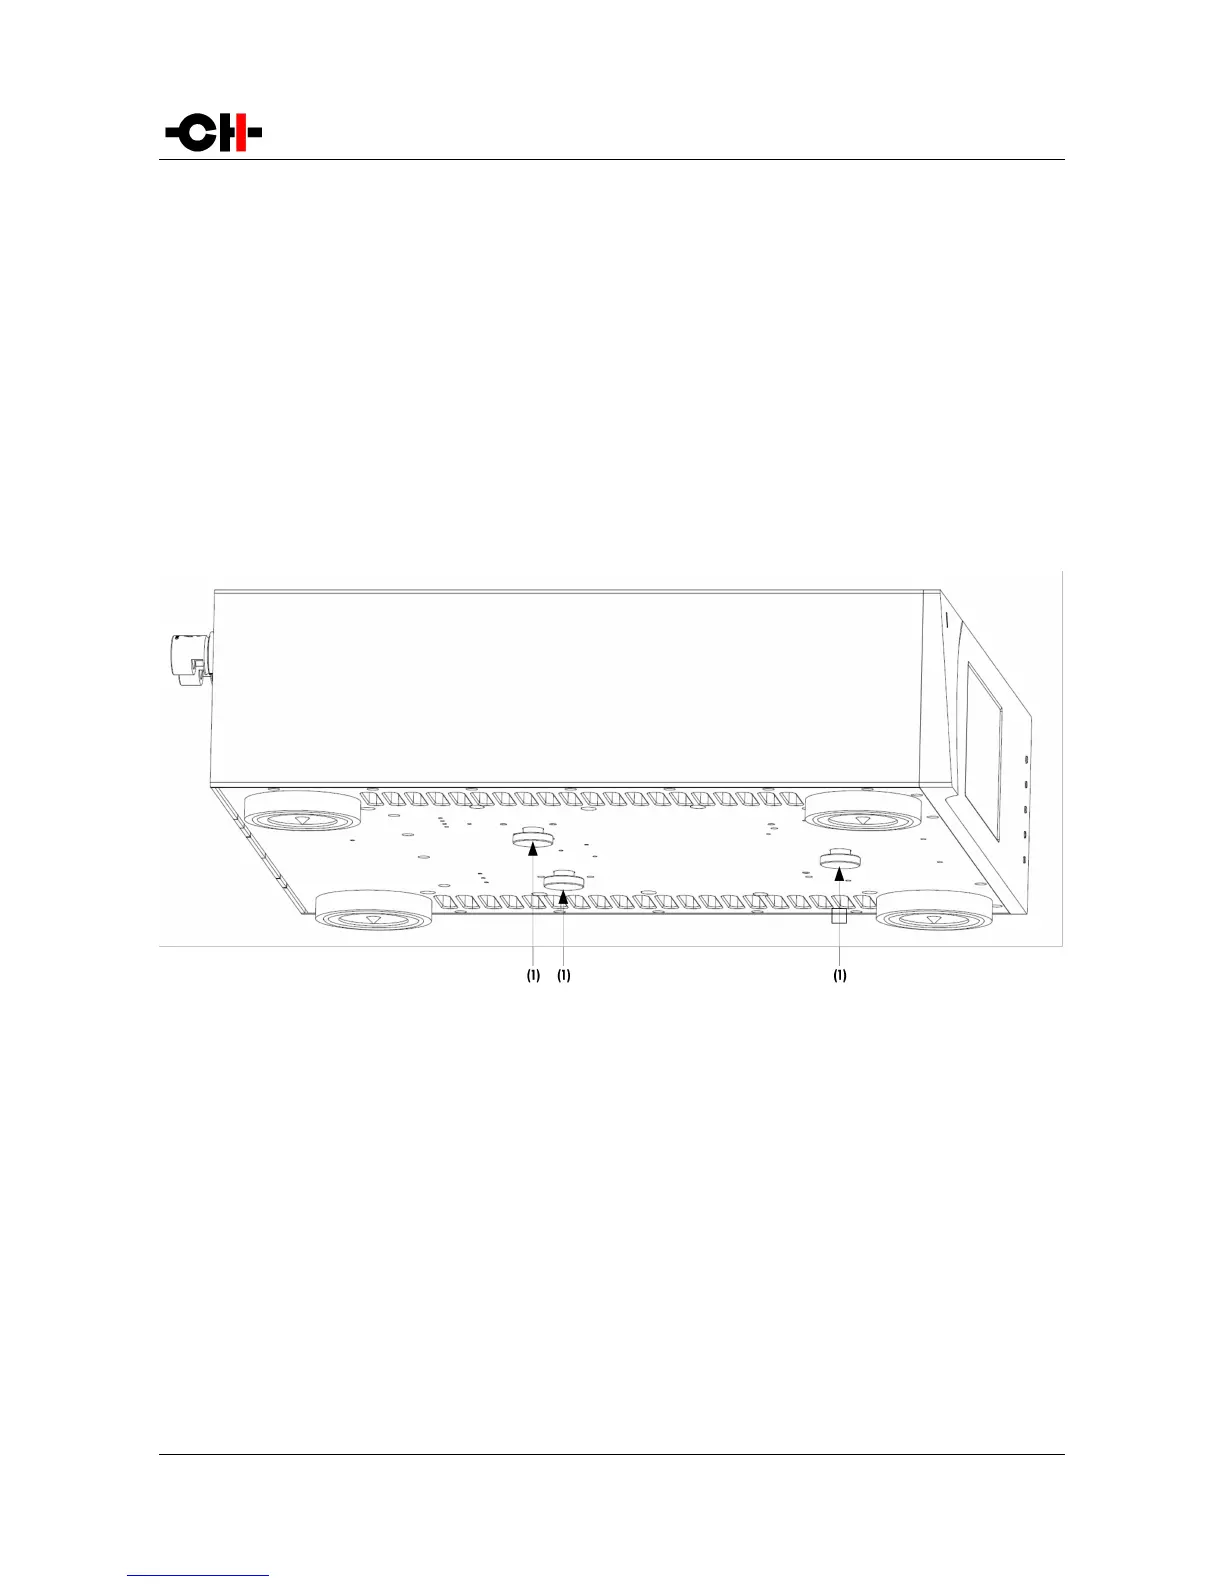
3.1.1 Removing the security screws
The transformer base plate must be secured during transportation to avoid damage to the isolating silent blocks. Three security
screws are located on the bottom of the unit. To remove the security screws, tilt the unit on its side and unscrew. Do not tilt the unit
on the front or back panels as this may damage the front plate or the connectors.
Security screw location
(1) Security screws. Must be mounted for transport and removed at installation
3.2 Unit positioning
We recommend to locate the A1 close to the loudspeaker it drives, using short loudspeaker cables.
For best transmission and immunity to external noise, we recommend to connect the A1 input to the upstream unit (preamplifier)
using a balanced XLR cable.
When delivered from factory, the A1 amplifier's four feet sit on elastomer rings, ensuring both scratch-protection for the base on
which the unit sits, as well as safe anti-slipping unit positioning.
But a more advanced vibration-channeling mechanical coupling can be implemented, thanks to the steel spikes and the polymer
Rev 2.0 A1 User Manual 15