CAC Gasoline Engine Maintenance And Servicing Manual
39
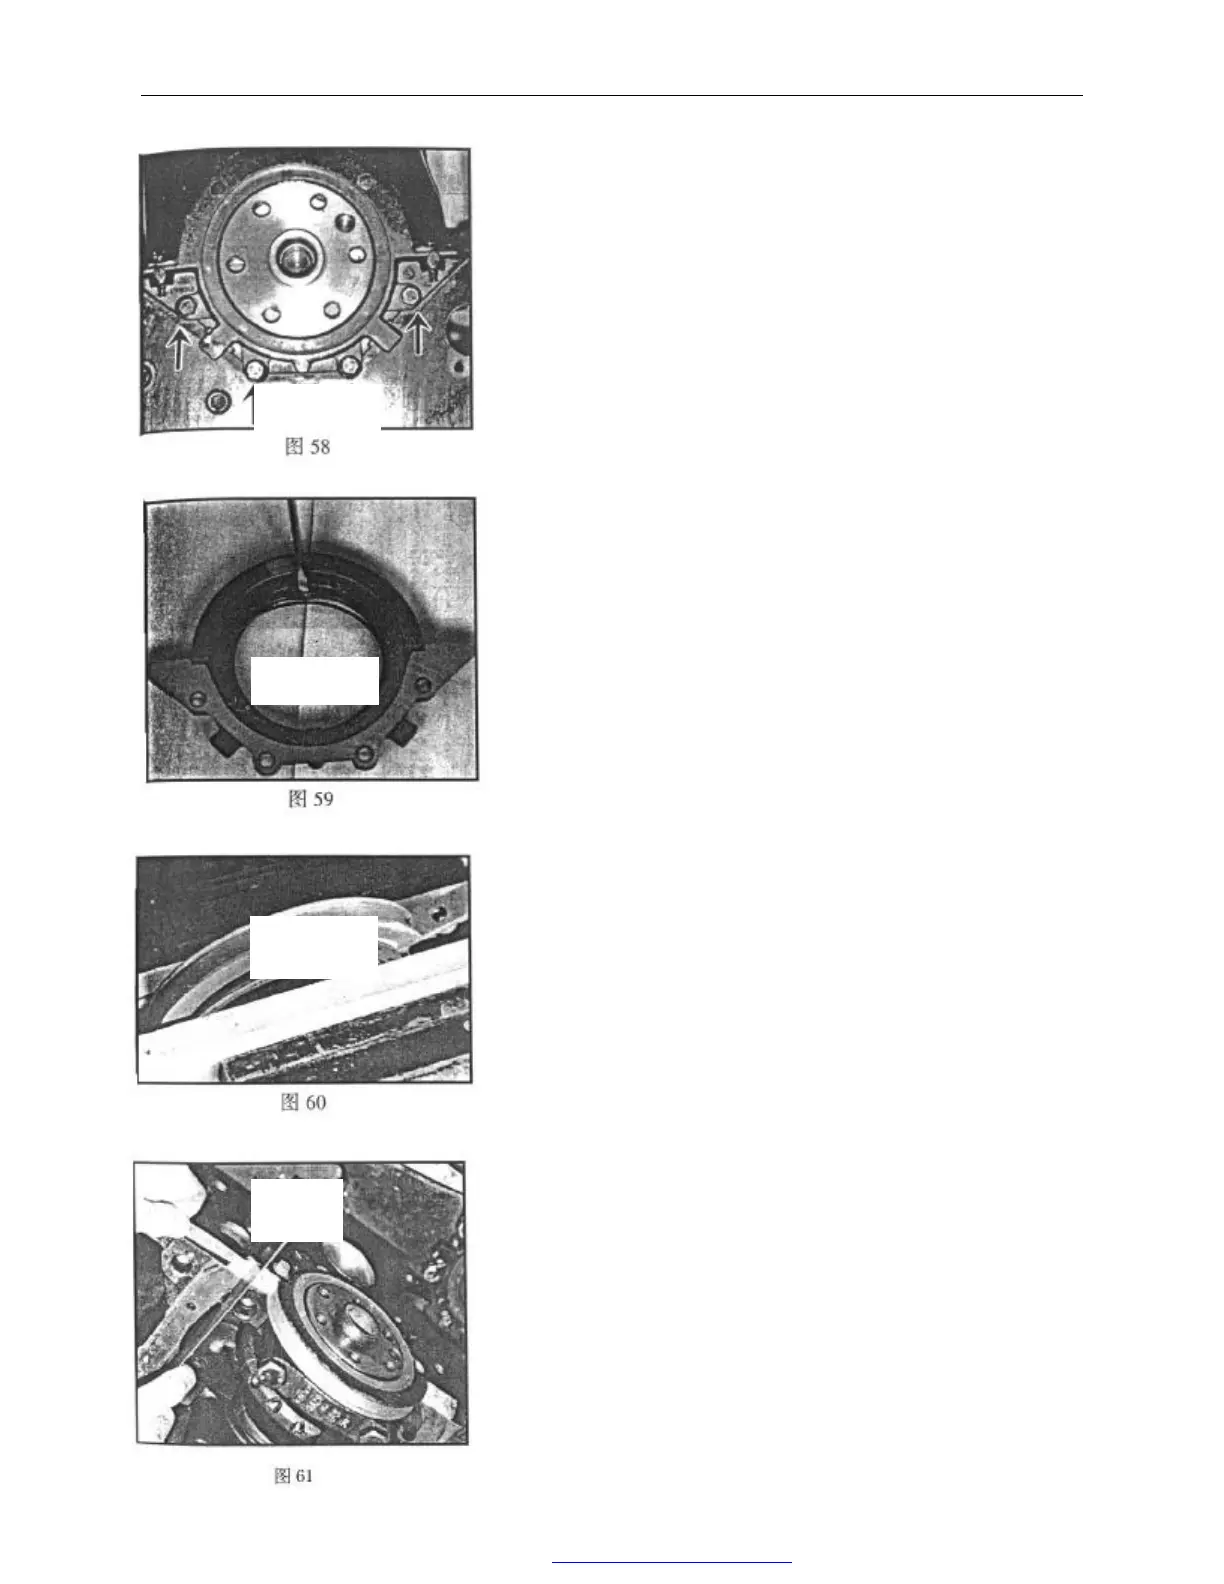
2). The removal and installation of carrier assembly of the real oil
seal:
Removal:
——Remove 4 bolts (as arrow indicates).
——Take out carrier assembly of the real oil seal
——Remove carrier sealing gasket of the real oil seal
——Use chisel or screwdriver to pry the real oil seal from the
carrier of the real seal oil. Note: please don’t damage the carrier of
real oil seal.
Installation:
——Position the carrier on the vise which is equipped with wood
on the jaw.
——Align rear oil seal carrier hole with the part number side of oil
seal outward .press oil seal into rear oil seal carrier with vise.. The
magnitude of interference for real oil seal and carrier hole is
0.26—0.50mm.
——Install new sealing gasket of real oil seal carrier .
——Install real oil seal carrier assembly. Before assembling, wrap
a piece of plastic piece on the crankshaft to avoid damaging oil seal.
At the same time, apply engine oil on oil seal edge and journal for
oil seal .
——Measure the roughness of lower oil seal carrier surface and oil
pan flange surface of cylinder block. It should be adjusted to the
range of ±0.26mm.
Fig.58
Fig.59
Fig.60
Fig.61
PDF 文件使用 "pdfFactory Pro" 试用版本创建 www.fineprint.com.cn