SPECIALISTS IN DIGITAL TELECARE
15
7 Installing SEVEN
When installing SEVEN follow all steps starting from Step 1.
Choose an installation location near a power outlet and Ethernet connection
(if applicable).
A central location at waist height is ideal.
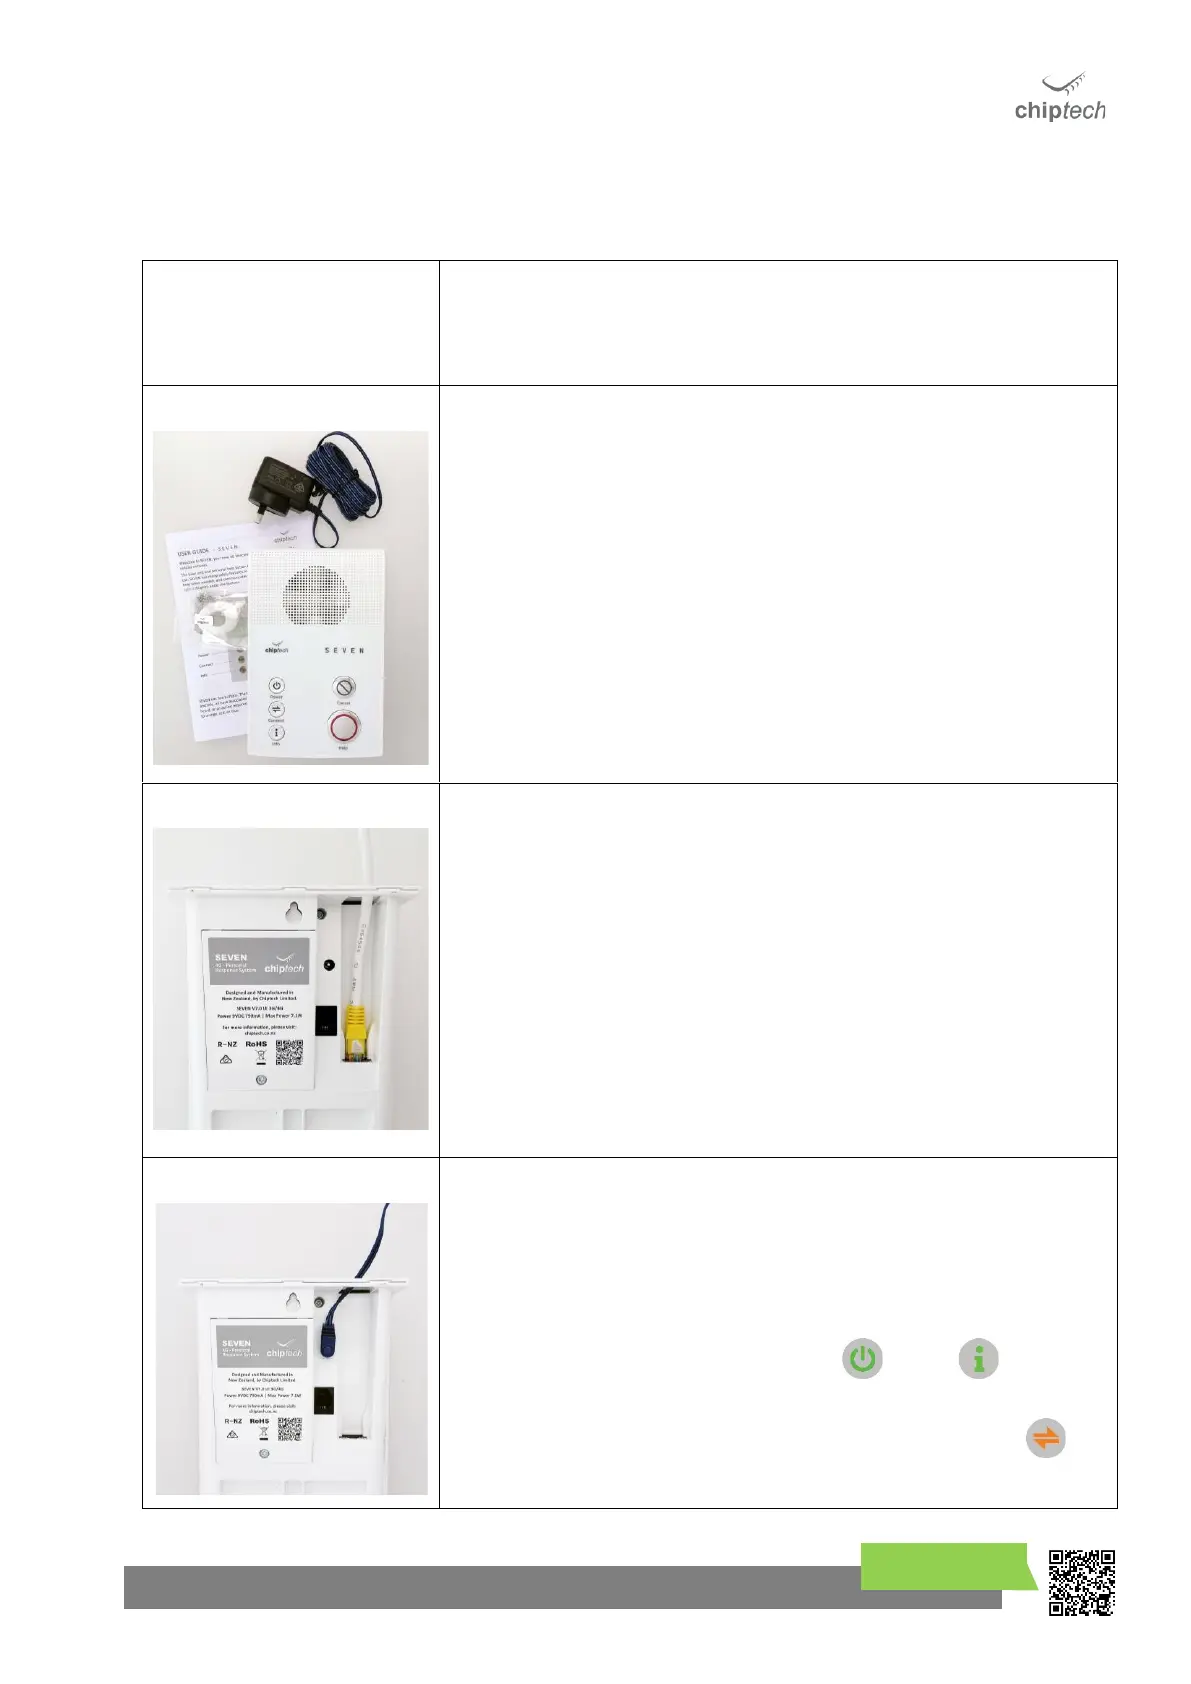
Remove SEVEN, the Pearl personal help button, plug pack and user guide from
the packaging.
The Ethernet cable is not supplied as standard by Chiptech, but can be
purchased as a separate item where required.
NOTE: It is not recommended to start SEVEN on battery, as it may send a
‘Mains Power Failure’ or ‘Base Unit Low Battery’ report to monitoring,
depending on the configuration settings applied and the state of the
battery.
If you are NOT installing SEVEN with an Ethernet cable, skip this step and go to
Step 4.
If you are installing SEVEN so it can send reports over the Internet, push the
Ethernet cable through the cable hole at the back of SEVEN, as depicted, and
into the Ethernet socket marked in the base of the cable cavity. Push the cable
from outside SEVEN until you hear it click.
The clip for the Ethernet cable will be visible when inserting it into the socket on
SEVEN. (This is how you can check the cable connection is the correct
orientation and enables you to unclip the cable later.) Plug the other end of the
Ethernet cable into an unused DATA port on the modem/router outlet, or
connect into the outlet at the wall, and go to Step 4.
Push the blue power cable through the cable hole on the back of SEVEN. Insert
the blue connector into the power socket marked 9V DC in the cable cavity on
the underside of SEVEN.
Connect the plug pack into the power outlet at the wall. Switch on power.
SEVEN will automatically start when the power is supplied.
SEVEN will play a welcome message. The Power and Info button will
be solid green.
The Connect button will be solid orange while it is connecting to the
network.