Model 108 FLEX-AUGER Installation Manual
in the instructions on page 54.
C. Use a small screw driver to remove the caulk concealing the
Sensitivity Adjustment Screw (see figure below).
D. IMPORTANT: A Proximity Switch may be used in a feed bin
boot to shut the fill system down when it no longer senses
feed.
A Proximity Switch may also be used as a feed level switch
at the control end of the line. In this application the switch is
used to shut the system down when it senses feed.
Before adjusting the Proximity Switch, carefully consider
how you want the switch to react when it senses feed. For
addition information, see the instructions shipped with the
Proximity Switch.
Greater switch sensitivity is achieved by turning the Sensi-
tivity Adjustment Screw clockwise.
Less switch sensitivity is achieved by turning the Sensitivity
Adjustment Screw counterclockwise.
Note the screw orientation before beginning adjustment.
Adjust the Sensitivity Adjustment Screw 1/4 turn, test
switch, continue adjusting as required.
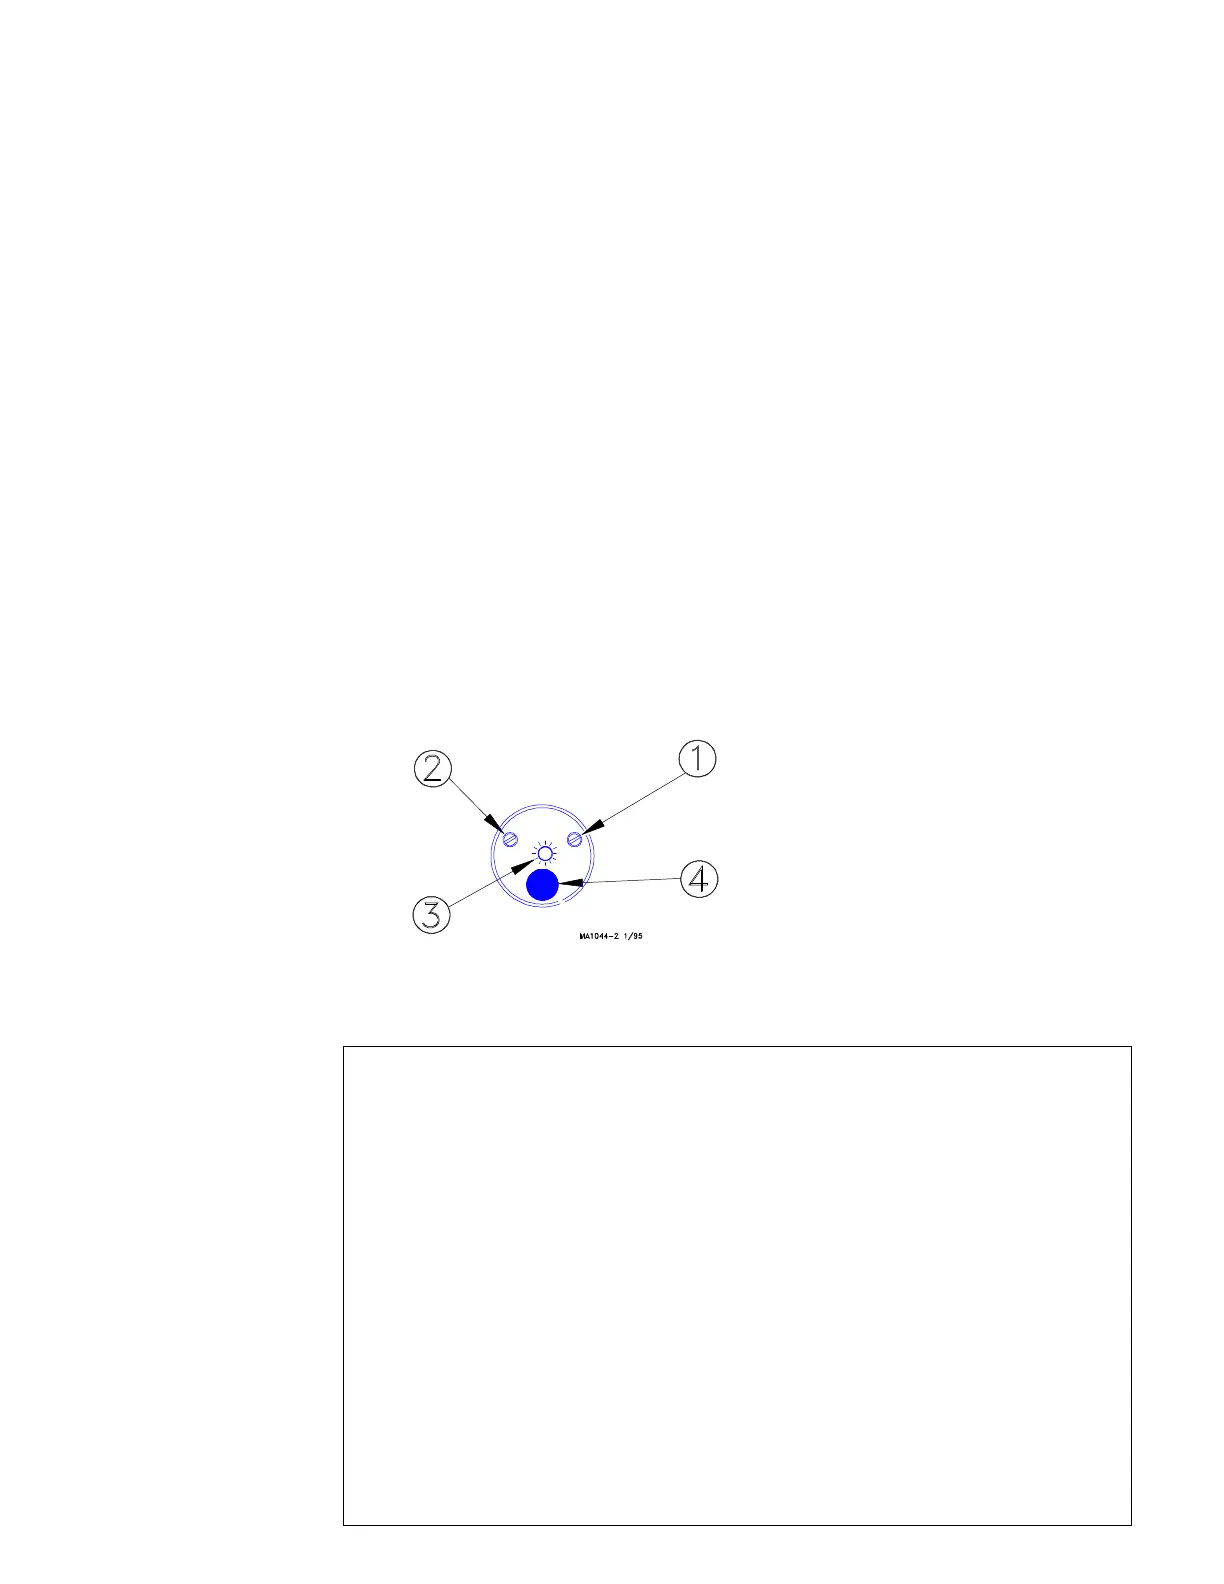
Proximity Switch (End View)
Key Description
1 Sensitivity Adjustment Screw
2 Delay Adjustment Screw
3 Indicator Light
4 Power Cord
10. Discard damaged or replaced equipment according to local
and national codes. Many of the components may be recy-
cled.
Cementing the PVC Auger Tube
The auger tubes and elbows for the FLEX-AUGER systems are made of special-
ly formulated PVC tubing. Use the PVC solvent cement to make strong, reliable
bonds.
FOLLOW DIRECTIONS ON THE CAN FOR SAFE HANDLING OF CEMENT.
1. Be sure tube is cut off squarely. Remove burrs from outside and inside the
end of the tube.
2. Dry fit all parts. Tube should fit inside belled end of next tube to full depth
without excess force.
3. Clean surfaces to be joined. SURFACES MUST BE FREE OF DIRT OR
GREASE!
4. Apply a generous coat of cement to both the inside of the belled end and
outside of the other tube. Be sure cement covers all of the joint area so
there are no bare spots.
5. Quickly join the tubes, giving them a twisting motion to bring them into
alignment as they are joined.
6. Keep pressure on the joint until the PVC cement sets up.
 Loading...

