Installation 2-29
3916 Service Delivery Switch Hardware Installation and Start-up Manual
009-3226-001 Standard Revision E
Copyright
©
2013-2015 Ciena
®
Corporation July 2015
Procedure 2-11
Installing the Cable Support Brackets
The 3916 includes 2 cable support brackets that can be installed to assist with
cable management. These brackets attach to the frame mounting bracket and
jut out from the front of the chassis.
Note: The cable support brackets are not used in wall mount installations.
The following procedure explains how to install the cable support brackets.
Step Action
1 Install the cable support on the mounting bracket using either the inner or
outer screw position and one of the longer 8-32 screws provided in the kit.
(One screw will be used per bracket.)
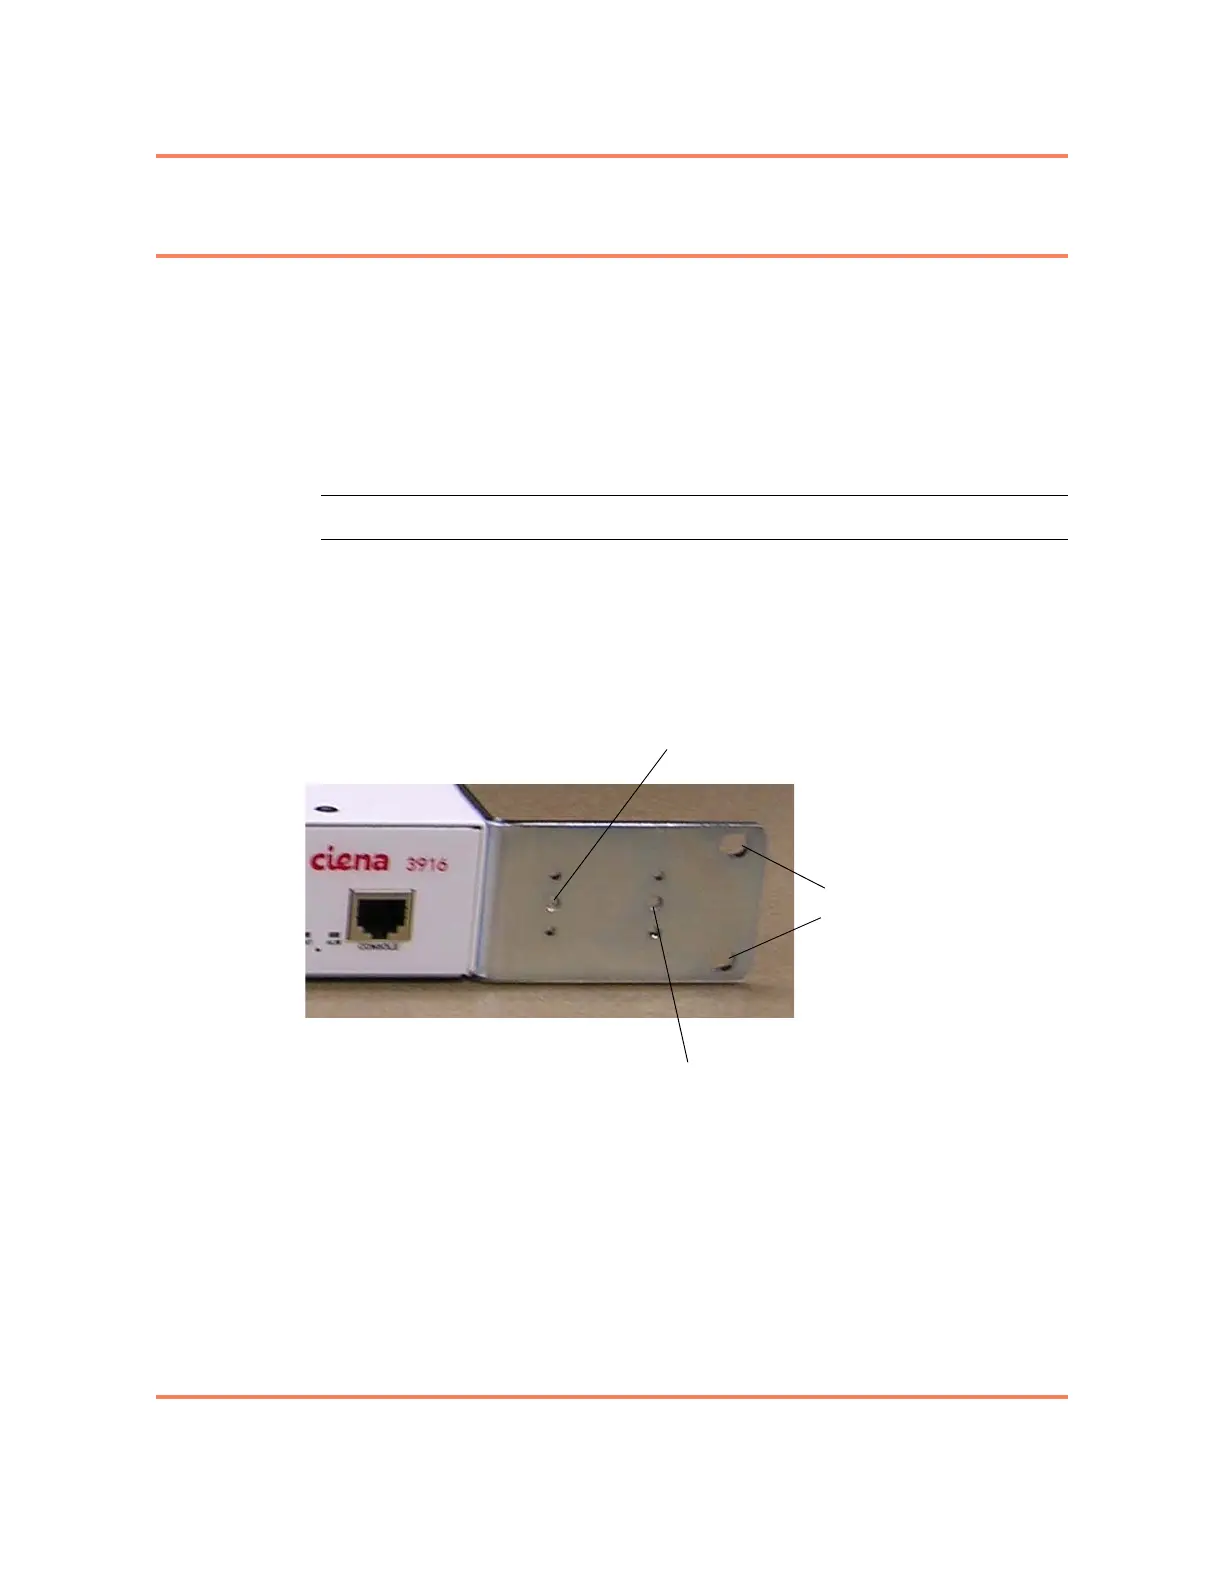
Figure 2-6
Front view of right bracket, showing mounting holes
(standard chassis brackets shown)
2 Repeat step 1 to install the second cable support bracket.
The cable support brackets have now been installed. You are now ready
to begin installing the power cable. Proceed to one of the following:
“Installing an AC Power Cable in a Standard Chassis system” on page
2-30 or “Installing a DC Power Cable” on page 2-34.
Inner cable bracket screw position
Outer cable bracket screw position
Frame mounting holes