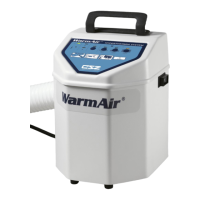
WarmAir
Model 135 Manual PREVENTATIVE MAINTENANCE
Page 22 of 43
Section 3: Preventive Maintenance
Cleaning the Unit
For cleaning and disinfecting always use conventional hospital-approved topical equipment cleaners,
and disinfectants. Thoroughly wipe down device with a damp cloth to remove any residue from
cleaning solutions.
Disconnect from power when cleaning the Warming
Unit. Allow to air dry thoroughly. Do not use dripping
wet cloth or otherwise allow water to seep into
electrical areas of the unit.
Replacing the Air Filter
The accumulation of dirt in the air filter can reduce the efficiency of the WarmAir
135 unit. The filter
should be replaced as alerted by the hour meter indicator or as indicated by visual inspection. Only
use parts provided by CSZ.
1. Turn the unit off and remove from power.
2. Lay the unit on its back.
3. Unscrew and remove the four rubber feet.
4. Remove the plastic baffle plate.
5. At the bottom of the unit, remove the nut (7mm) and washer that hold the filter in place.
6. Remove the old filter and discard.
7. Insert the new filter, replace the washer and tighten nut.
8. Install the plastic baffle plate.
9. Install and tighten the four rubber feet.
10. Set the unit upright. The unit is ready for use.
Do not return unit to service without the filter present.
Thermal injury may result.
Hour Meter
The WarmAir
135 unit is equipped with a built-in timer that will activate the "Hour Meter" light after
500 hours of use. This is an indication that routine maintenance, including replacement of the filter, is
needed. After the maintenance has been performed, the timer may be reset by the following steps.
1. Turn the unit off.
2. Hold down the "Fan Only" and "High" buttons simultaneously.
3. Turn the power switch on.