6-5
Hardware Installation Guide for Cisco 4000 Series Integrated Services Routers
OL-32185-02
Chapter 6 Install and Upgrade Internal Modules and FRUs
Access Internal Modules
Step 6 Pull the cover towards you to disengage the slots along the front (bezel) edge of the chassis. See
Figure 6-1.
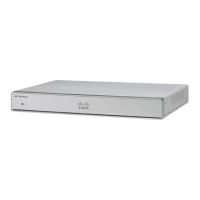
Remove the Cover from Cisco 4300 ISR
To remove the cover:
Step 1 Read the “Safety Warnings” section on page 6-2 and disconnect the power supply before you replace any
module.
Step 2 Confirm the router is turned off and disconnected from the power supply or power supplies. If a
redundant power is used, disconnect from the redundant power supply.
Step 3 Place the chassis on a flat surface.
Step 4 Remove the four cover screws on the top of the router cover and remove the two cover screws from each
side of the router cover
. See Figure 6-45
Step 5 Lift the cover from the back edge to a 45-degree angle.
Step 6 Pull the cover towards you to disengage the slots along the front (bezel) edge of the chassis. See
Figure 6-1.
Replace the Cover on Cisco 4400 or 4200 ISR
To replace the cover:
Step 1 Read the Safety Warnings, page 6-2 and disconnect the power supply before you replace any module.
Step 2 Confirm the router is turned off and disconnected from the power supply or power supplies. If a
redundant power is used disconnect from the redundant power supply.
Step 3 Place the chassis on a flat surface.
Step 4 Hold the cover at a 45-degree angle and insert the cover tabs into the slots along the front (bezel) edge
of the chassis. See Figure 6-1.
Step 5 Center the cover over the chassis and lower it onto the chassis.
Step 6 Install the three cover screws.