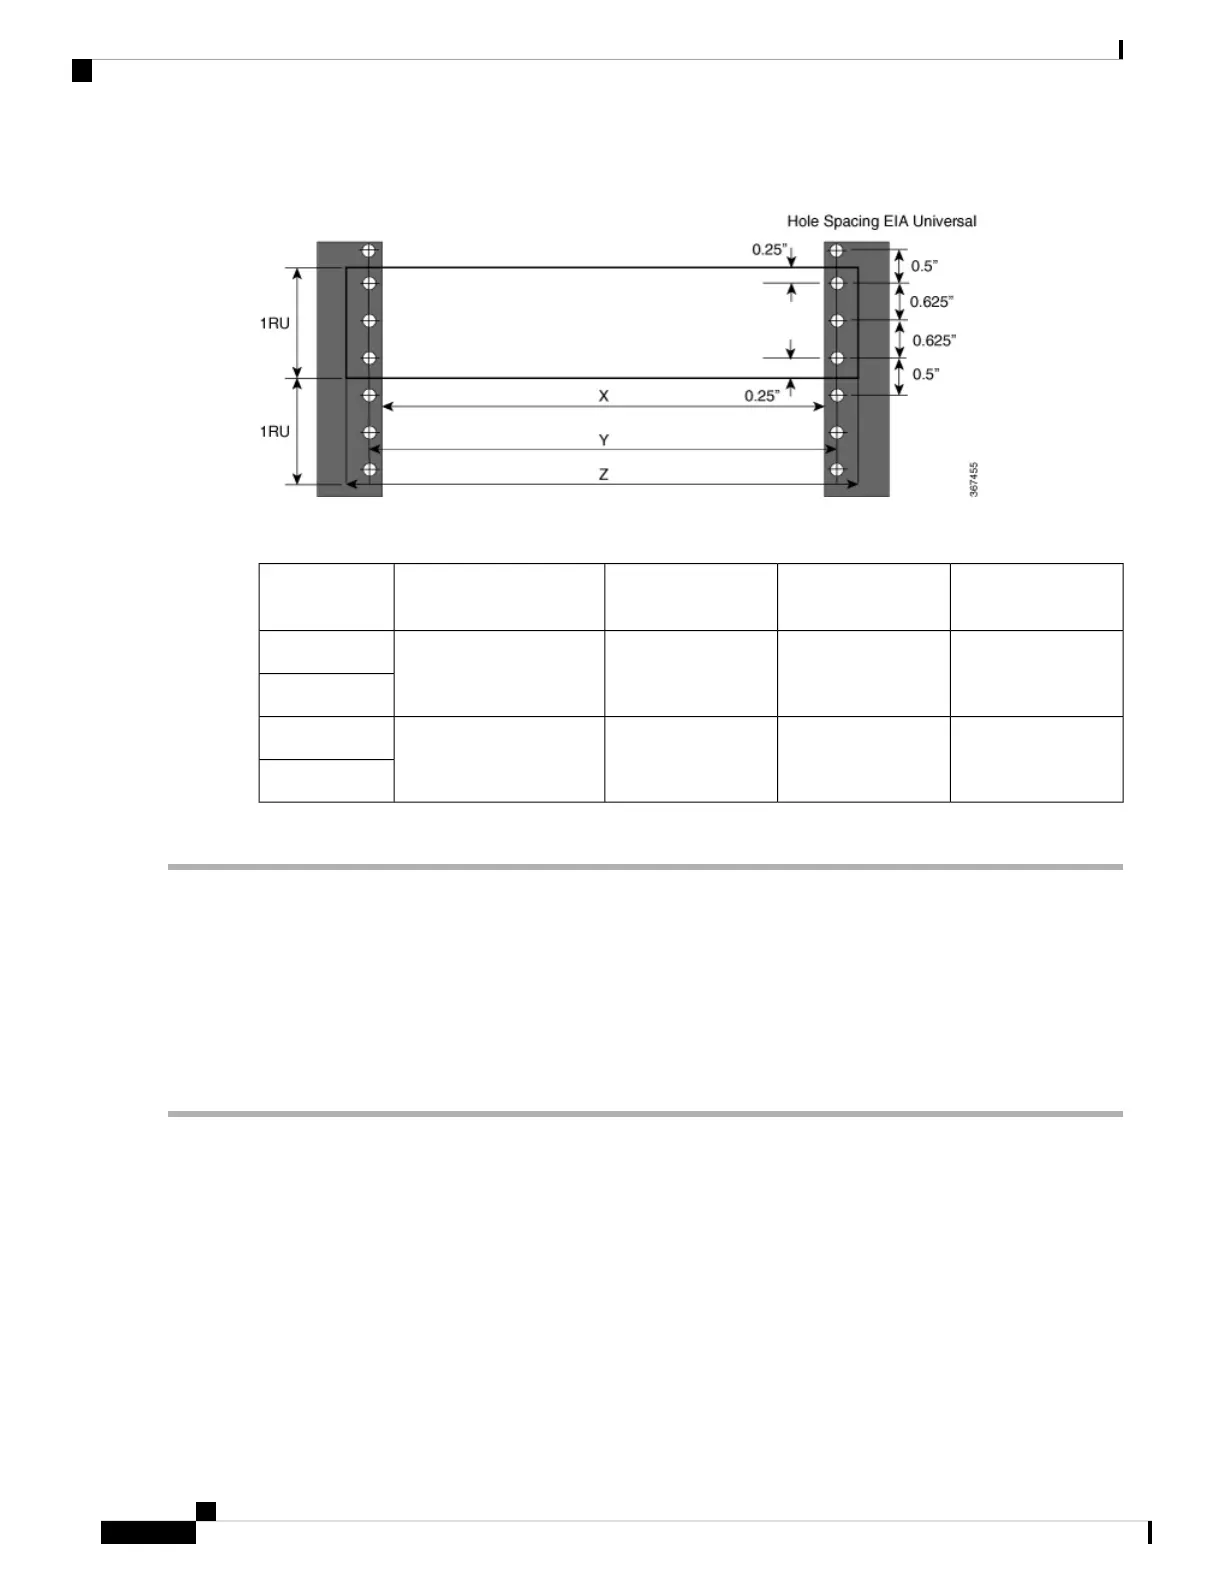
Figure 3: Rack Specification EIA (19 and 23 inches)
Table 1: Rack Specification EIA (19 and 23 inches)
Mounting Flange
Dimension (Z)
Rack Mounting Hole
Center-Center (Y)
Rack Front Opening
(X)
Rack TypePost Type
482.6mm (19”)465mm (18.312”)450.8mm (17.75”)19 inches (48.3
centimeters)
4 Post
2 Post
584.2mm (23”)566.7mm (22.312”)552.45mm (21.75”)23 inches (58.4
centimeters)
4 Post
2 Post
Before you move the chassis or mount the chassis into the rack, we recommend that you do the following:
Step 1 Place the rack at the location where you plan to install the chassis.
Step 2 Secure the rack to the floor.
To bolt the rack to the floor, a floor bolt kit (also called an anchor embedment kit) is required. For information on bolting
the rack to the floor, consult a company that specializes in floor mounting kits (such as Hilti; see Hilti.com for details).
Make sure that floor mounting bolts are accessible, especially if annual retorquing of bolts is required.
Ensure that the rack in which the chassis is being installed is grounded to earth ground.
Note
Clearance Requirements
The chassis requires front-to-back airflow. Leave at least 6.0 in. (15.24 cm) front and rear clearance for air
intake or exhaust. We recommend that you have at least 6.0 in. (15.24 cm) of space in front of the chassis to
provide room to manoeuvre the cables to make the required connections. Leave an extra 6.0 in. (15.24 cm)
rear clearance for removal and installation of power supplies and fan modules.
Hardware Installation Guide for Cisco 8200 Series Routers
10
Prepare for Installation
Clearance Requirements
 Loading...