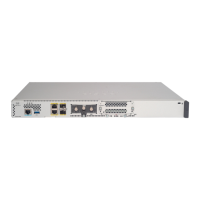
Before you can connect the console port to a computer terminal, make sure that the computer terminal supports
VT100 terminal emulation. The terminal emulation software makes communication between the router and
computer possible during setup and configuration.
Note
Before you begin
• The router must be fully installed in its rack. The router must be connected to a power source and grounded.
• The necessary cabling for the console, management, and network connections must be available.
• An RJ45 rollover cable and a DB9F/RJ45 adapter.
• Network cabling should already be routed to the location of the installed router.
Step 1 Configure the console device to match the following default port characteristics:
• 115200 baud
• 8 data bits
• 1 stop bit
• No parity
Step 2 Connect and RJ45 rollover cable to a terminal, PC terminal emulator, or terminal server.
You can find this cable in the accessory kit.
Step 3 Route the RJ45 rollover cable as appropriate and connect the cable to the console port on the chassis.
If the console or modem cannot use an RJ45 connection, use the DB9F/RJ45F PC terminal adapter. Alternatively, you
can use an RJ45/DSUB F/F or RJ45/DSUB R/P adapter, but you must provide those adapters.
What to do next
You are ready to create the initial router configuration.
Create the Initial Router Configuration
You must assign an IP address to the router management interface to connect the router to the network.
When you initially power up the router, it boots up and asks a series of configuration-related questions. You
can use the default choices for each configuration except for the IP address, which you must provide.
When the system is powered on and the console port is connected to the terminal, the RP CPU messages are
seen. You can toggle between BMC CPU messages and RP CPU messages by pressing the hot-key sequence
Ctrl-O.
Hardware Installation Guide for Cisco 8200 Series Routers
29
Connect Router to the Network
Create the Initial Router Configuration

 Loading...