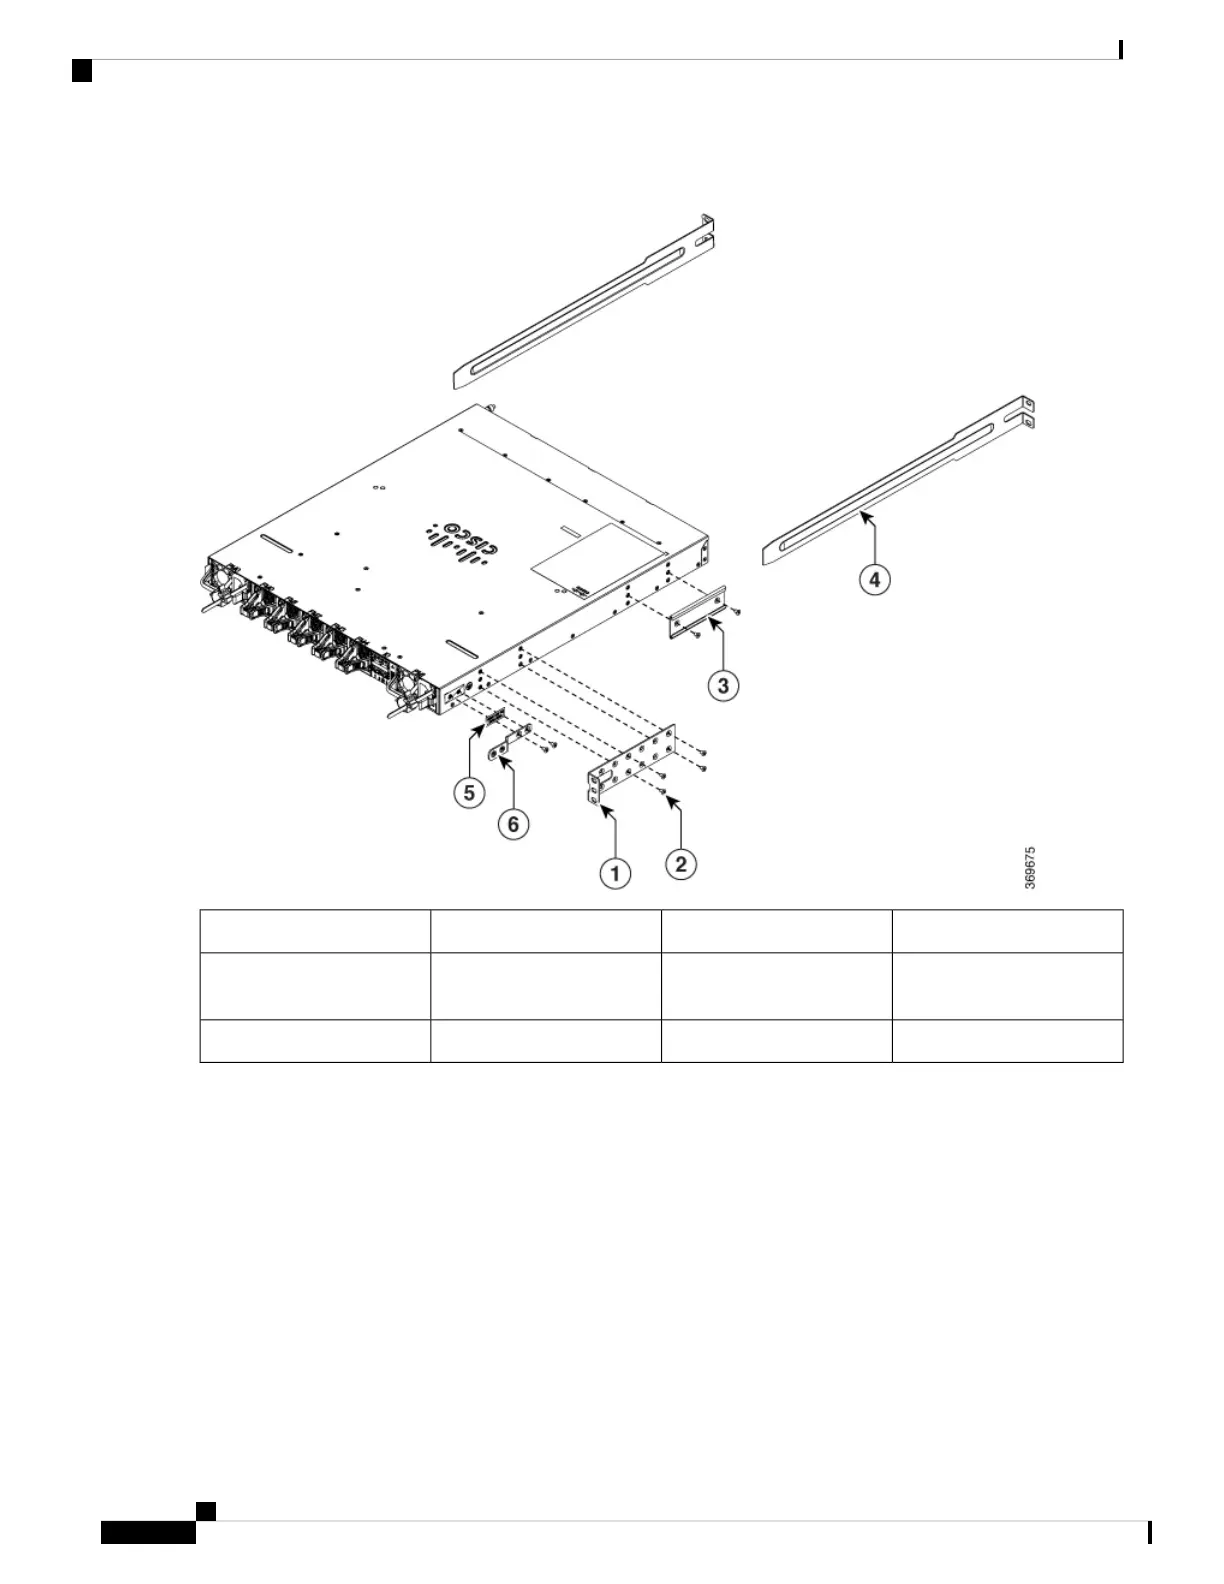
Figure 6: Rack-Mount Brackets on Cisco 8201 Router—Port-Side Exhaust
Rack-mount guide rails4Rack-mount brackets1
Remove grounding cover
label
5M4 x 6mm Phillips
flat-head screws
2
Grounding cover plate6Rack-mount guide3
c) Repeat Step 1b with the other rack-mount bracket on the other side of the router.
Step 2 Install the two rack-mount guides on the chassis:
a) Position a rack-mount guides on the side of the chassis with its two holes aligned to the two screw holes on the side
of the chassis, and use two M4 flat-head screws to attach the guides to the chassis.
b) Repeat with the other rack-mount guides on the other side of the router.
Step 3 Install the guide rails to the rack:
a) Position the guide rails at the desired levels on the back side of the rack and use two 12-24 screws or two 10-32
screws, depending on the rack thread type, to attach the rails to the rack.
For racks with square holes, you may need to position a 12-24 cage nut behind each mounting hole in a
guide rail before using a 12-24 screw.
Note
b) Repeat with the other guide rail on the other side of the rack.
Hardware Installation Guide for Cisco 8200 Series Routers
16
Installing the Chassis
Rack-Mount the Chassis in a 4-Post Rack
 Loading...