EasyManuals Logo

Cisco ASR 903 Hardware Installation Guide

Cisco ASR 903
196 pages
To Next Page IconTo Next Page
To Previous Page IconTo Previous Page
Page #125 background imageLoading...
Page #125 background image
Lugs fork-type or ring-type (Burndy, see Manufactures)TP10 -6 or TP10-8F (recommended)
Step 1
Follow the steps to remove the power supply unit if installed in the chassis. See Removing and Replacing the DC Power
Supply.
Step 2
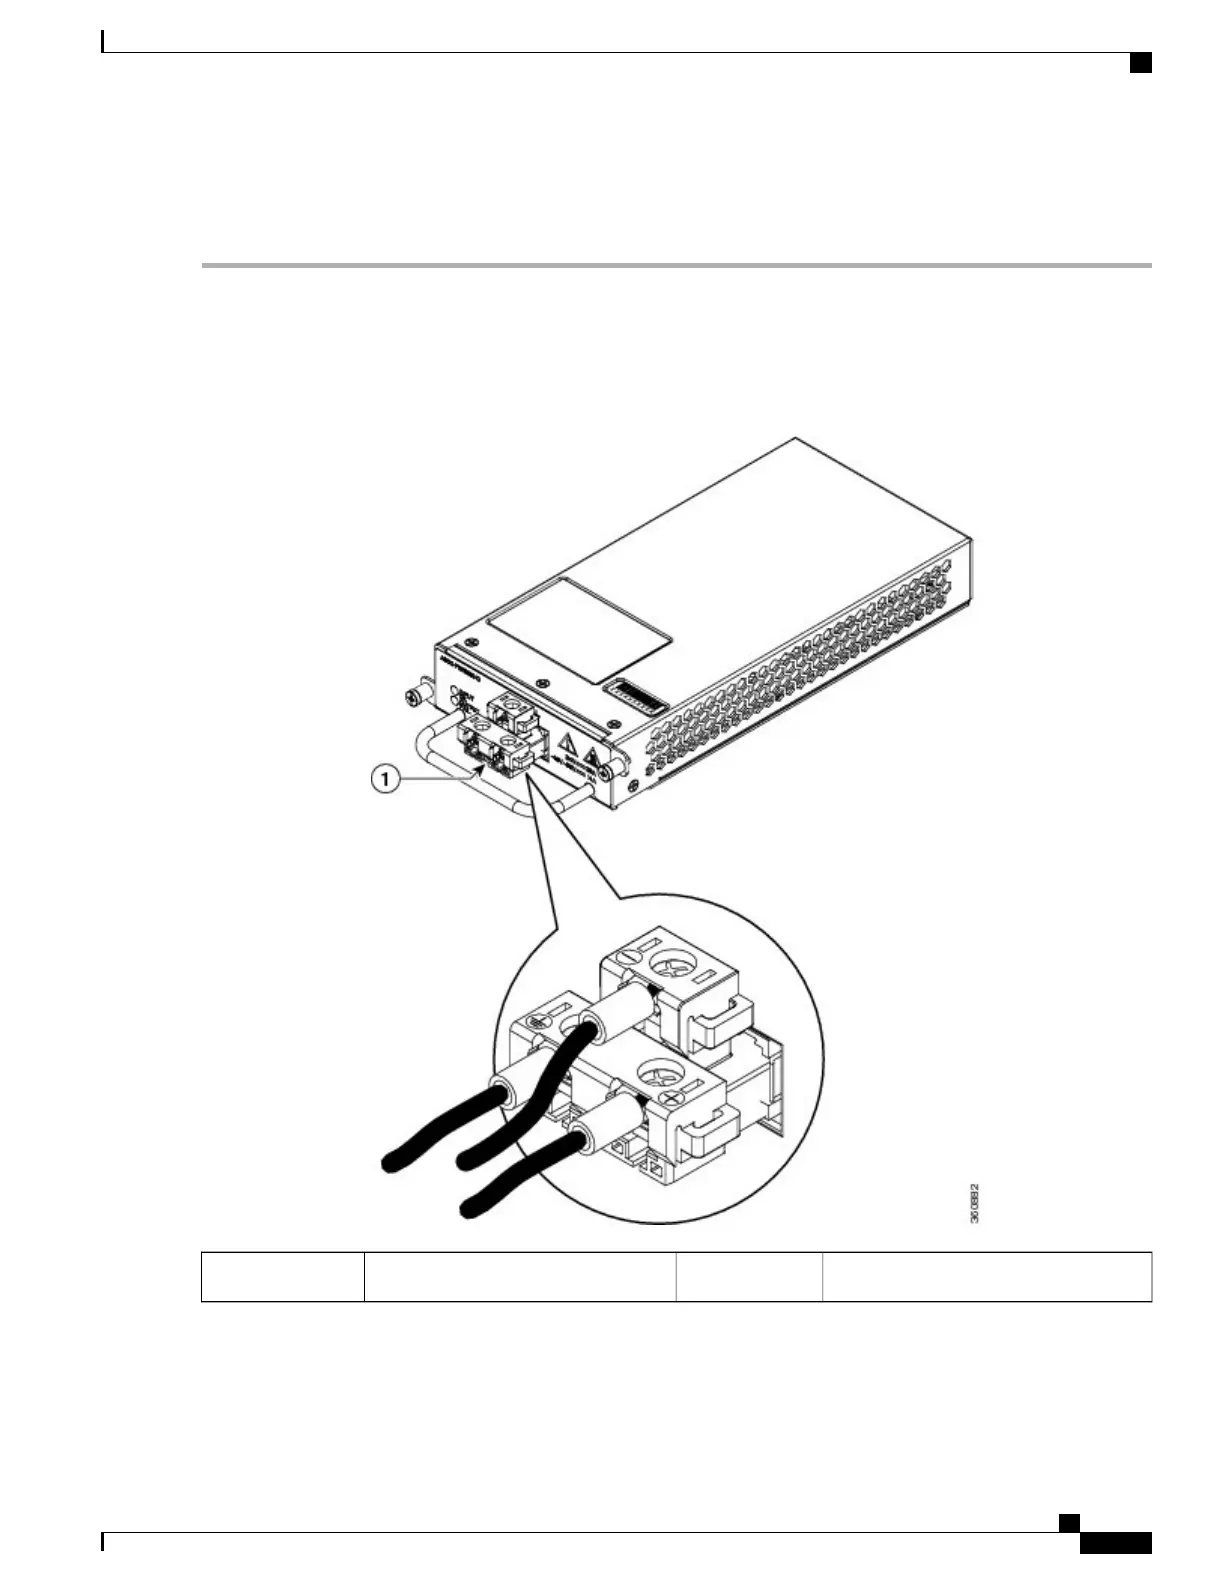
Locate the T-shaped terminal block plug on the DC power supply unit. See the figure below.
Figure 67: DC PSU (A900-PWR550-D-E) with T-Shaped Connector
T-shaped connector1
Step 3
Use a wire-stripping tool to strip the ends of each of the two wires coming from the DC-input power source to 0.27 inch
(6.6 mm) ± 0.02 inch (0.5 mm) and the wire for grounding. Do not strip more than 0.29 inch (7.4 mm) of insulation from
Cisco ASR 903 Aggregation Services Router Hardware Installation Guide
109
Installing the Cisco ASR 903 Router
Installing the DC Power Supply

Table of Contents

Other manuals for Cisco ASR 903

Questions and Answers:

Question and Answer IconNeed help?

Do you have a question about the Cisco ASR 903 and is the answer not in the manual?

Cisco ASR 903 Specifications

General IconGeneral
Form FactorModular
Storage Temperature-40°C to 70°C (-40°F to 158°F)
Humidity5% to 95% non-condensing
RedundancyYes, redundant power supplies and route processors
Operating SystemCisco IOS XE
Power SupplyAC or DC
Switching Capacity240 Gbps
Operating Temperature-40°C to 65°C (-40°F to 149°F)
MTBF200, 000 hours
Supported ProtocolsIPv4, IPv6, MPLS, L2VPN, L3VPN
InterfacesGigabit Ethernet, 10 Gigabit Ethernet, T1/E1

Related product manuals