Verify the PowerKEY Information
Verifying the PowerKEY Information Using the Diagnostic Screens
1 Connect the DHCT to a TV monitor.
2 Press and hold the Pause key on the remote control until the message indicator
of the DHCT blinks (approximately 13 seconds).
Note: For POWER LED only DHCTs, the POWER LED blinks four times, pauses,
and repeats only once.
3 Press one of the following keys:
For the 3-function remote controls (models ER-1 and AT2300), press the
PAGE – key.
For the 4-function remote controls (models AT2000 and AT 2400), press the
PREV – key.
For the 4-function PVR/PIP remote controls (model AT8400), press the
PAGE – key.
4 Using the PAGE +/NEXT + or the Page – /PREV – keys, go to Page 4 of the
diagnostic screens.
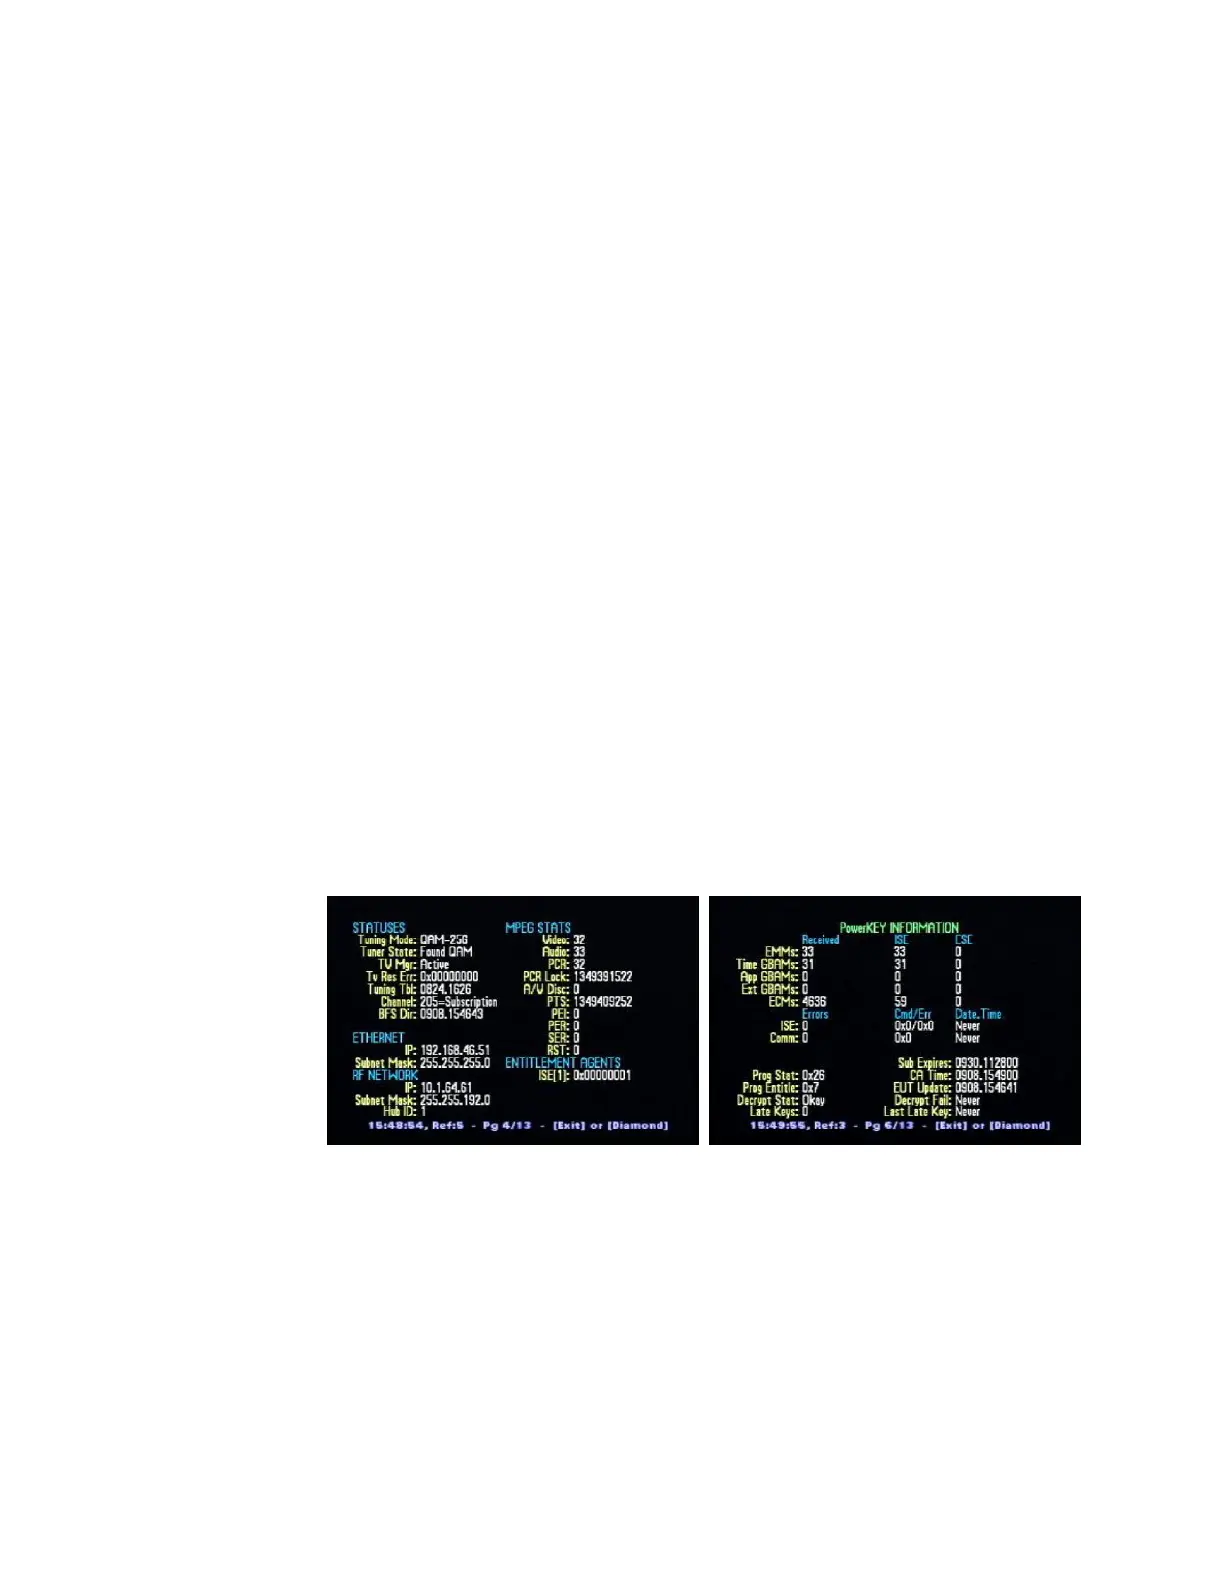
5 Verify that the ENTITLEMENT AGENTS / ISE(1): field displays 0x0000001.
6 Go to Page 6 of the diagnostic screens and verify the EMMs: / ISE: field displays
at least 33.
7 From the same page, verify that the Sub Expires field displays the
appropriate time stamp (usually 30 days in the future).
Notes:
The following illustrations are examples of Page 4 and Page 6 of the Explorer
diagnostic screens:
The EMMs: / ISE field will vary based on the level of Service Authorizations
provisioned for the DHCT.
When the DHCT has received all its PowerKEY information, the Time
GBAMs: / ISE field will increment, and the ISE error count will no longer
increase.
Refer to Understanding Diagnostic Screens for the Explorer DHCTs Application
Guide (part number 749244) for more information.