3-32
Cisco UCS C240 Server Installation and Service Guide
OL-25761-01
Chapter 3 Maintaining the Server
Installing or Replacing Server Components
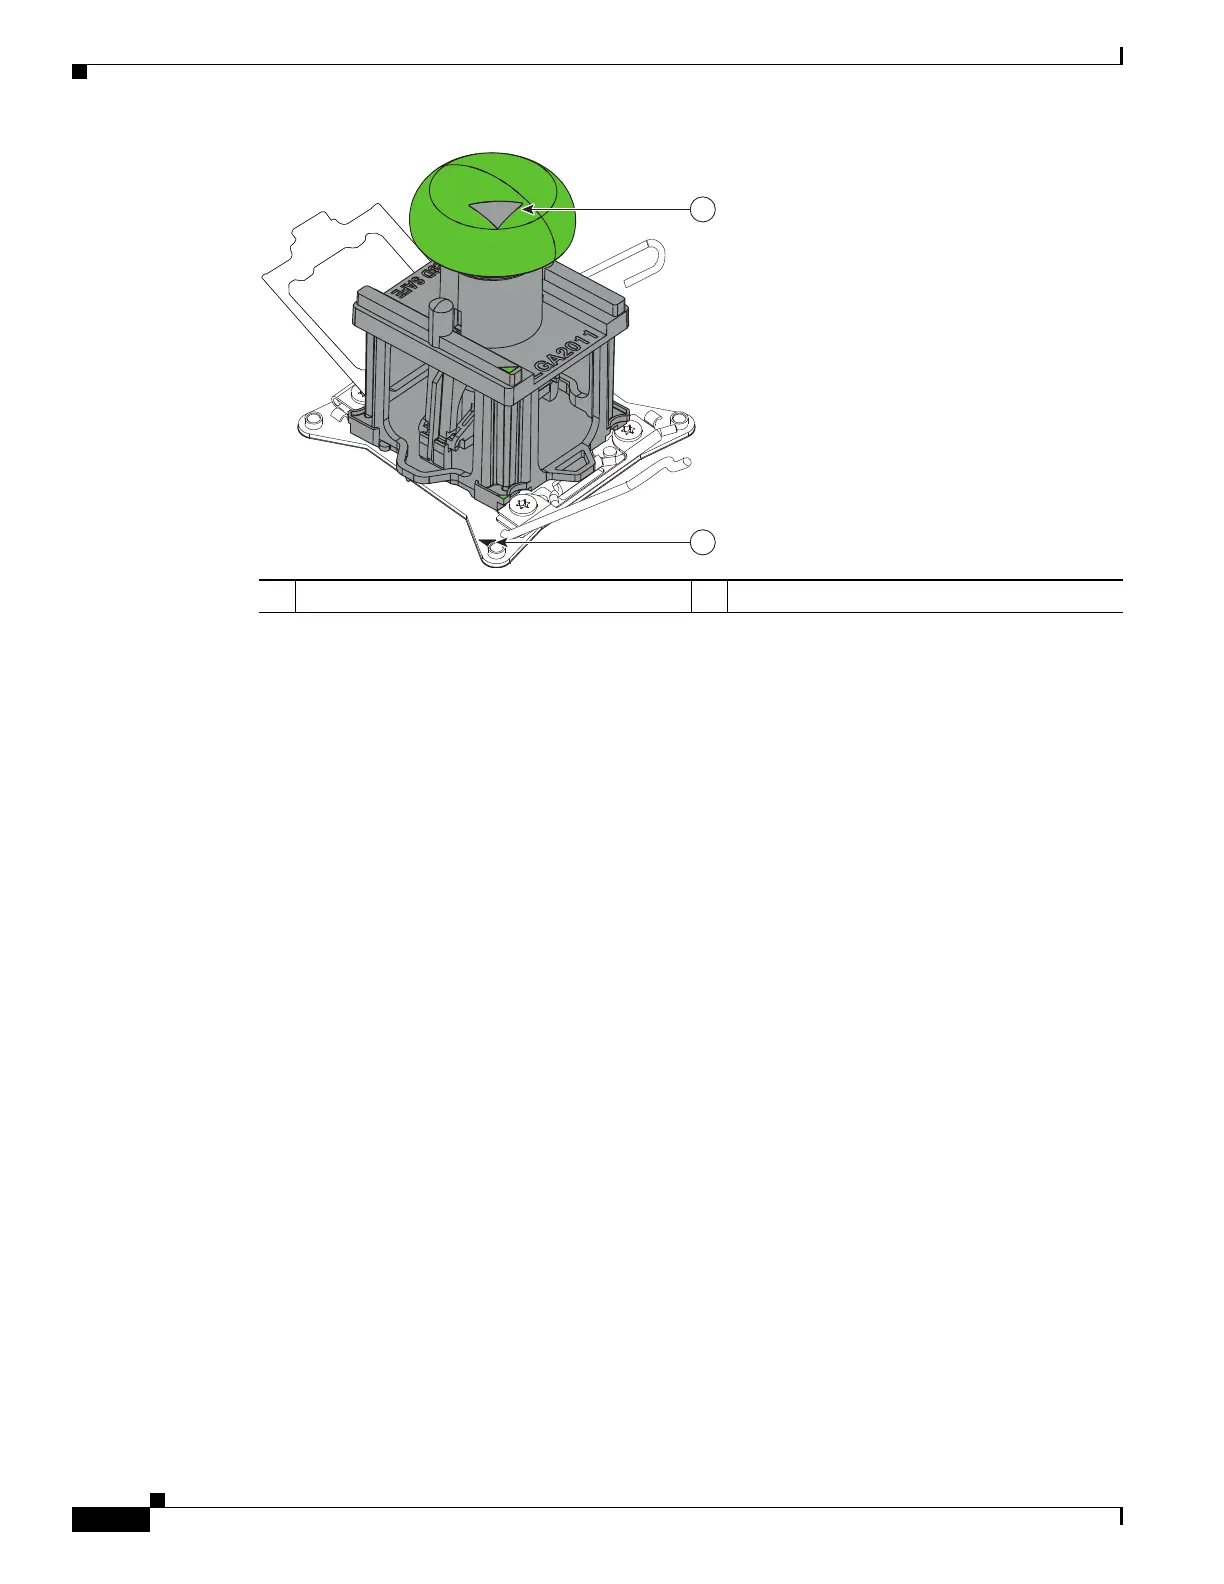
Figure 3-17 Removing or Inserting a CPU
Step 4 Insert the new CPU into the Pick-and-Place tool:
a. Remove the new CPU from the packaging and place it on the pedestal that is included in the kit.
Align the registration mark on the corner of the CPU with the arrow on the corner of the pedestal
(see Figure 3-18).
b. Press down on the top button of the tool to lock it open.
c. Set the Pick-and-Place tool on the CPU pedestal, aligning the arrow on the tool with the arrow on
the corner of the pedestal. Make sure that the tabs on the tool are fully seated in the slots on the
pedestal.
d. Press the side lever on the tool to grasp and lock in the CPU.
e. Lift the tool and CPU straight up off the pedestal.
1 Arrow on tool 2 Registration mark on CPU socket