3-20
Catalyst 3560 Switch Hardware Installation Guide
OL-6337-07
Chapter 3 Switch Installation (8- and 12-Port Switches)
Where to Go Next
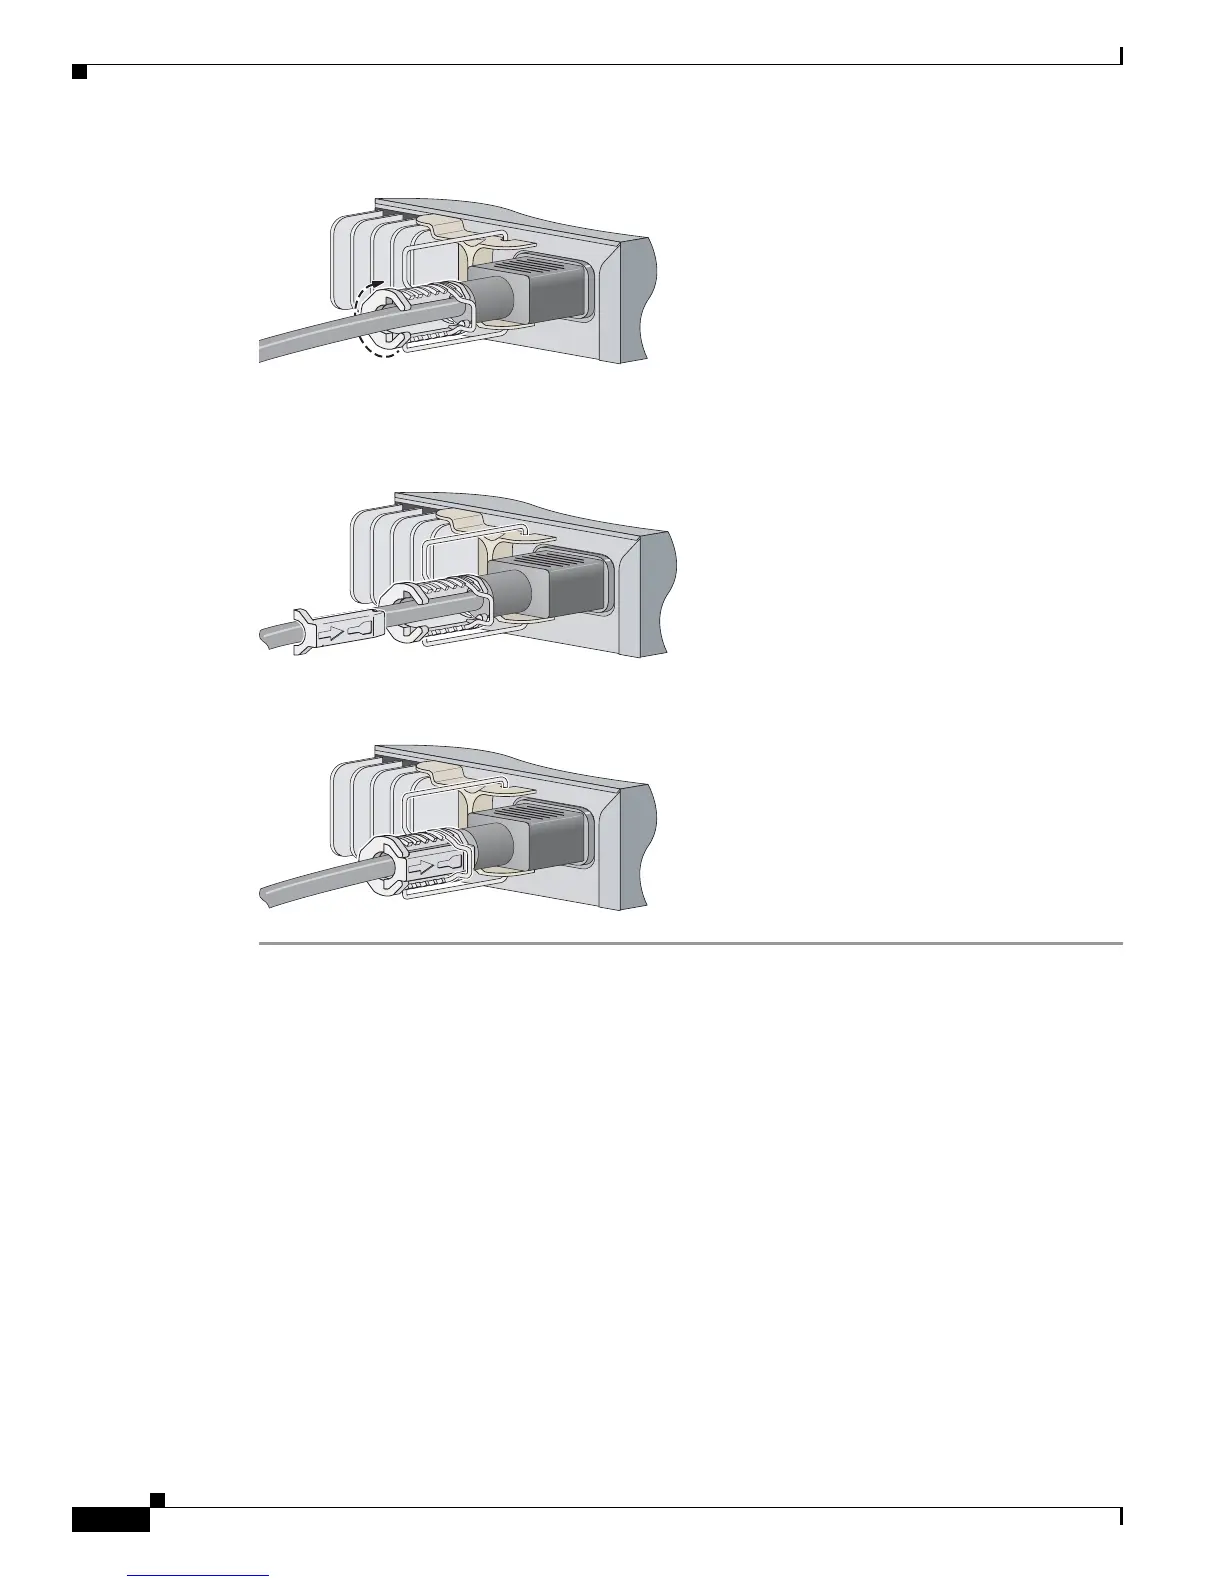
Figure 3-14 Rotate the Bushing Clockwise
Step 6 Insert the securing clip in the opening of the bushing (see Figure 3-15).
Figure 3-15 Insert the Securing Clip
After the power cord is correctly secured, it looks like this:
Where to Go Next
If the default configuration is satisfactory, the switch does not need further configuration. You can use
any of these management options to change the default configuration:
• Start the device manager, which is in the switch memory, to manage individual switches. The device
manager is a web interface that offers quick configuration and monitoring. You can access the
device manager from anywhere in your network through a web browser. For more information, see
the device manager online help.
• Start the Network Assistant application, which is described in the Getting Started with Cisco
Network Assistant guide. Through this GUI, you can configure and monitor a switch cluster or an
individual switch.
• Use the CLI from the console to configure the switch as a member of a cluster or as an individual
switch. See the Catalyst 3560 Switch Software Configuration Guide and the Catalyst 3560 Switch
Command Reference on Cisco.com for information on using the CLI with a Catalyst 3560 switch.
• Start an SNMP application such as the CiscoView application.
 Loading...