18
auxiliary harness (H2) wire connection guide
H2/1 VIOLET/BLACK (-) channel 4 output
This wire provides 200 mA programmable output. (See Feature Descriptions section of this guide.)
H2/2 GREEN/WHITE factory rearm output
This wire sends a negative pulse every time the remote start shuts down or the doors are locked. This
can be used to pulse the arm wire of the vehicle's factory anti-theft device. Use a relay to send a (-
) or (+) pulse to the arm wire.
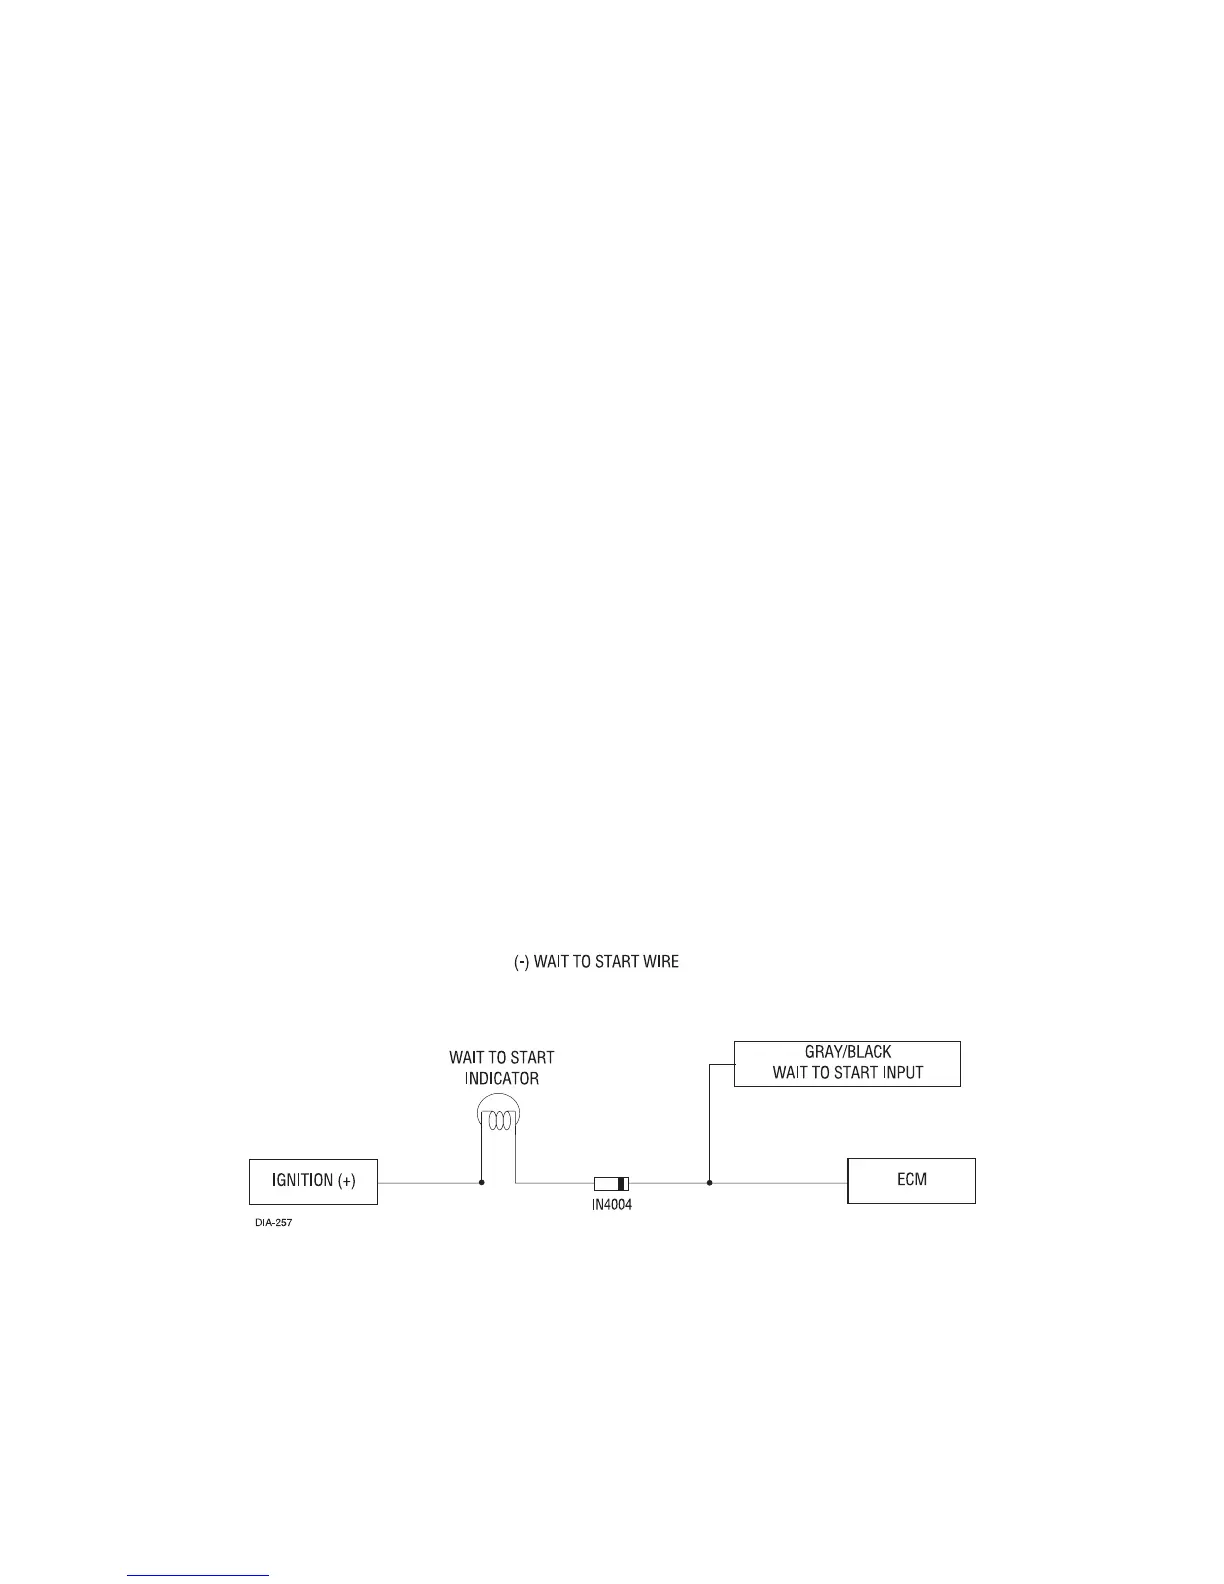
H2/3 GRAY/BLACK (-) diesel wait-to-start bulb input
Connect this wire to the wire in the vehicle that sends the signal to turn on the WAIT-TO-START bulb
in the dashboard. In most diesels the wire is negative (ground turns on the bulb) and the
GRAY/BLACK can be directly connected to the wire in the vehicle. If the vehicle uses a positive wire
(12V to turn on the bulb) a relay must be used to change the polarity. (See Finding the Wait-To-Start
Bulb Wire For Diesels section of this guide.) Here are some common colors of this wire:
● Chevrolet and GMC trucks: Light Blue or Dark Blue
● Ford Trucks: Black/Pink
● Dodge Ram Trucks: Orange/Black or Black/Orange
NNOOTTEE!!
A 1-amp diode must be installed in line on the factory wire between the wait-to-start indicator and the
ECM. (See the following diagram for details.)
 Loading...