Warning!
The installer and user are responsible for
ensuring the installation and operation of this
warewasher are in accordance with this
manual and with local and national
regulations.
4.1 Recommended Hand Tools
The following hand tools are required when installing the
warewasher:
• Spirit level
• 8mm spanner
• Multimeter or voltmeter
• Insulated No. 2 Posi screwdriver
• Drill with 8mm bit
4.2 Warewasher Placement
Your warewasher should be installed on a flat, stable surface that
can hold the full weight of the filled warewasher and withstanding
the vibration of regular use
Ensure there is a minimum of 10mm clearance on each side of
your warewasher and 20 mm clearance at the top of the
warewasher (►4.3).
Once your warewasher is in its final position, adjust the adjustable
feet to ensure the warewasher is stable, its weight is being
distributed equally, and it does not tilt more than 2 degrees in any
direction.
Your warewasher should be placed in a location that allows the
electrical, supply water and waste water connections to be fitted
(►4.3).
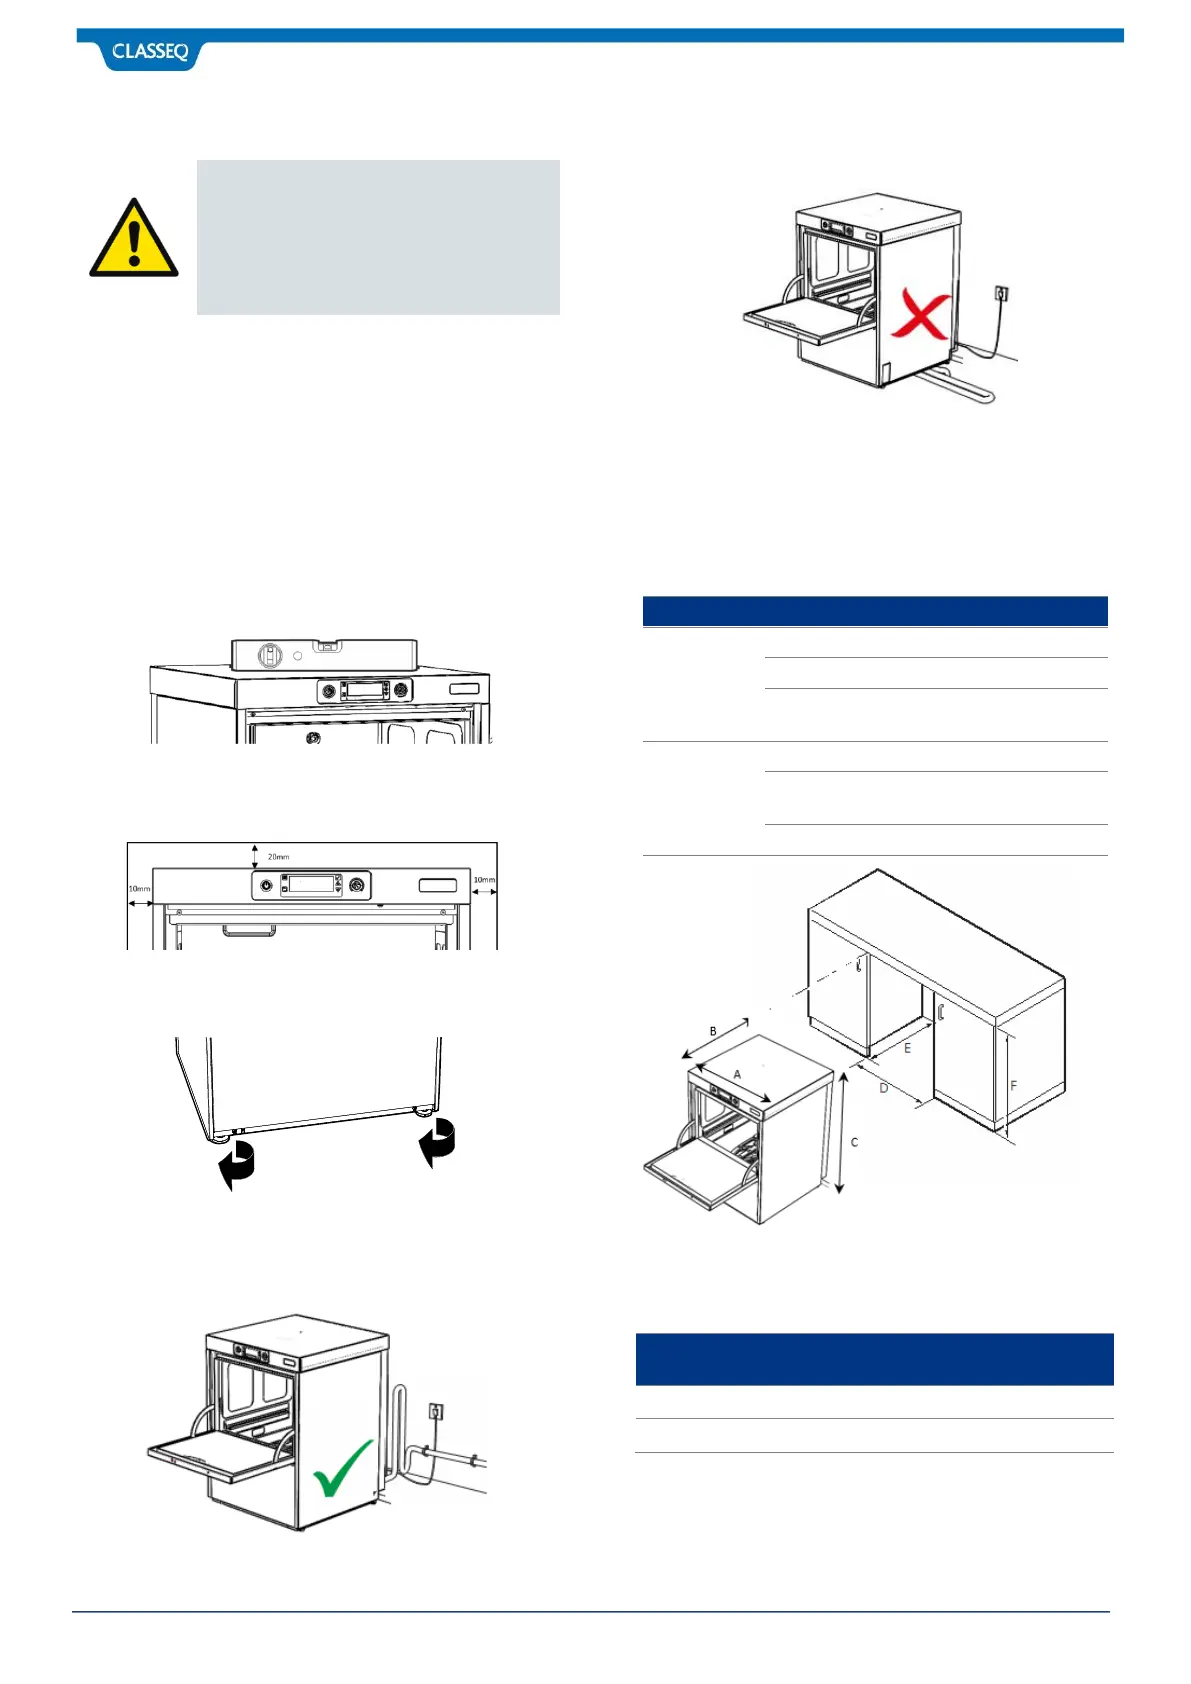
When positioning your warewasher, ensure that the water inlet,
chemical tubes and drain hoses are not kinked or squashed. Care
must also be taken to ensure the warewasher does not rest on any
of its supply hoses / leads.
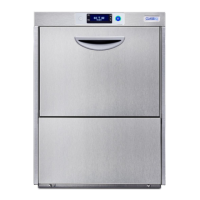
4.3 Site Requirements
Overall Warewasher and Clearance Dimensions