Inspection and Maintenance
8-28
750-91 (revised 2009)
Model CB-LE Packaged Boiler Manual
It is recommended that the tile be dry-fitted, match-marked, removed, and then reinstalled with the proper amount
of refractory cement. Thin joints (less than 1/16”) are desirable. Generally, it will be necessary to shave a portion
from one or more tiles to obtain a fit. If a fill piece is required, cut it to fit and install the piece at the bottom of the
furnace. When installing the housing, or the tile against the housing, liberally coat the surface with refractory
cement. Remove any cement that is squeezed out.
Allow refractory to air dry as long as possible. If immediate use is required, fire intermittently at a low rate for sev-
eral hours to thoroughly dry the refractory.
For detailed information, request Bulletin C10-5921 from your local Cleaver-Brooks representative.
8.20.3 — Installation
The following procedure is typical for all standard diameter boilers with the exception of steps 6, 7, and 8 which are
not used for an 1.p. (plain furnace) boiler. Disregard these steps when working with 1.p. boilers.
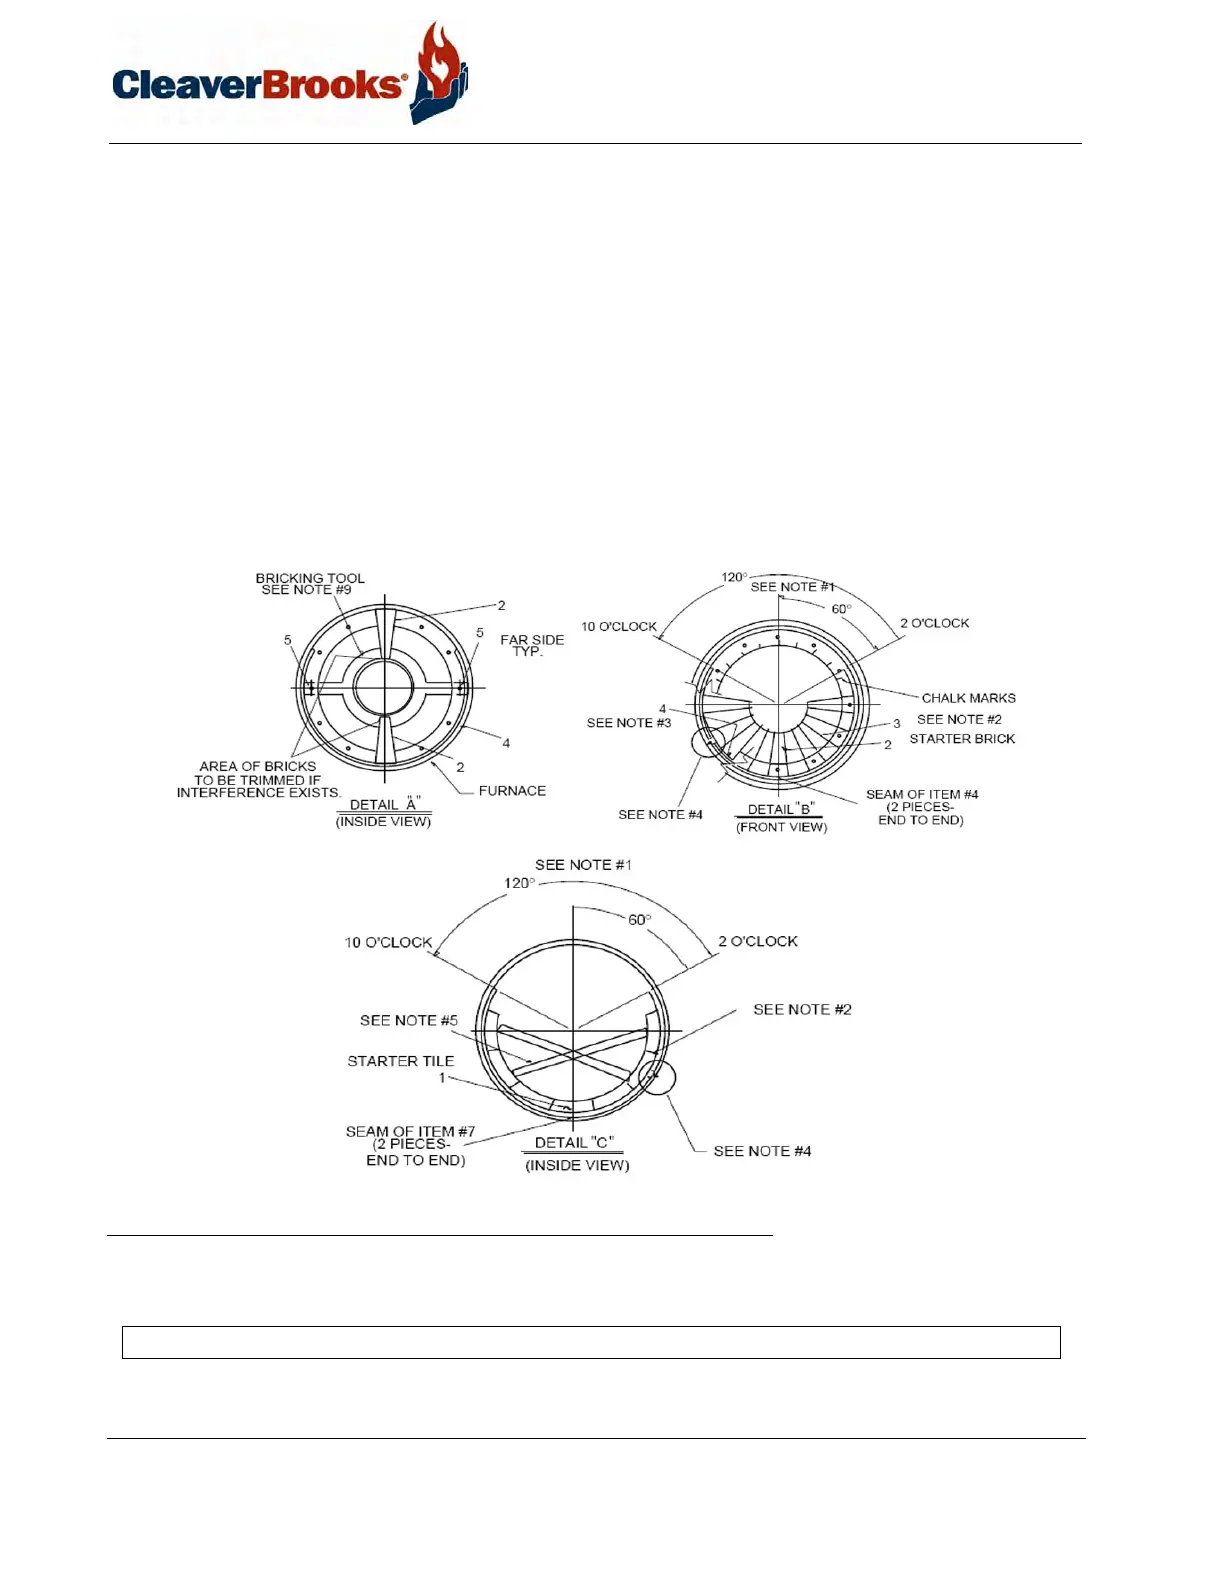
FIGURE 8-14. Throat Tile and Furnace Liner
1. Install studs, bricking tool, creafelt, bottom and top arch bricks as shown on “Detail A” to check for correct fit
up. If interference is present at the arch brick, measure this distance and trim inside diameter (I.D.) of all bricks.
2. Install the bottom half of arch bricks as shown on “Detail B.”
NOTE: The arch bricks must be trimmed to 12” on excessive pressures to maintain brick I.D.