Windows 7 Information
F - 2 Operating System Setup
F
Operating System Setup
If you are installing new system software, or are re-configuring your computer for a different system, make sure
you configure the appropriate OS setting in the BIOS before installing a new operating system (Note: If you have
installed the Windows Vista/Windows 7 operating system with AHCI mode enabled, DO NOT disable AHCI
mode or you will need to reinstall the Windows Vista/Windows 7 OS).
1. Start-up the computer and press <F2> to enter the BIOS.
2. Go to the Advanced menu, select “Installed O/S” and make sure the appropriate operating system is
selected.
3. Go to the Exit menu and select “Exit Saving Changes” (or press F10 and select “Ye s” then press
Enter) and press Enter to exit the BIOS and reboot the computer.
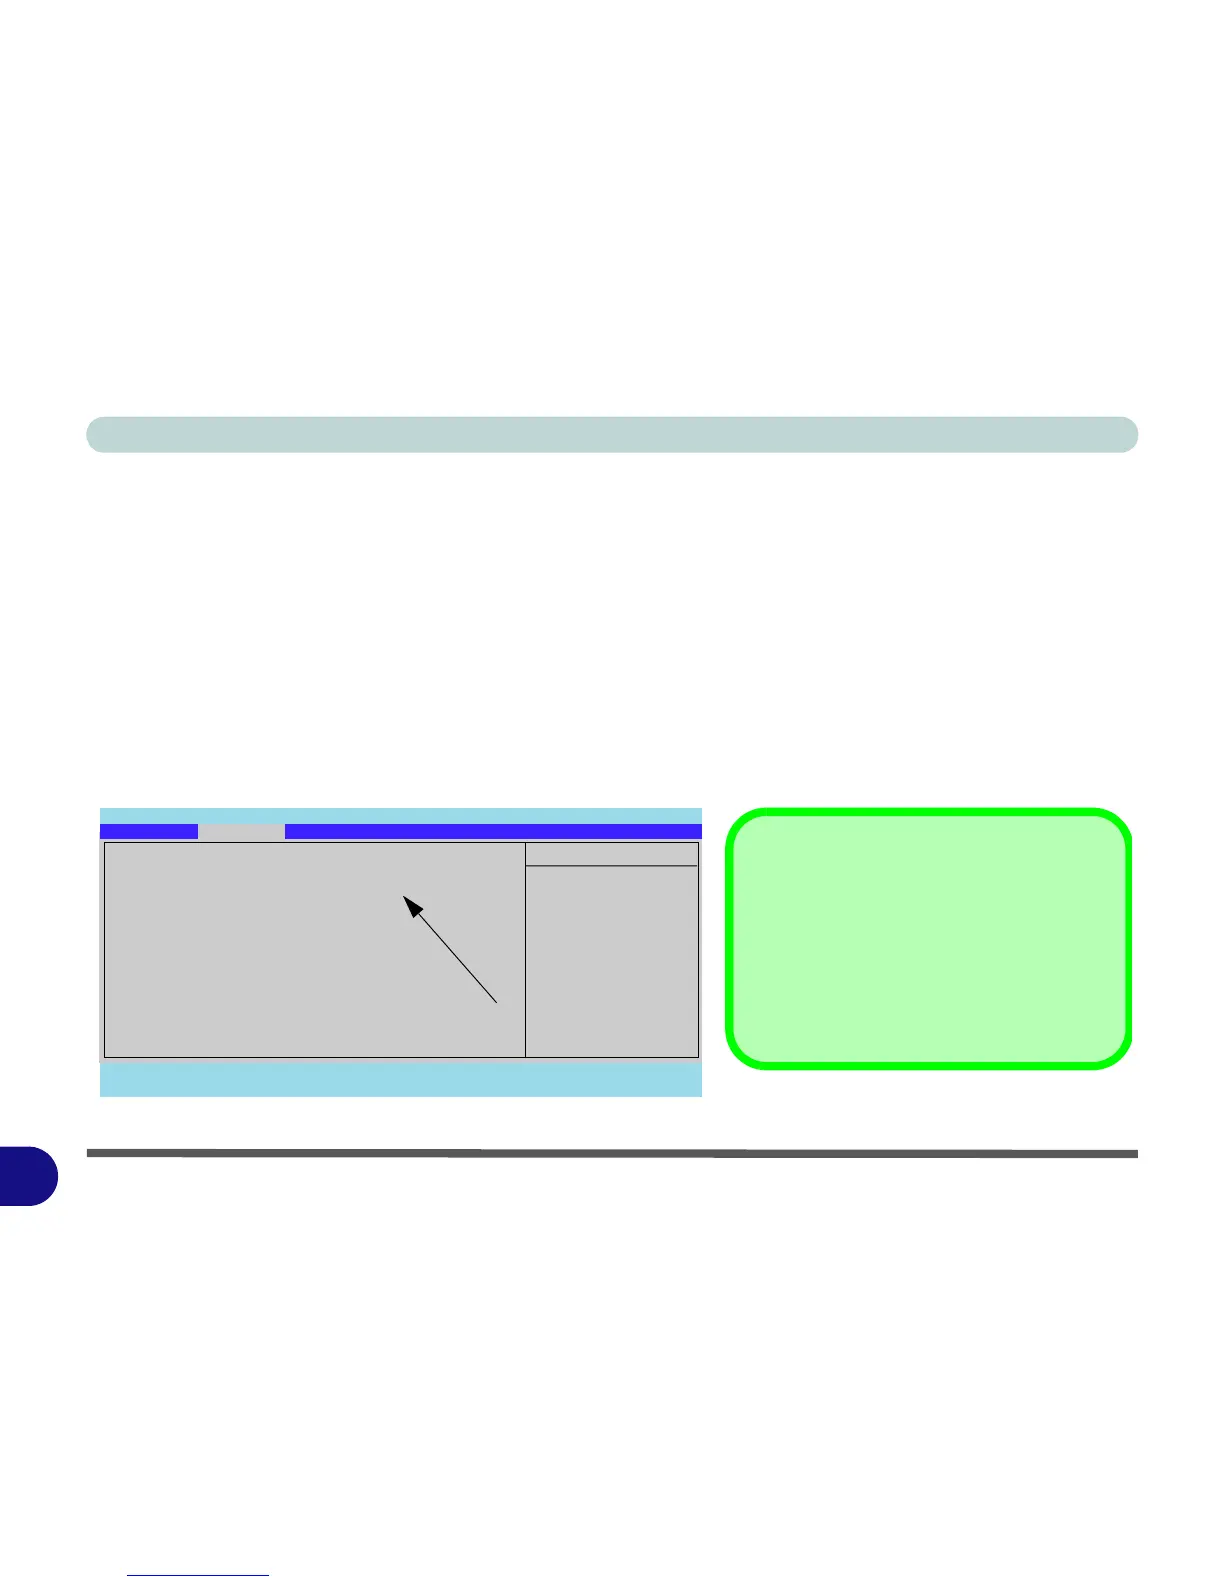
Figure F - 1 - Advanced BIOS Menu
Main A
dvanced Security Boot Exit
F1 Help Select Item -/+ Change Values F9 Setup Defaults
Esc Exit Select Menu Enter Select Sub-Menu F10 Save and Exit
Item Specific Help
Advanced
Select options for
Advanced Chipset
features.
Phoenix SecureCore(tm) Setup Utility
Advanced Chipset Control
Installed O/S: [Vista / Win 7]
SATA Mode Selection: [AHCI]
DFOROM (Robson) Support: [Enabled]
Legacy USB Support: [Enabled]
Boot-time Diagnostic Screen: [Disabled]
Legacy OS Boot: [Enabled]
Reset Configuration Data: [No]
Power On Boot Beep [Disabled]
Battery Low Alarm Beep [Disabled]
Only available if Windows Vista/Win 7
is selected as the O/S.
SATA Mode Selection
Make sure that you have selected the appro-
priate SATA Mode Selection for your hard
disk. If you have installed the Vista/Win 7 O/S
with AHCI or IDE mode selected, do not
change the setting (otherwise you will need to
reinstall your O/S).