Instruction Manual - Original Version
5. Slowly lower the axis while ensuring the anchors fit into the base holes of the axis.
6. While crane is still holding the axis, secure the bolts with nuts and washers as in Figure 5.
7. Make sure axis is fully resting on the anchors before lowering the crane completely.
8. Use leveler to determine vertical calibration of installed Z-axis. Carefully adjust nuts bellow and
above the base of Z-axis until its perpendicular to the ground.
9. After correct angle is achieved, carefully tighten nuts constantly switching between one below and
one above in order to maintain correct angle.
10. Repeat for each column.
5.4.1.3 Mounting Y-axis
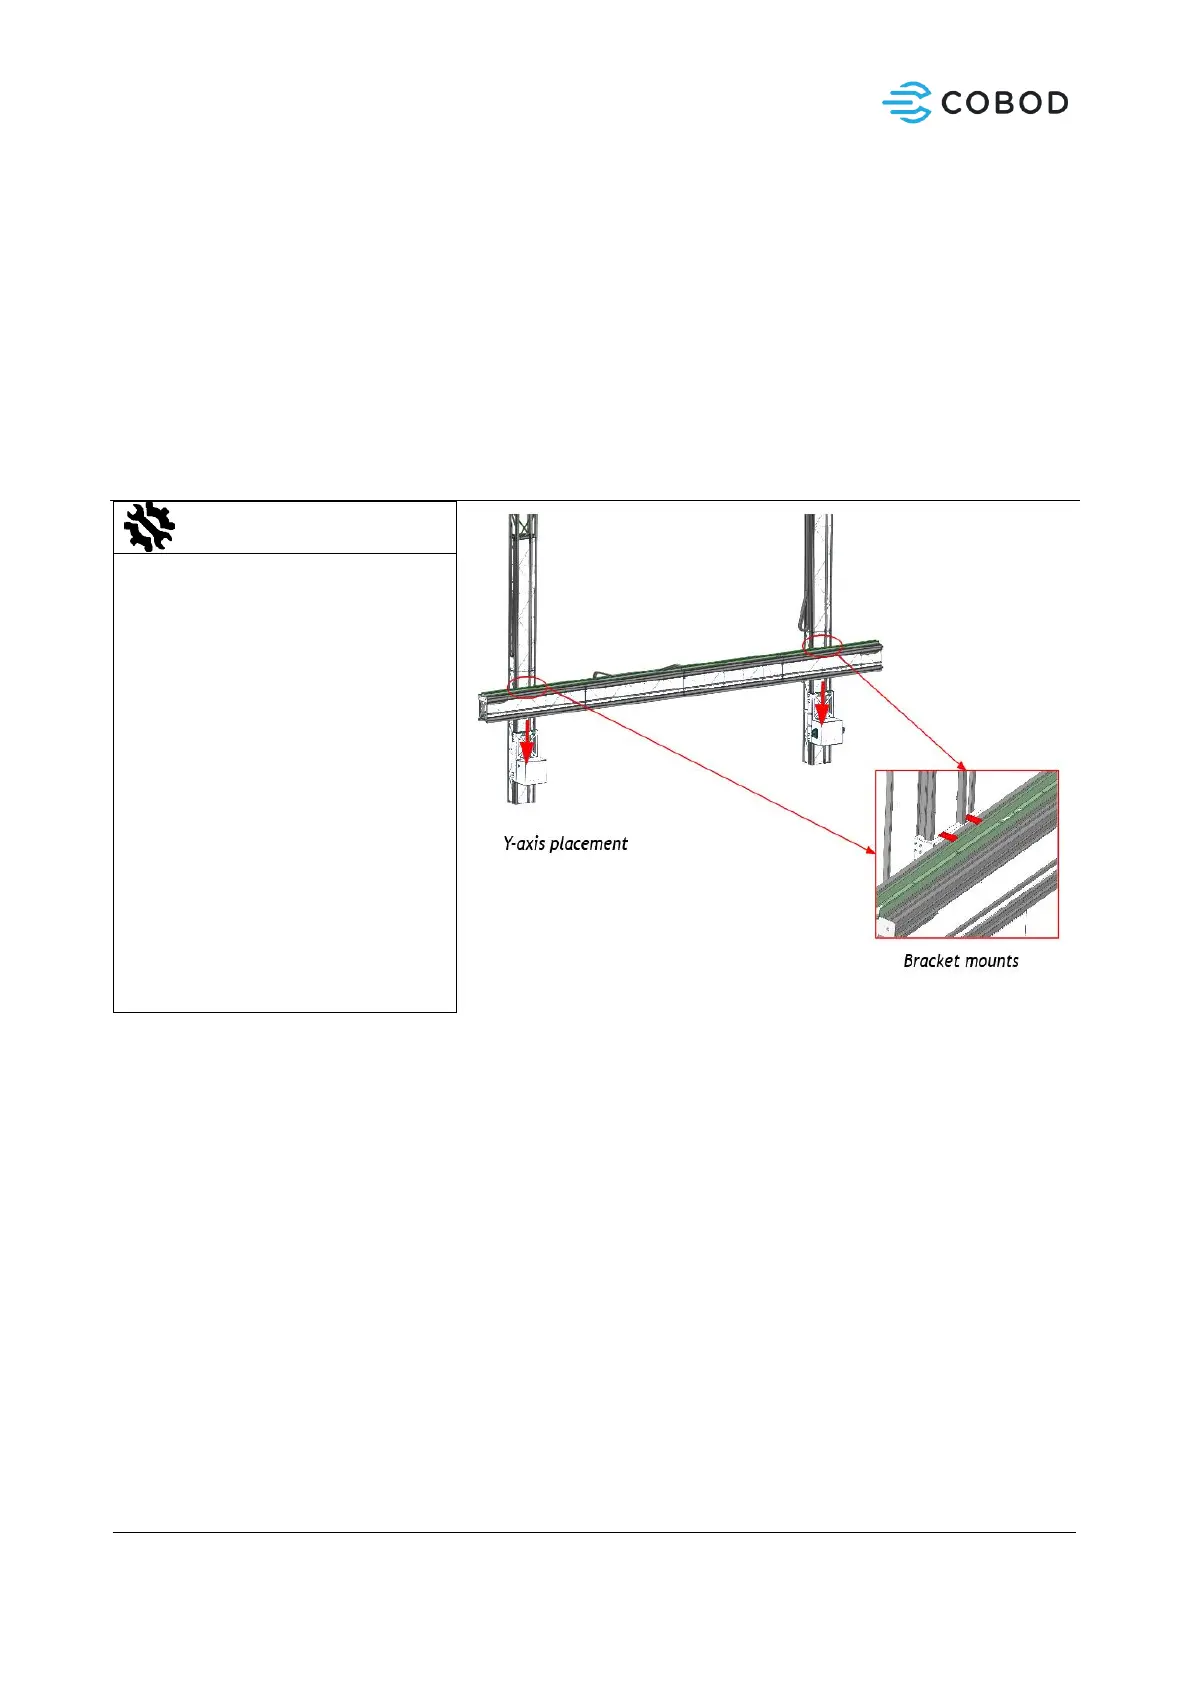
Figure 6: Bracket mounts placement
• 1 x Crane or telescopic
forklift (min. 1000 kg at 12
meters)
• 1 x 6mm Allen key (or bit)
• 16 x M8 bolts + washers
• 1 x Laser measuring device
Procedure:
1. Before starting, make sure Z-axes and Z-carriages are leveled and aligned.
2. Lift Y-axis using the crane hook in the middle of the truss.
3. Carefully place the axis on top of the Z-carriage as in Figure 6
4. Measure the distance from the end of the Y-axis to the Z-carriage.
5. Adjust the axis sideways until centered (within 1-2mm)
6. Mount the brackets that holds the Y-axis in place as in Figure 6.
7. Repeat for remaining Y-axis.