Page 24 For technical questions, please call 1-888-866-5797. Item 63890
Trim Video
Note: Use this function if you need to backup
a particular section of the video recording.
1. Connect a USB flash drive to the DVR.
2. Double-click on the channel (to display in full screen
during video playback) that you wish to backup.
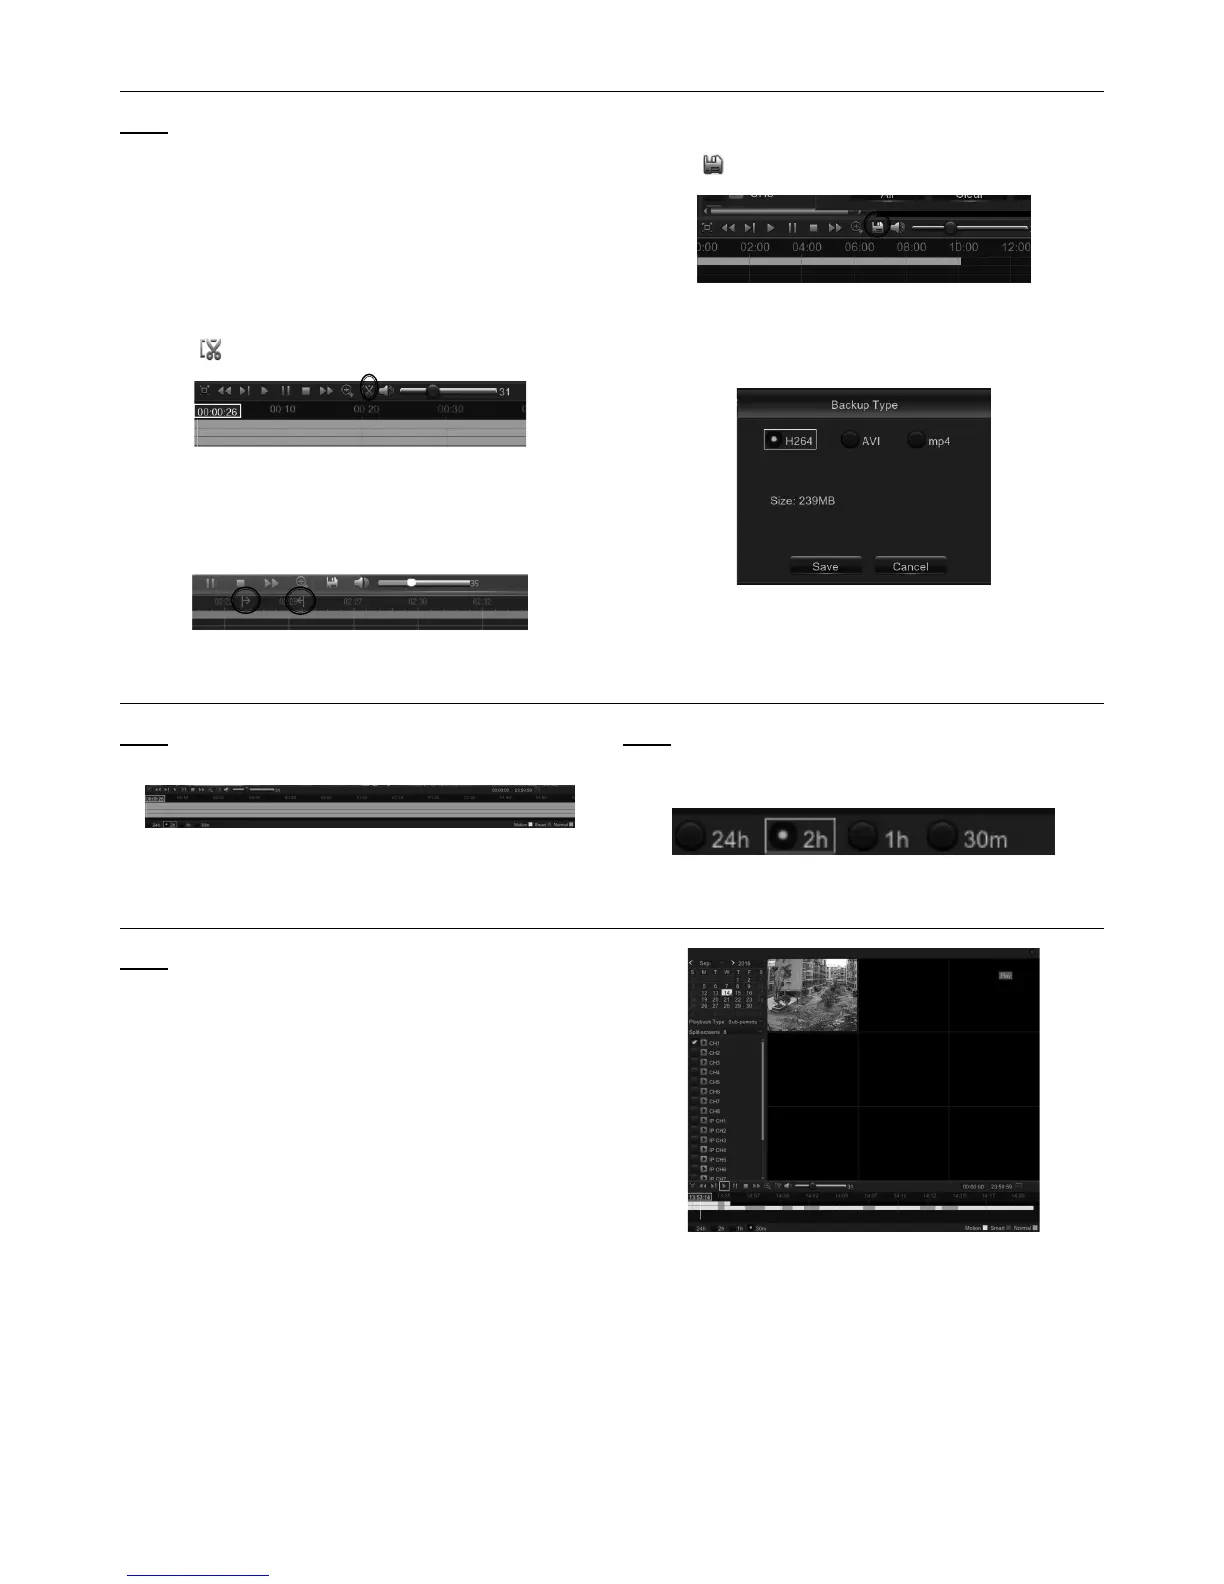
3. Click on the Time Bar to mark the beginning
of the video footage you wish to backup.
4. Click to start selecting the footage See Figure AN.
Figure AN
5. Click on the Time Bar to mark the end of the video
footage you wish to backup. The marked up area is
now displayed within the red arrows. See Figure AO.
Figure AO
6. Click
to save the footage.
Figure AP
7. A video type selection message appears, as
below. Select the file format and click Save.
Figure AQ
Time Frame
Note: During video playback, the time bar is
displayed in 24 Hours (00:00~24:00) by default.
Figure AR
Note: You can shorten the time bar to be displayed
in 2 Hours, 1 Hour or 30 Minutes in order to
make an accurate position to the time bar.
Figure AS
Sub-periods Playback
Note: This function will allow you to divide a
recording video into average separate segments
and play together in the same screen.
1. In the video playback interface, choose Sub-
periods from Playback Type section.
2. Select a channel that you want to play.
3. Choose the Split Screens. If you have a 4
Channel DVR, the max number of split screens
will be 4. For an 8 channel DVR, 8 screens.
For a 16 channel DVR, 16 screens.
For example, if the video you want to play is 60
minutes in length, and the split screen is 4, the
video will be divided in to 4 segments, and each
segment will be 15 minutes in length. All 4 segments
will be played in the same screen. See Figure AT.
Figure AT
 Loading...