These installation steps are very important. Please follow them carefully when
installing your first and every DroneMobile system. The Drone’s SIM MUST be
activated prior to powering on the DR-2000.
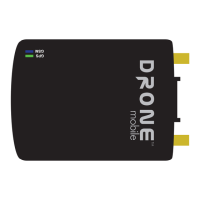
STEP 1: Install DroneMobile (and alarm/remote start system if applicable). Leave harnesses unplugged
from DR-2000.
STEP 2: Go to https://live.dronemobile.com/login and click on “New Dealer Registration.” If you
already have an account, login with your Dealer account information.
STEP 3: Register the Drone unit using the 20 digit serial number. (Click on “New Dealer Registration” if
this is your first time registering a Drone unit.) Wait for the Activation Status to change to
“Active.”
STEP 4: Once the status changes to “Active” you may now plug the harnesses into the DR-2000.
STEP 5: Wait for the unit to achieve cell lock (blue LED flashes slowly) Proceed to the “Settings” page.
STEP 6: Complete the “Asset Description” and “Installation Options” sections.
Configure the other settings and click “Save” to save your settings.
STEP 7: Once you are on the “Controls” page, test all of the features including GPS tracking to verify
that the unit is fully functional before releasing the vehicle.
STEP 8: Give your customer the 20 digit serial number and Quick Start Card and have them register
the unit in their name by going to https://live.dronemobile.com/login and clicking on “New
User Registration.” If they currently have an account, have them log in and “Manage Account”
> “Add/Remove Vehicle(s).”
Installation Overview
3 | Copyright 2011 Firstech, LLC.
Failure to properly select this feature will require a call to tech support to reset.
Once you log out of this session, you will not be able to control the unit again
and the user will not have access to GPS functions unless they upgrade to the
Premium Plan.
TM
DR-2000 Install Guide