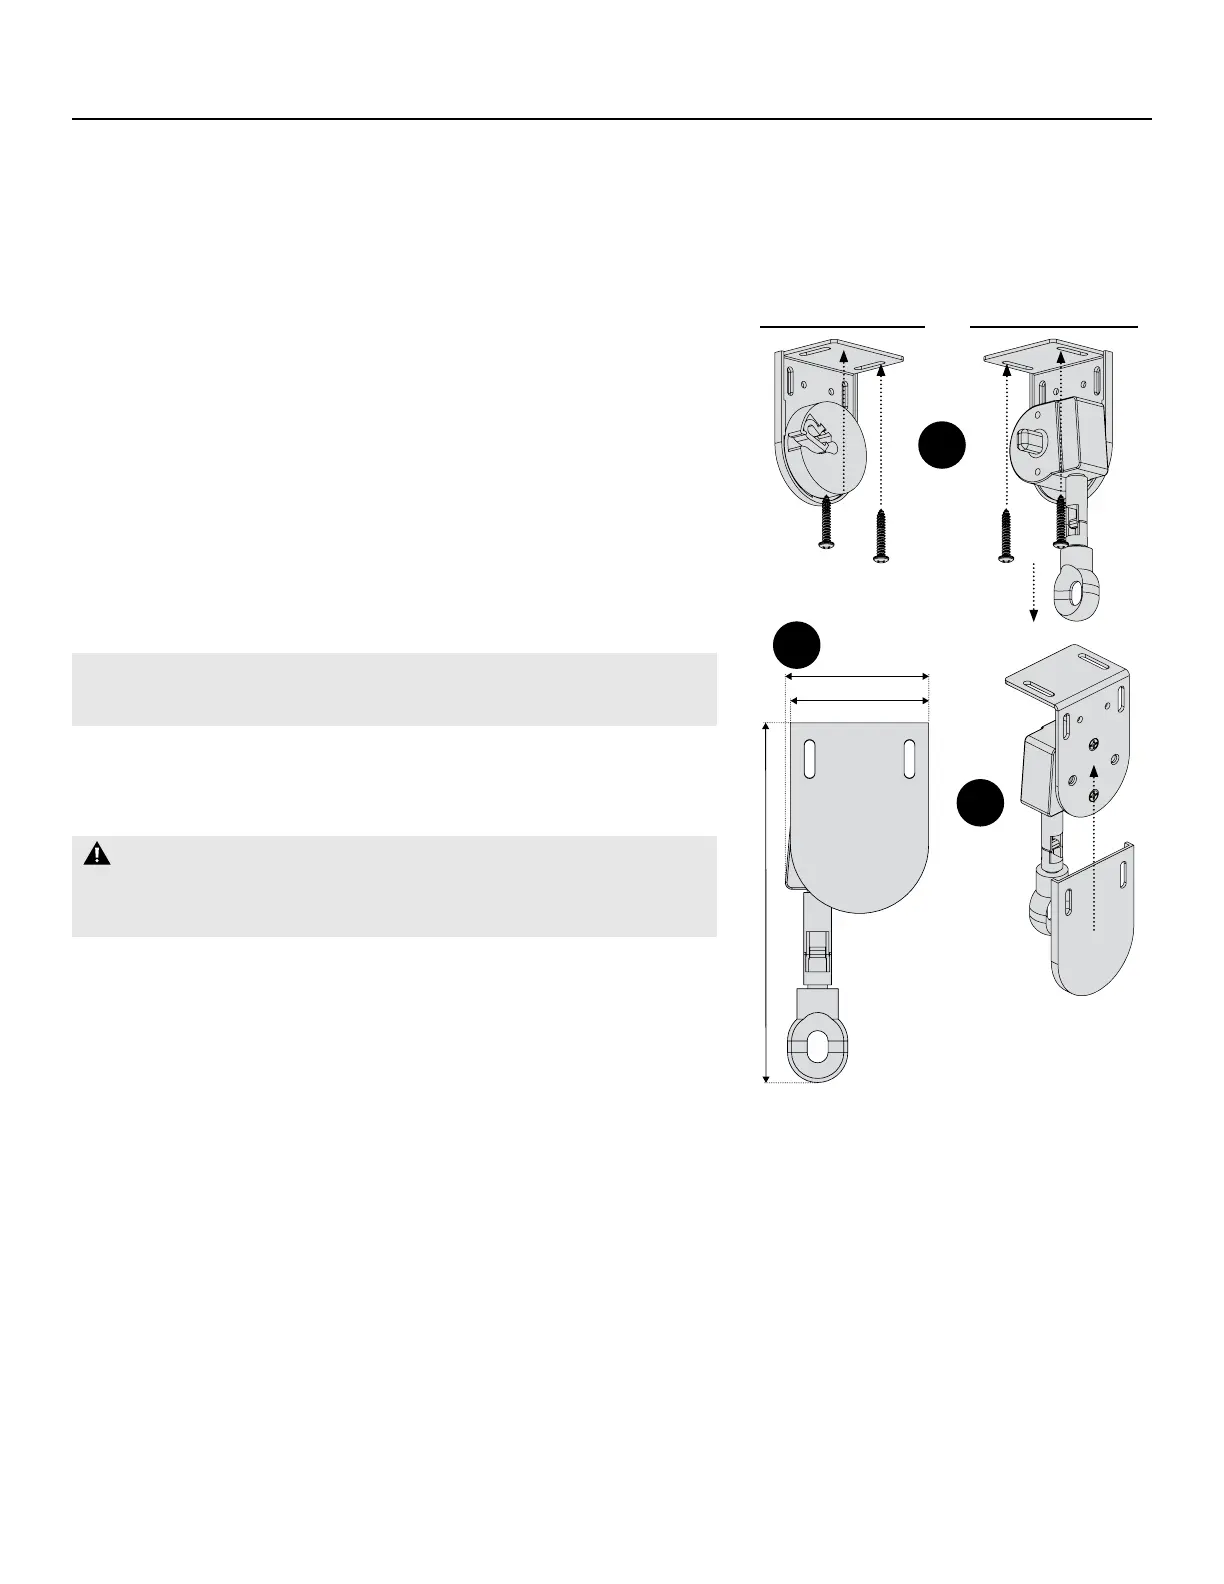
10
The installation brackets are supplied in pairs: Control Side and Idle Side. Identify which side of the shade each
of the brackets will go on based on your order. Note: Removable Wand control is shown, but Continuous Chain
Loop follows the same installation instructions.
STEP 1: Mount the Brackets
•
Check the orientation of the control side. For wand shades, the
Wand Eyelet hangs down from bracket. For Continuous Chain
Loop, the Chain hangs from the bottom of bracket (g. A).
•
Measure the Marking Distance (pg. 9) and use the results to
mark the locations for mounting the brackets.
•
Place the outside edge of the brackets on the marks and mark
the screw holes.
•
Check that the top of the installation brackets are at the desired
height, level, and aligned.
IMPORTANT: A minimum 2 ⁄ " mounting depth is required to
mount brackets (g. B).
•
Ensure the mounting surface is level and drill pilot holes using a ⁄"
drill bit, then use provided screws to attach installation brackets.
WARNING: Must be mounted into wood/metal studs
or concrete anchors. Mounting with drywall anchors is NOT
recommended.
•
Install Bracket Covers: Align the bracket with the channels in the
Bracket Cover and slide onto the bracket (g. C).
STEP 2: Install the Shade
•
Insert the Control End Plug onto the mechanism of the Wand or
Clutch Bracket Assembly of the roller shade (g. D).
•
Sliding it from front to back, insert the Idle End Plug into the Idle
Bracket Assembly and click the Idle End Plug into place (g. E).
INSTALLATION: STANDARD Shade — TOP Mount
2 ¹⁄″
2 ¹⁄″
5 ¹⁄″
Slide onto
Bracket
Hangs
Down
A
B
C
Idle Side Control Side