18
B
INSTALLATION: Solar Panel and Battery
Solar Panel and Battery
(Solar-Powered Motor Only)
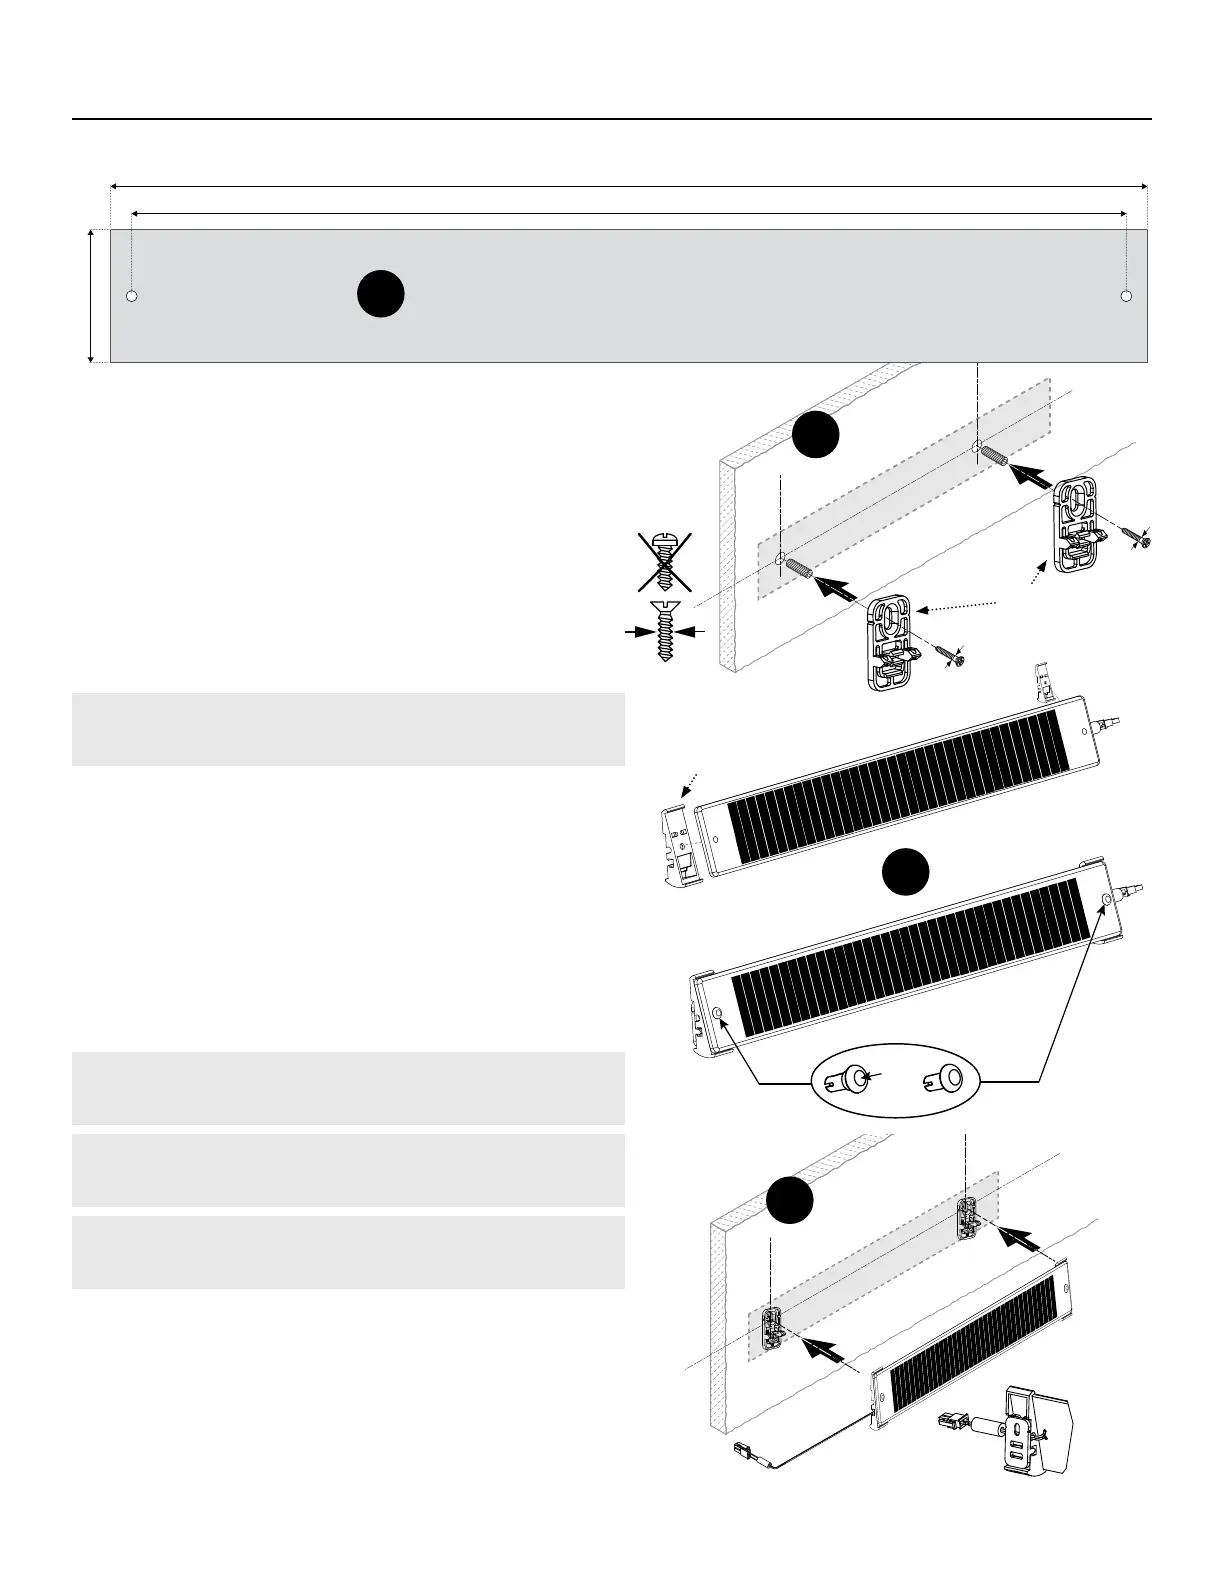
STEP 1: Mount the Solar Panel
•
Position Solar Panel in a location that receives at
least 8 hours of sun per day.
•
Mount the Solar Panel and Battery within 3 feet of
the wired end of the shade to ensure wires connect.
CAUTION! Make sure the wires are clear of the shade
so that they do not interfere with its movement.
•
Using the measuring guide above (g. A), mount the
Wall Brackets with 4mm athead screws (g. B).
•
Attach the Angled Brackets to the Solar Panel by using
the provided Rivets. The Rivets should go through the
holes on either side of the Solar Panel and attach to
the Angled Bracket (g. C).
•
Clip the Angled Bracket onto the Wall Bracket (g. D).
CAUTION: Don’t mount to a surface that can reach
temperatures above 158° F.
NOTE: Place in an open area so that it can get as
much uninterrupted sun as possible.
IMPORTANT: Do not drill directly into the Solar
Panel's holes.
2 ⁄″
17 ⁄″
18 ⁄″
>>>
A
Solar Panel
C
D
Bracket
Backside View
Wall
Brackets
Angled
Bracket
Rivets