CowTech Ciclop 3D Scanning Guide
Calibration Segmentation
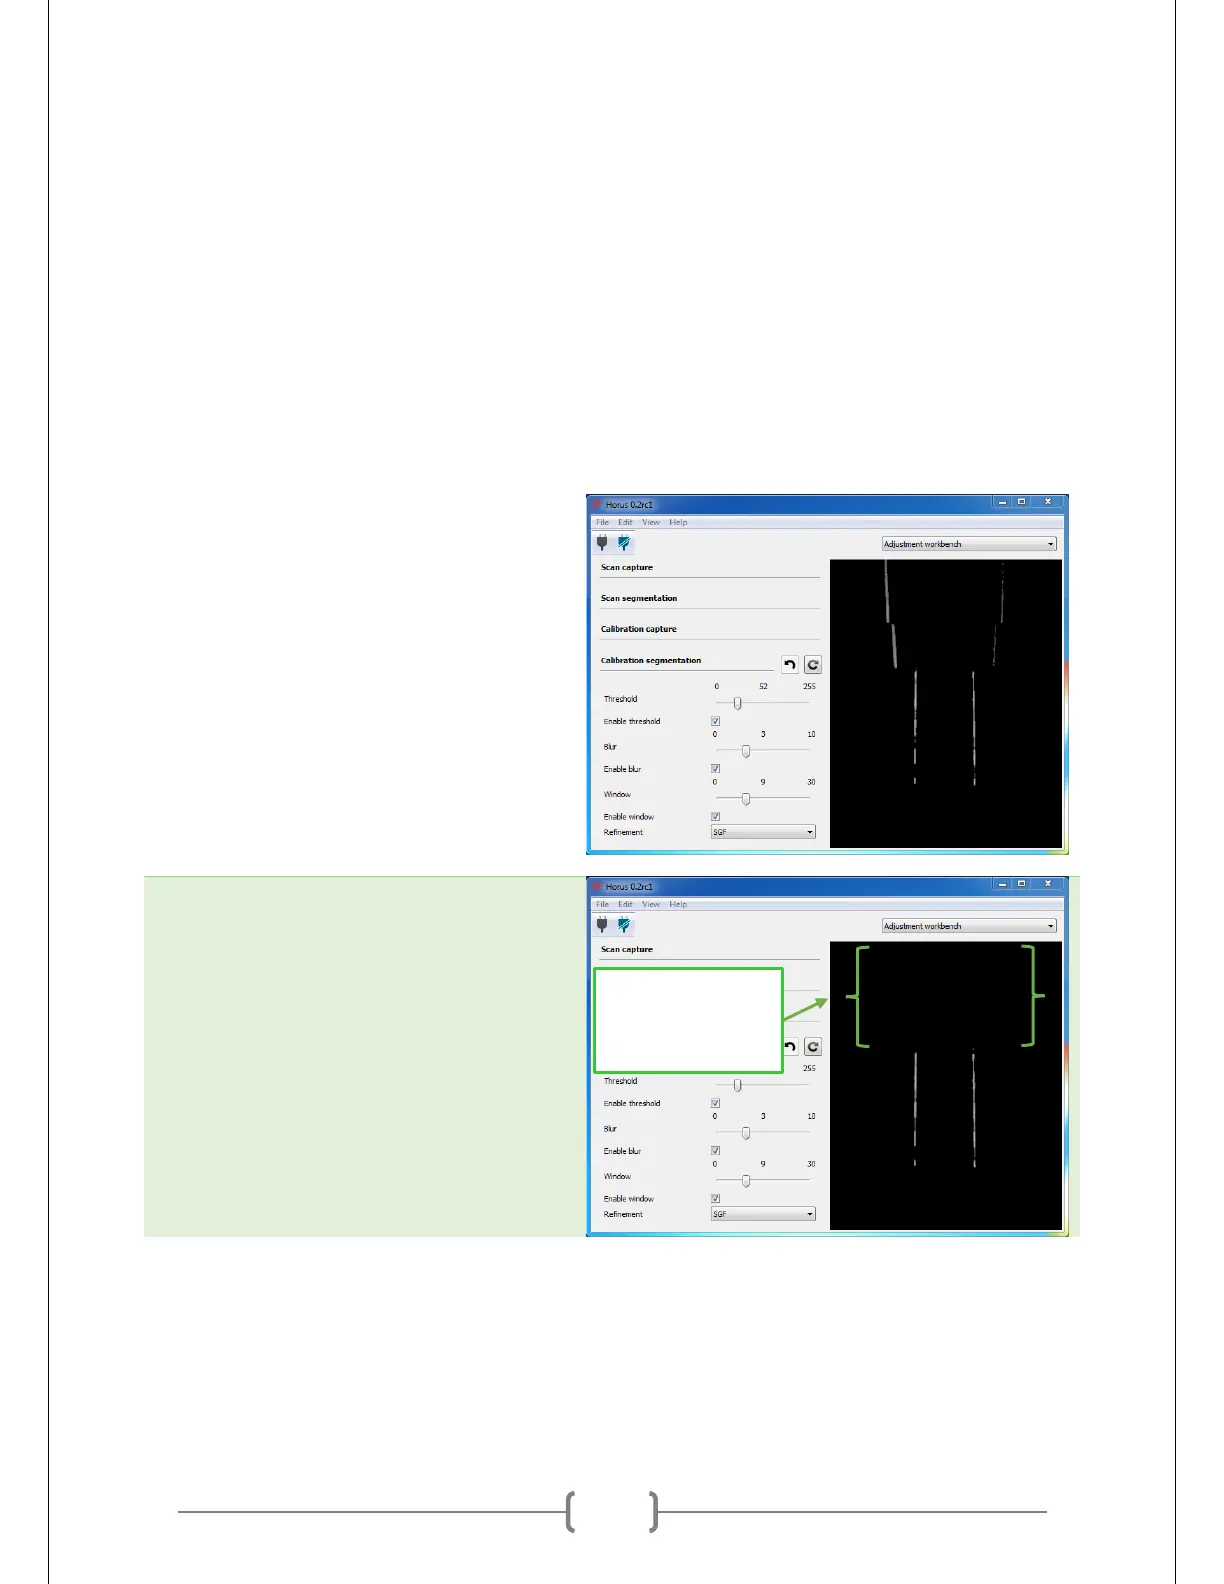
Calibration segmentation covers all the settings that govern how Horus tells red laser light from other
colors. Horus will show you which areas register as laser light with white highlights, while leaving
everything else black. This is important during calibration, when Horus uses light from the lasers shining
on the calibration pattern to orient the lasers and table in relation to the camera.
The goal is to get Horus to detect only the laser light that shines on the white squares. Ideally, the areas
where the laser lines hit the black squares should not be detected. We also want to lines to be stable (not
constantly shifting) and to be relatively crisp.
Turn off the lights. For this step, less
ambient light will allow the red laser light
to shine brighter and make it easier to
detect. The lights will stay off when it’s
actually time to scan. We can do this
because we are not capturing a texture.
If we were capturing a texture, we would
want to keep the lights on during
scanning. Lights on means that you get an
accurate depiction of the object’s colors.
Just be warned that texture scans may
make calibration more difficult and
possibly compromise the level of detail of
the scan.
Make sure Horus does not detect the
background. In the picture on the
previous step, the top four lines are from
the wall rather than from the calibration
pattern. To remove them, hang a darkly
colored sheet behind the table or move
the table further away from the wall.
AREA ABOVE
PATTERN IS NOT
DETECTED