20 x 5/8 flat head screws, washers
and hex nuts. (See Fig.20).
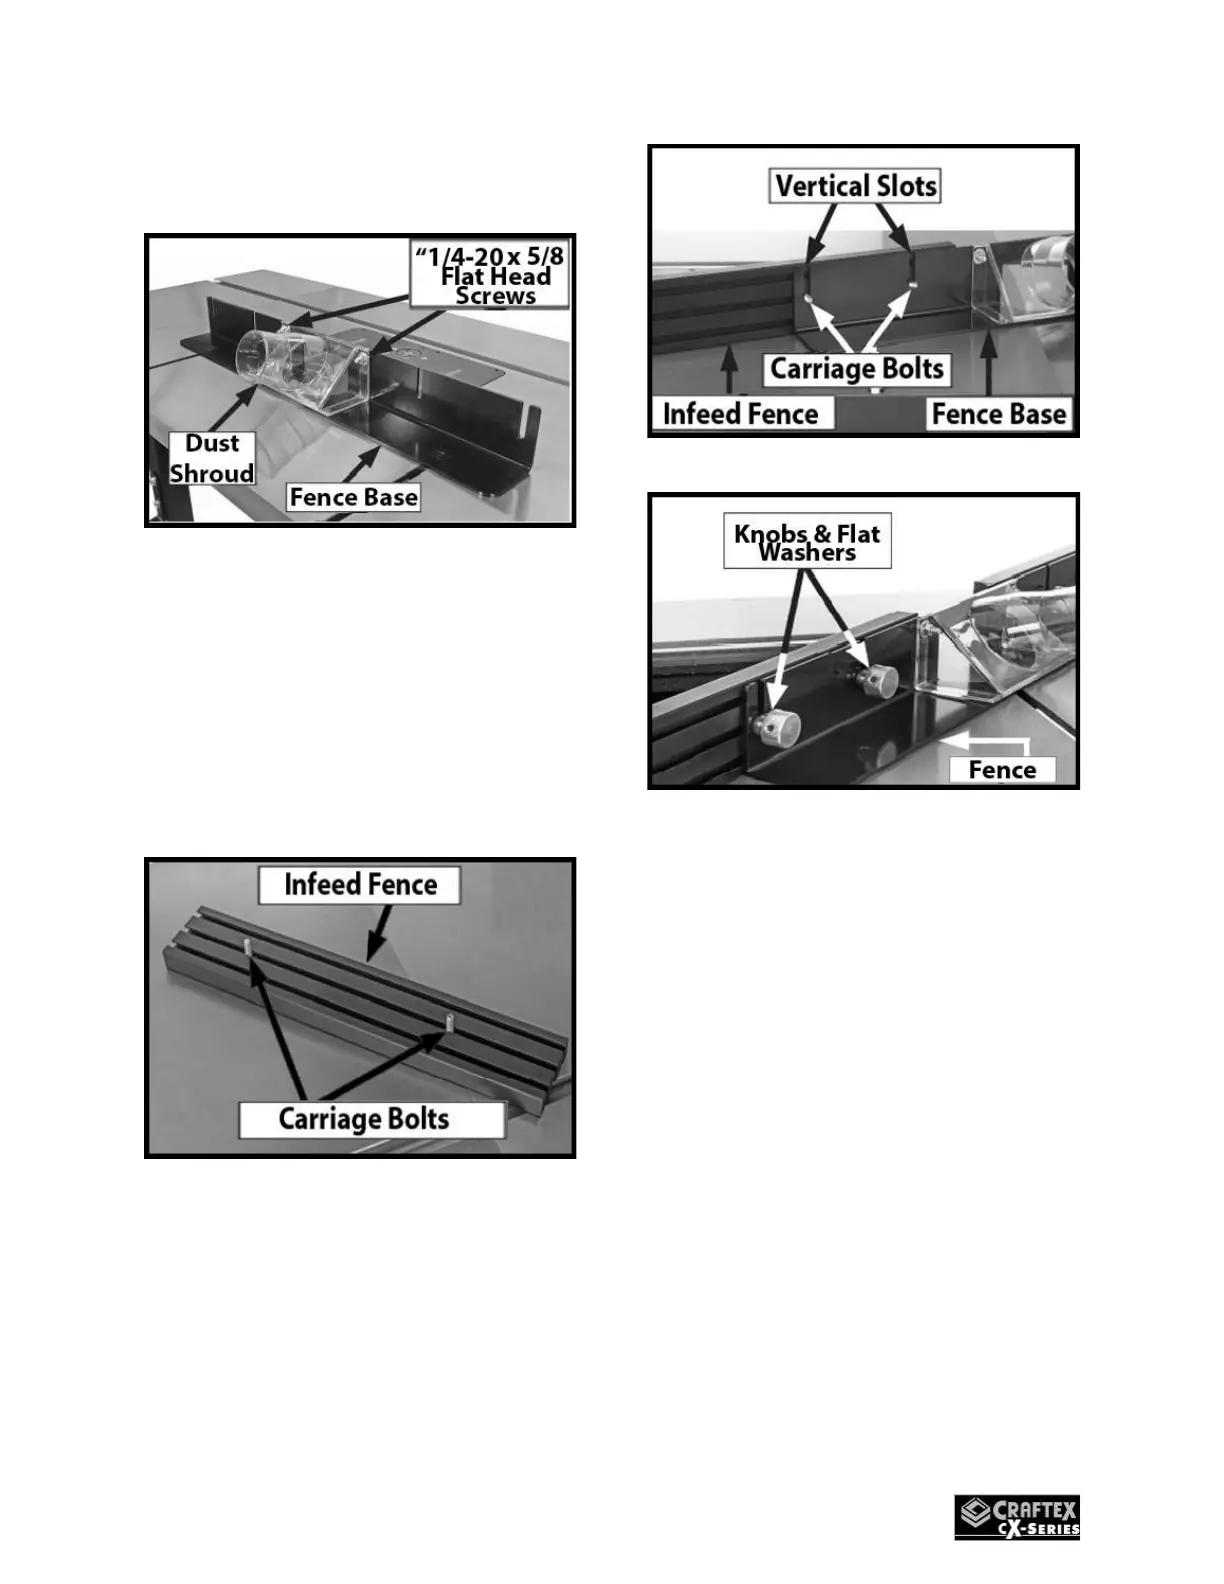
Figure 20
10. Insert (2) ¼-20 x ¾” carriage bolts
into the centre slot of the infeed
fence. (Fig.21), then align the
carriage bolts to the vertical slots
in the fence base (Fig.22) and
secure with (4) ¼” flat washers
and ¼-20 steel knobs as in (Fig.23)
Figure 21
Figure 22
Figure 23
11. Repeat Step 10 to install the
outfeed fence on the opposite
side of the fence.
12. Align the two holes in the fence
base with the slots in the table
and insert (2) 5/16-18 T-Bolts
through the table and fence base,
as in (Fig.24). The T-Bolts must sit
flush in the T-Slots beneath the
table.

 Loading...


