16
ADJUSTMENTS
Blade Alignment
Your CX205/CX206 table saw is shipped
from the factory fully aligned so that the
mitre slots are parallel to the saw blade.
However, shipping and rough handling may
have affected this. It should be checked
and adjusted if needed.
To check the alignment, clamp a dowel to
the front of the miter gauge and raise the
saw blade and pick out a saw tooth on the
front of the blade and set the dowel in front
of the miter gauge so that the dowel end
just touches the edge of the saw tooth.
Mark the tooth with a felt marker and rotate
the saw blade by hand to bring the marked
tooth to the rear of the saw. Now, gauge
this tooth with the dowel. If the tooth is in
the same position, the blade is parallel to
the miter slot.
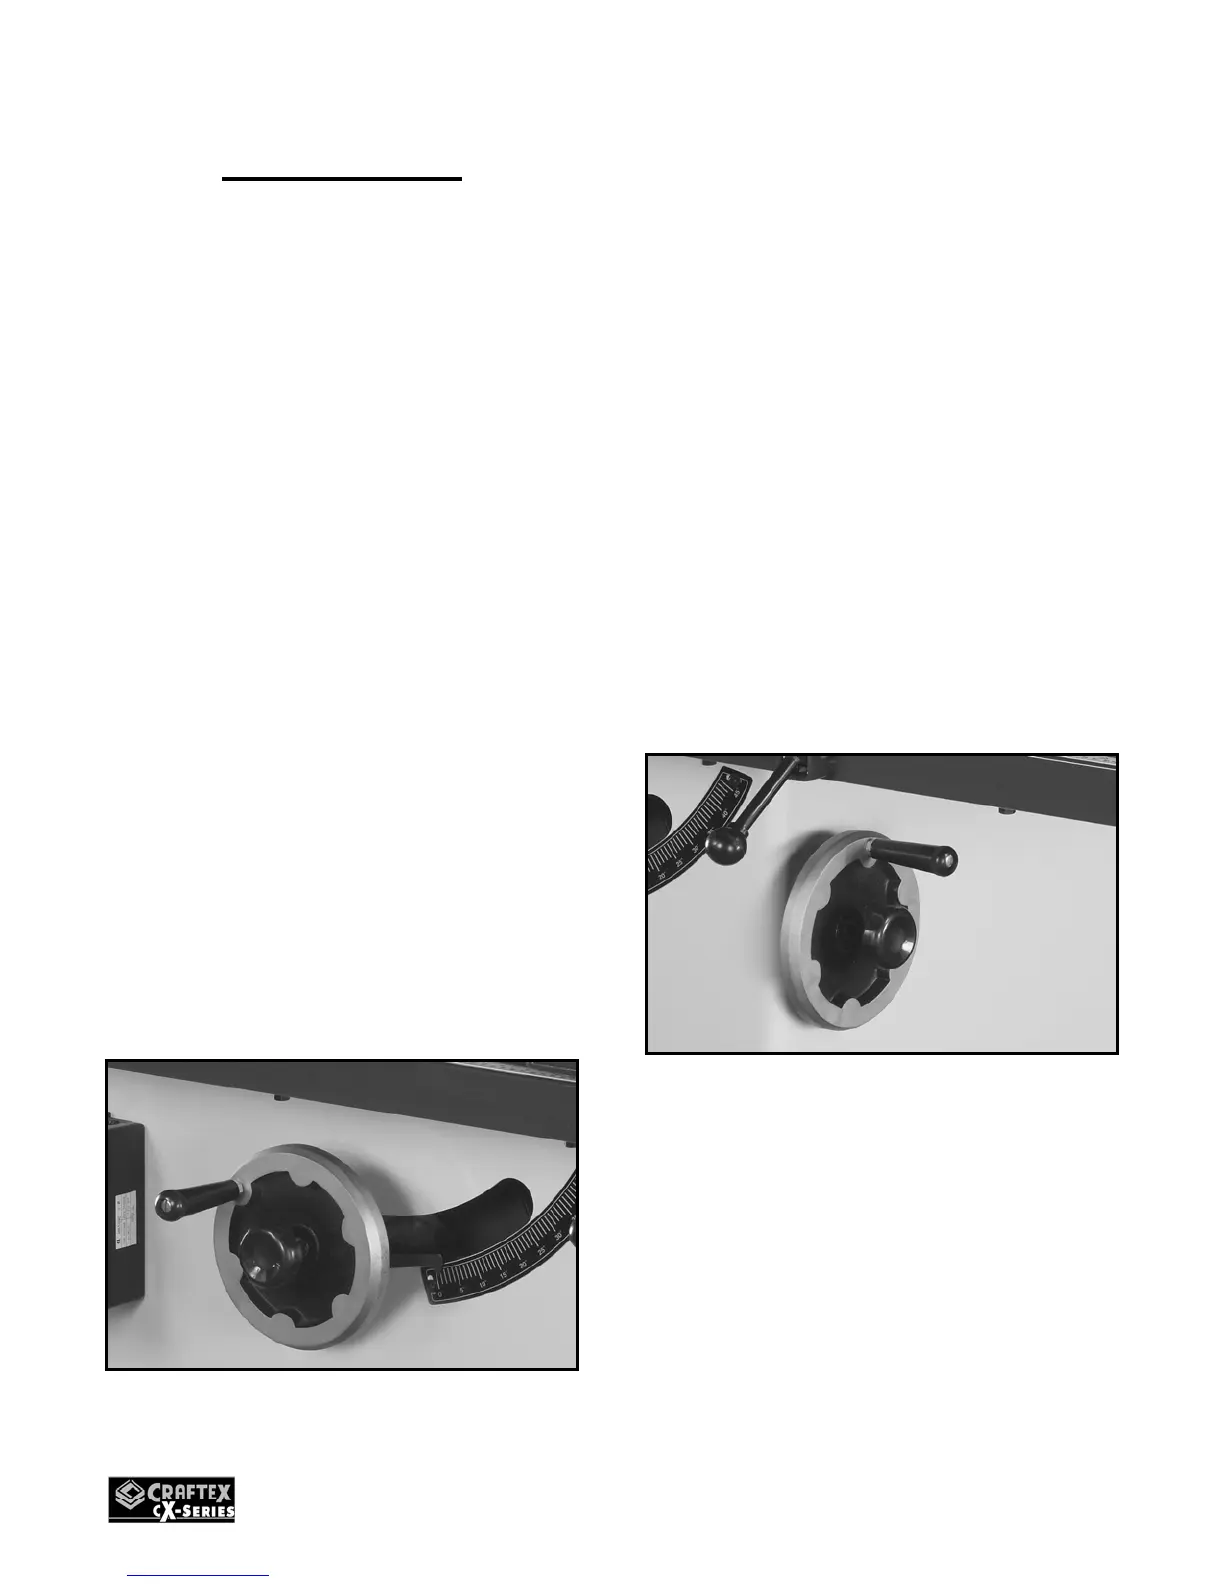
Blade Height Adjustment
The hand wheel on the front face of the saw
cabinet is to control the blade height.
To adjust the blade height, loosen the knob
and turn the hand wheel to set the blade at
the desired height. Rotate the knob clock-
wise and tighten it back.
Figure-16 Blade height hand wheel
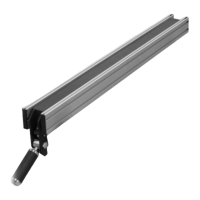
Blade Tilt Adjustment
The blade can be tilted at any angle
between 90-degree and 45-degree and the
blade tilt is controlled by the hand wheel on
the side of the saw cabinet. There are
positive stops at both 45 and 90 degrees.
The tilt angle dial at the front face of the
cabinet shows the angle the saw blade is
sitting at.
To adjust the blade tilt, loosen the hand
wheel lock knob and rotate the hand wheel
until the blade is at the desired angle. Keep
an eye on the tilt angle dial and once the
blade is at the desired angle, lock the hand
wheel by rotating the lock knob.
Make sure not to over tighten the lock knob.
Figure-17 Blade tilt hand wheel
Fence Adjustment
The fence should be flush with the table
surface. To raise or lower the fence, use
the nylon screws.
The edge surfaces of the fence must be
perpendicular to the table surface. Use a
combination square for verification and
adjust the nylon square as required.