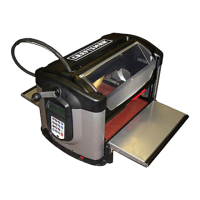
If it is desired to square both ends, or joint both sides, of a board,
simply reverse the board in the machine and repeat the operation.
If there is a significant crown to the board, place the highest point of
the crown under the cutting head. This will allow the machine to
measure the highest point of the crown and will prevent the
machine from taking and excessive cut. Use the Repeat shortcut
key as many times as necessary to eliminate the crown.
_ ARNING: Use only a 3/8" straight bit for jointing or squaring.
Any other bit can cause damage to the workpiece or machine
and can result in serious injury.
Bevel and Miter Cuts
Bevel cuts are cut at an angle across the thickness of the workpiece. A
typical bevel cut application would be seen in making small boxes where
the corners are formed by two 45-degree bevel cuts. Miter cuts are cut at
an angle across the width of a workpiece. A typical application would be a
picture frame. Once the Miter shortcut key is pressed user will be
prompted to choose either the Bevel or Miter type of cut and then the
desired angle. For bevel cuts there will also be the option to Cross or Rip
depending on what edge will be beveled. A Cross bevel will ALWAYS be
applied to the left end of the board and a Rip bevel will ALWAYS be
applied to the far side of the board as explained in Figure 14. Finally,
there will be a prompt to insert a 1/4" Ballnose bit (not included' for bevel
cuts or a 1/8" Cutting bit (included) for a miter cut.
To repeat the last Bevel or Miter cut to multiple boards, s_mply raise
the head, remove the previous board from the machine, load a new
the board, set the sliding guide plate, lower the head, and press
Repeat.
Routing an Edge
The Edge Rout function allows the user to rout the edges of a rectangular
board with a shaped bit. Various decorative edge effects can be
achieved, depending on the available bit selection. The user will be
prompted to select the edges to rout. Choices include: an End, an Edge,
or All Edges. If Edge is selected the rout will ALWAYS be applied to the
far side of the board and if End is selected the rout will ALWAYS be
applied to the left end of the board as explained in Figure 14. Finally,
there will be a prompt to select a bit from the selection menu. After the
first rout operation the LCD will ask if the depth is OK.
To repeat the last Edge Rout to multiple boards, simply raise the
head, remove the previous board from the machine, load a new the
board, set the sliding guide plate, lower the head, and press
Repeat.
Sears, Roebuck and Co. CompuCarve TM System (Rev 1.13) 01/06/07 19

 Loading...