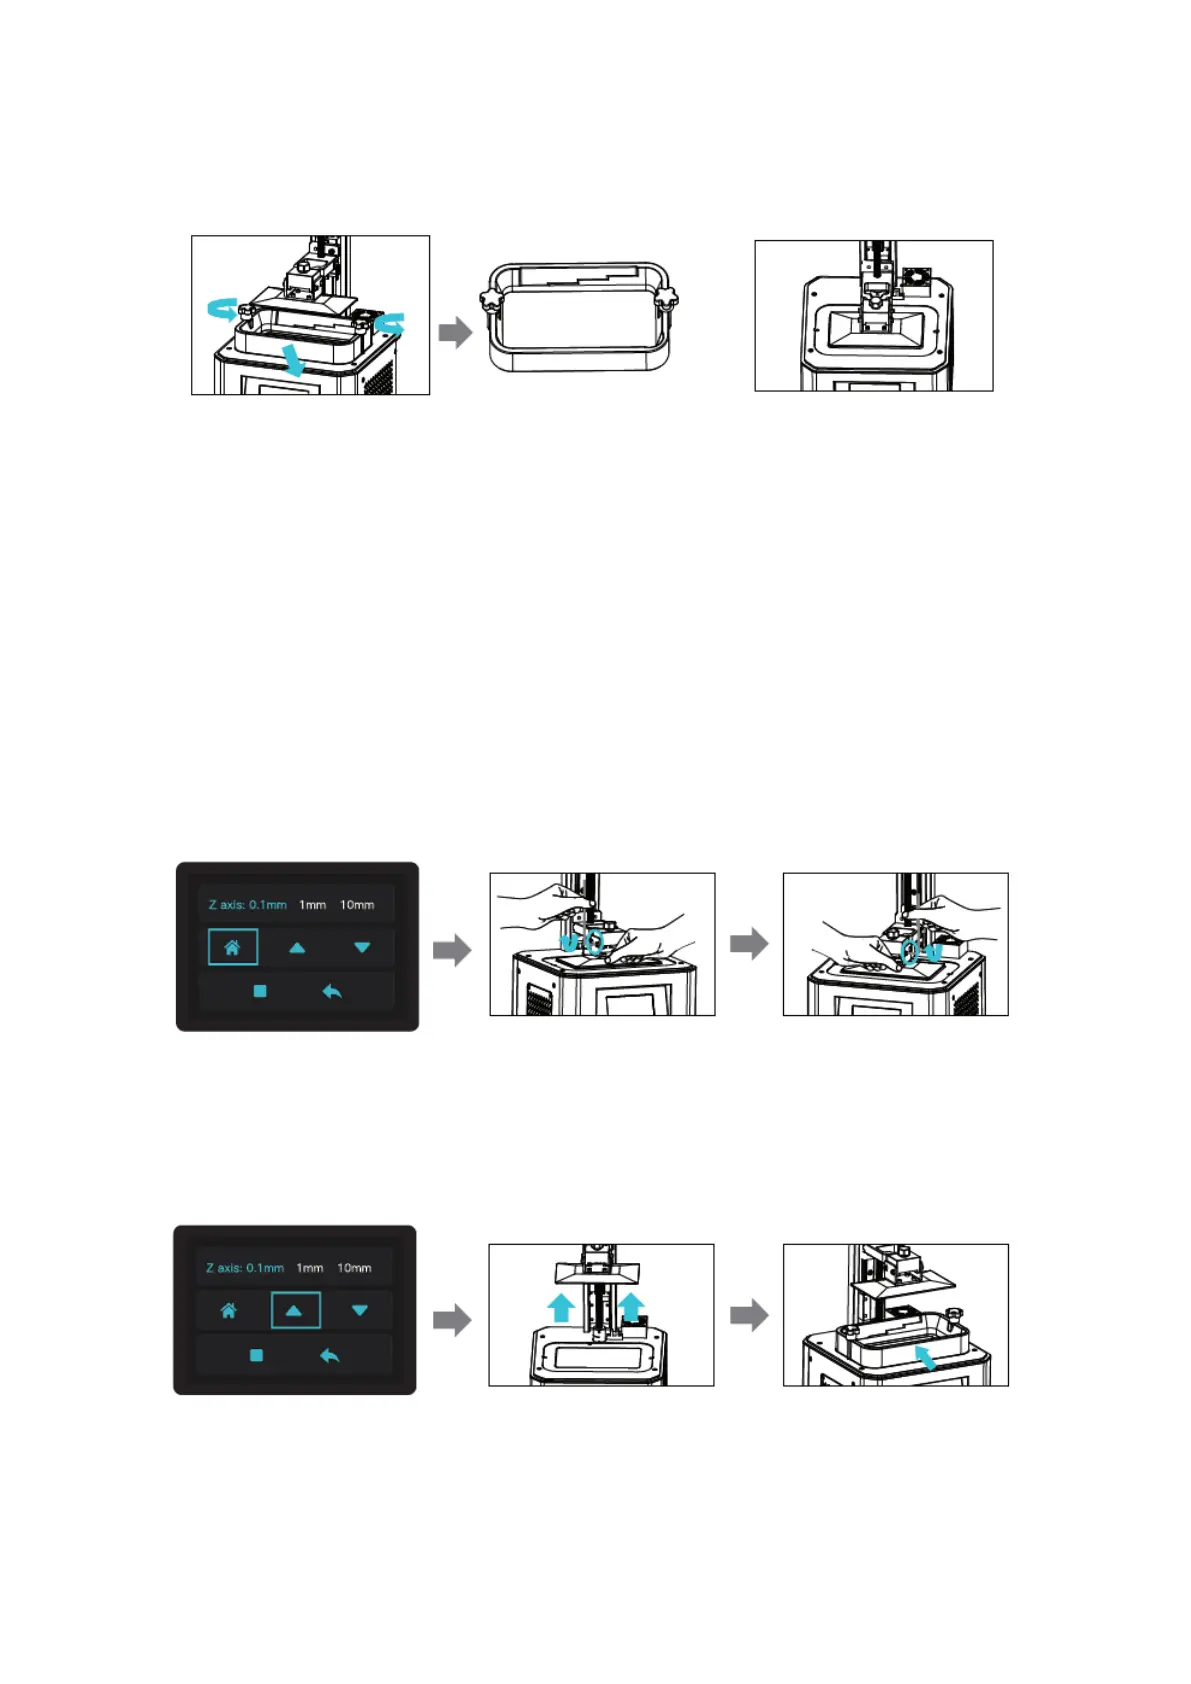
Level Platform 1
1. First raise the platform, then loosen rubber screws on the left and right sides of the
resin vat and take out the resin vat.
2. Tool > Manual > Home, and check whether the platform sticks into the printing
screen.
NOTE: The printing platform has been leveled at the factory. IF it needs leveling due to
transportation or other reasons, please follow the steps below to adjust the printing
platform.
Level Platform 2
In the platform does not stick to the print screen, do as the following:
1) After unscrewing the screw, press “Home” to keep the platform and the print screen
parallel.
2) Gently press the platform and tighten 4 screws clockwise, ant the platform can be
leveled successfully.
3) Level up the z-axis a proper position, put the resin vat in, align the screw holes at both
ends of the resin vat, and then tighten the fixing screws at both ends of the resin vat.