5.4.1 Create new job template
Table 5.1:Term Explanaon
5.4 Create work template
Chapter 5: Operaon Instrucons
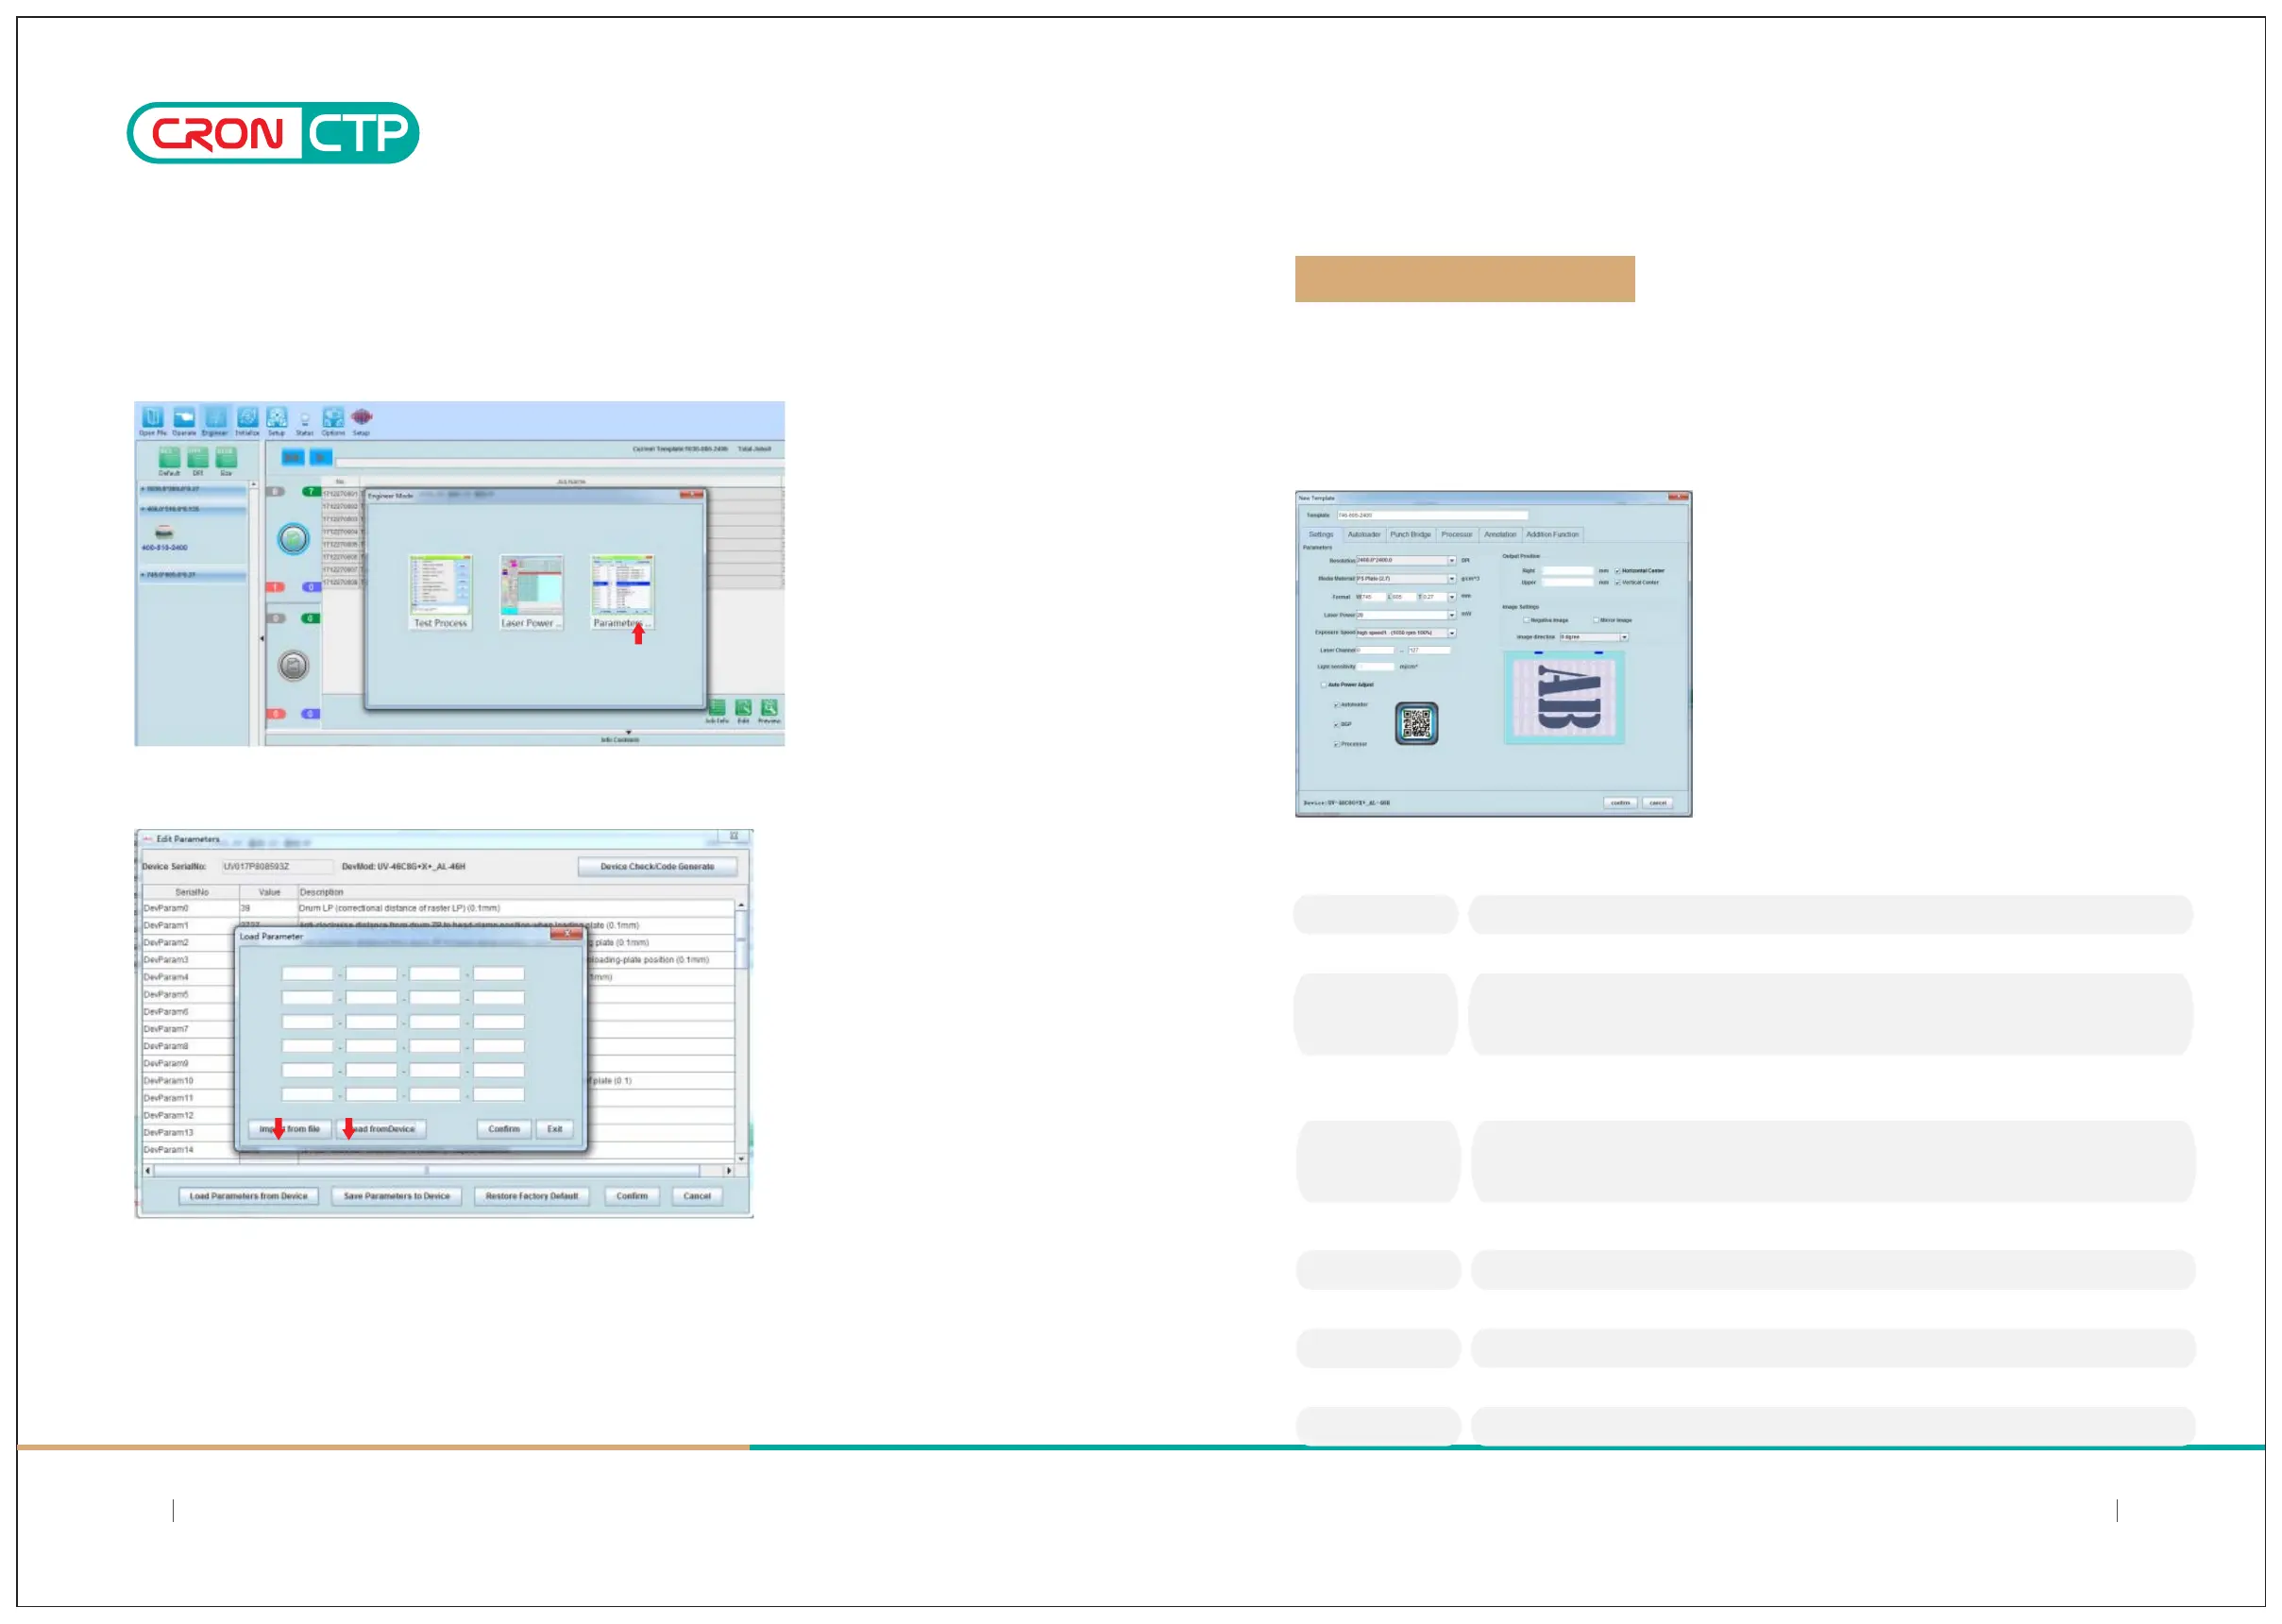
5.3.8 Enter to the device parameter sengs:
After engineer mode password is entered, there will be a pop-up windowswith 3 options prompted. Click on the right
option “Parameters” button.
5.3.9 To read in device parameters, there are 2 opons available:
a)Import from file: Obtained one of the disk(Parameters disk) that bundled with device. Insert it into the CD-
ROM drive, then clicks on “Import from file”, and browse for the file in the disk that named with the device’s serial
no. Select and confirmed to read in the parameter values from the file into the LaBoo soware.
b)Read from device:Click on this opon to allow LaBoo soware to read in (download) the parameter values
directly from the HDI device connected.
Once device’s parameter values correctly loaded into LaBoo soware, you can proceed with the soware for
further operaon;
Click the "New Template" buon to bring up the new template dialog box. According to the actual work
needs, setup a job template, in this case we have added a 745-605-2400Dpi PS platetemplate for the operaon;
confirm setup once done to establish of a hot folder that can facilitate subsequent jobs that relevant to this
template sengs.
Field
Description
Template
Resolution
Media Material
Format
Laser Power
Exposure Speed
Laser Channel
Light Sensitivity
Autoloader
BGP Punch Bridge
Processor
Set the template name; Recommended naming conventions:Media size-resolution-thickness.
Example: 510x400-2400-0.135
Set the resolution for the template to work with.(Different model’s configuration, available resolution
may be different).
Set the material used in the template. Support materials: PS plate, film,(Different model’s
configuration, available material selection may be different).
Note: Material setting incorrect will cause out of focus, device jitter and other issues, including
affecting the imaging quality.
Set the plate size of the jobs template. Size direction refers to the lower right diagram.Thickness
should be in accordance with the actual measurement. (Available largest and smallest format
depends on CTP model).
Laser power is set manually, in accordance with the energy needs of the plate, value should not
exceed the factory default maximum power;
Note: If the Auto Power Adjust is checked, platemaking exposure is automatically adjusted
according to Light Sensitivity value entered. It is strongly recommended to choose this option.
Exposure drum speed selection, in accordance with the actual production settings. Maximum
exposure speed is determined by the plate sensitivity, maximum laser power and drum speed limit.
Setting the number of output channels 0-128 (The number of laser channels is defined by model)
The platemaking energy is determined by the plate characteristics, provided by the plate supplier
or by measurement.
Autoloader option - if checked, the template includes the ability of the automatic plate feeder
(determined by model)
Punch Options - If checked, the template will work with automatic punching (determined by model)
Plate processor options (determined by the model)
2524
SIMPLE AND DIRECT 丨 STEADY 丨 MAJOR
SIMPLE AND DIRECT 丨 STEADY 丨 MAJOR