Released on 10/31/05 - X800058A UV Pure Technologies Inc. © 2005
No part of this document may be photocopied, reproduced, transmitted, or translated to another language without the
prior written consent of UV Pure Technologies Inc.
For additional info call 1-888-407-9997 or email info@uvpure.com
or visit www.uvpure.com
27
NOTE TOP & BOTTOM COVERS
HAVE SLOTS THAT HANG
ON THE WALL BRACKETS
COVER PLATE
(FOR Hallett 30)
DO NOT TWIST/TURN THE LAMPS
WHILE PINS ARE ENGAGED
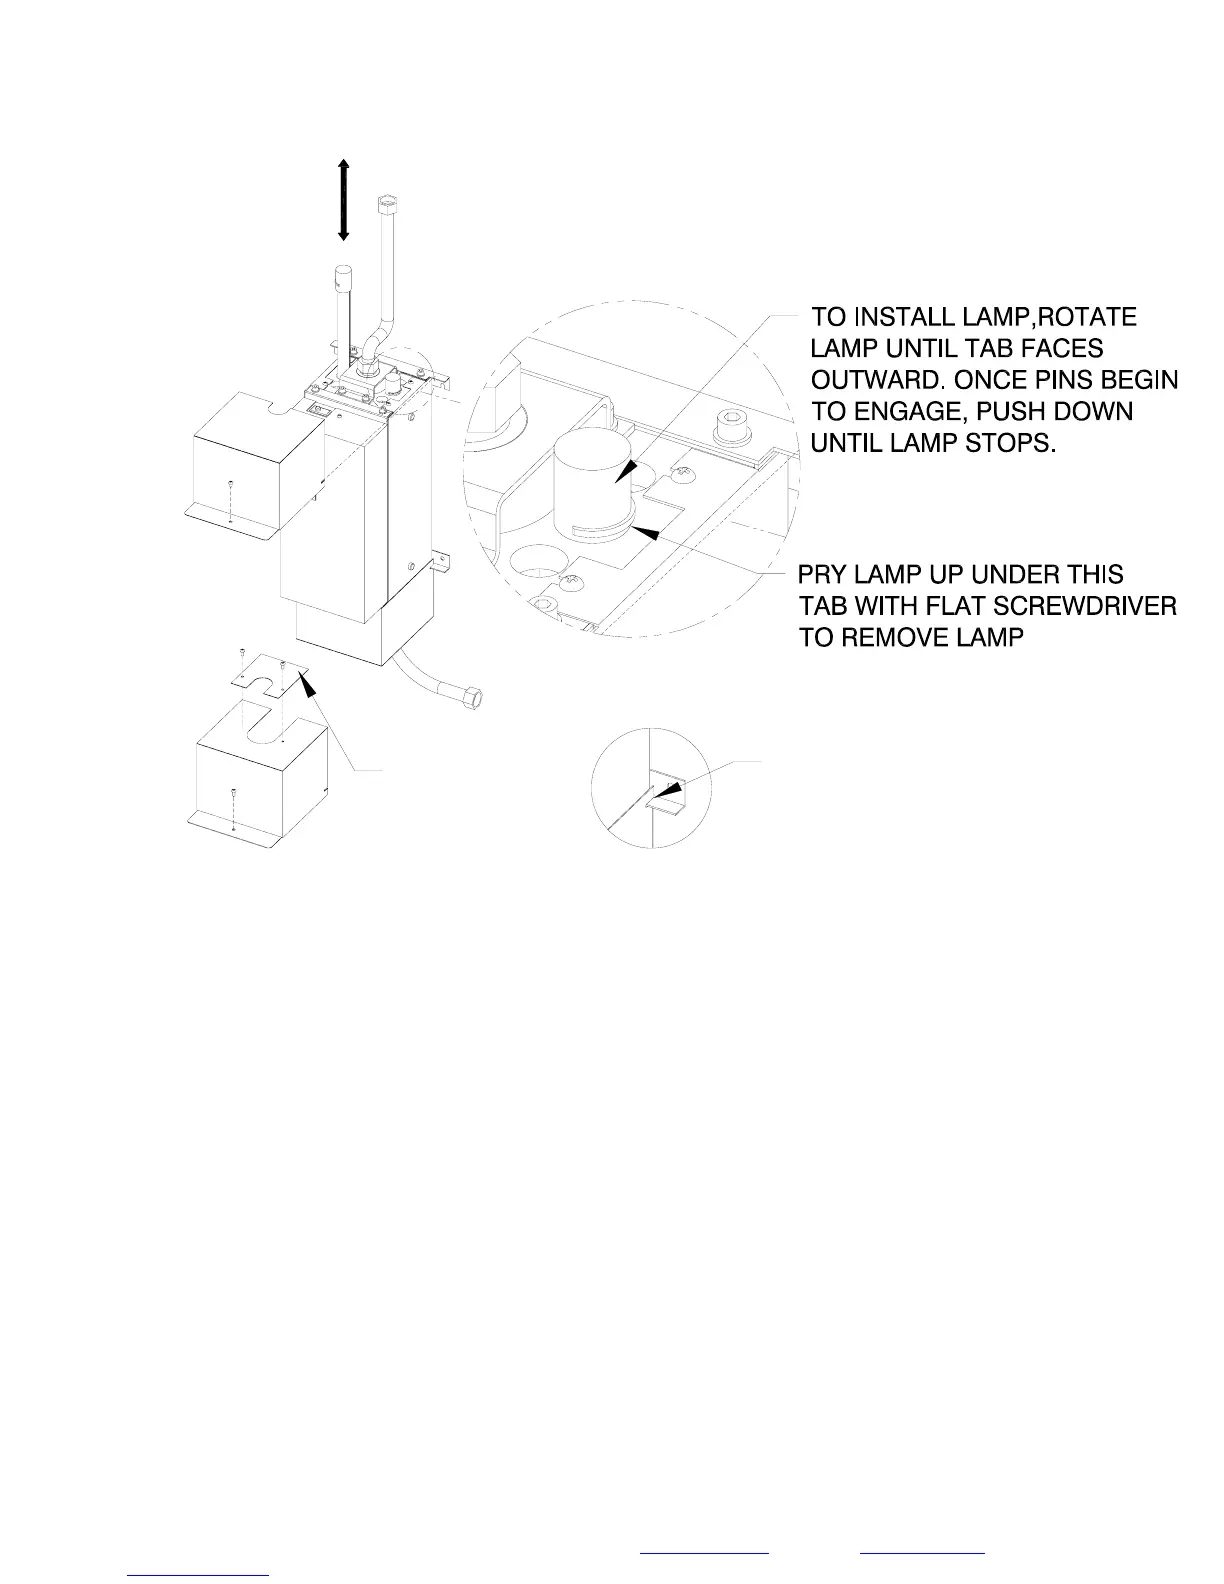
Figure 3
Step 1: Always unplug the unit before attempting to install or replace the lamps.
This will close the solenoid valve and temporarily shut off the water supply.
Caution: The lamps heat up after continuous use and can burn your skin if
touched. Allow lamps to cool for five minutes before removing them.
Step 2: Remove the top cover by removing the screw.
Step 3: Slowly lift the old lamps out of the unit. Do not twist the lamps when
they are installed. For assistance in this task, use a flat screwdriver and pry the
lamps up (see Figure 3). Dispose of the old lamps in the same way as you would
dispose of ordinary fluorescent tubes. Note that old lamps should be disposed of
at a household waste management depot or transfer station; contact your local
recycling and waste management authority for proper disposal procedures in
your area.
Step 4: Install the new lamps into the unit, being careful not to touch the bulbs.
Align the tab of the lamp to face the outside of the unit, as shown in Figure 3.
Once the pins of the lamp begin to engage into the lamp socket, push firmly
 Loading...