DRIVE SYSTEM-HYDROGEAR
26
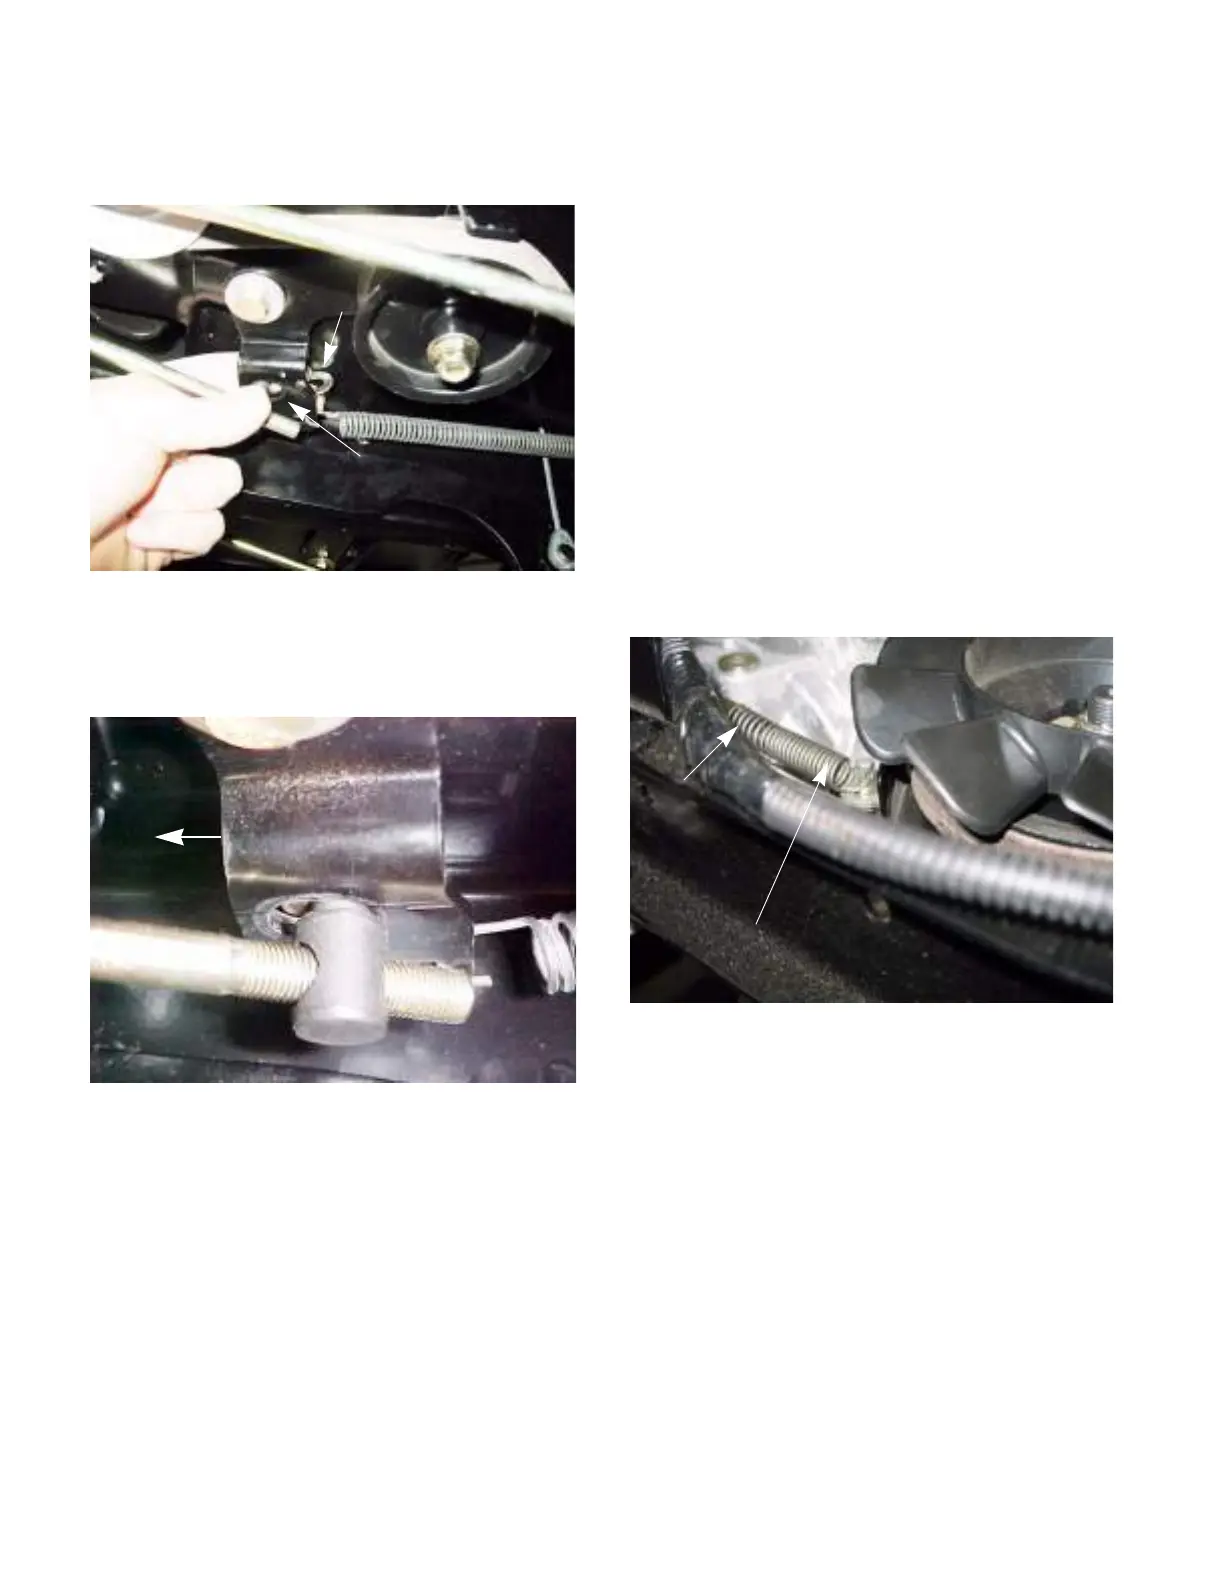
4. Slide the ferrule out of the idler bracket.
See Figure 5A.8.
5. Adjust the ferrule so that it lines up with the rear
of the slot and slides in without pulling on the
spring. See Figure 5A.9.
6. Install the washer and a new cotter pin.
7. Test drive the tractor before returning to service.
8. Re-attach the deck.
Transmissions
The I-series tractor uses two EZT transmissions
from Hydro-gear. The transmissions can be removed
separately. To remove a transmission:
NOTE: The transmission model and serial num-
ber tags are located on the frame channel next
to the transmission that they refer to.
1. Remove the deck as described in chapter 8 Cut-
ting Decks and Lift Shaft.
2. Remove the drive belt as described previously in
this chapter.
NOTE: Leave the transmission links and the
transmission brace disconnected.
3. Lift and safely support the rear of the tractor.
4. Remove the rear wheels.
5. Unhook the by-pass rod. See Figure 5A.10.
6. Disconnect the brake rod by following the steps
described in Chapter 3: Brakes.
Figure 5A.8
Washer
Slot
Figure 5A.9
Front of tractor
Figure 5A.10
Unhook the spring
Bad
spring
 Loading...