Do you have a question about the Cub Cadet I Series and is the answer not in the manual?
Explains the purpose and target audience of the manual.
States that information is subject to change and disclaims liability for errors.
Explains the use of NOTE, CAUTION, WARNING, and DANGER symbols.
Discusses fastener types, sizes, and usage of threadlocking compounds.
Covers torque specifications, special instructions, and referencing other procedures.
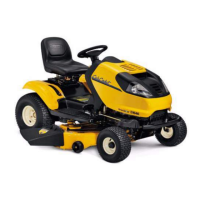
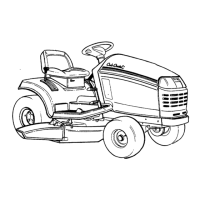
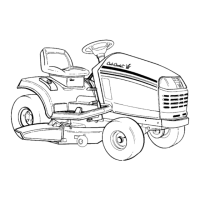
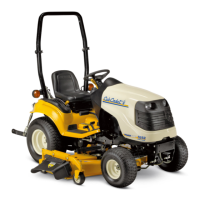
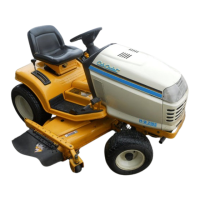
Details the I-series tractor platform, zero-turning, and deck options.
Explains how to locate and interpret model and serial number tags.
Provides step-by-step instructions for removing and replacing the muffler.
Details the procedure for removing and replacing exhaust pipes, including gasket use.
Step-by-step guide for removing and replacing the fuel tank.
Explains the two braking systems for HydroGear and IVT transmissions.
Step-by-step guide for adjusting brakes on HydroGear transmissions.
Instructions for adjusting brakes on IVT transmissions.
Details replacing brake pucks and rotors for HydroGear transmissions.
Covers servicing brake shoes and drums for IVT transmissions.
Explains servicing the brake cross shaft assembly and replacing bushings.
Instructions for removing and reinstalling the tractor hood.
Steps for removing and installing the tractor bumper.
Guide for removing the dashboard for access to internal components.
Provides instructions for removing the tractor fender.
Details the procedure for removing and replacing the drive belt.
Explains how to adjust the drive belt tension linkage for proper operation.
Covers the removal and installation of HydroGear EZT transmissions.
Instructions for removing and replacing the drive pedal shaft assembly.
Introduces the IVT system and its components like variators and T-box.
Explains the function and serviceability of IVT drop axle assemblies.
Step-by-step guide for rebuilding the IVT drop axle assemblies.
Details the removal and installation of IVT drive pedal shafts.
Explains the two-phase steering system and its link to transmissions.
Critical adjustment for steering gear box replacement or misalignment.
Procedures for coordinating steering gear box, transmissions, and control linkages for neutral.
Steps for aligning front wheels after steering adjustments.
Instructions for removing the steering gear box for replacement.
Detailed steps for disassembling and rebuilding the steering gear box.
Adjusting the wear block to set steering rack backlash.
Procedures for removing/replacing front wheels and ball bearings.
Steps for removing and replacing front axles and steering gears.
Instructions for removing and replacing drag links.
Procedure for removing and replacing the tie rod.
Steps for removing/replacing the inboard steering gear or king pin.
Guide for removing and replacing the pivot bar.
Explains steering system with IVT transmission, similar to HydroGear.
Critical adjustment for steering gear box replacement or misalignment in IVT.
Steps to ensure transmission is in neutral and adjust control links.
Procedures for aligning front wheels after IVT steering adjustments.
Instructions for removing the steering gear box for replacement on IVT models.
Detailed steps for disassembling and rebuilding the IVT steering gear box.
Procedures for removing/replacing front wheels and ball bearings on IVT models.
Steps for removing and replacing front axles and steering gears on IVT models.
Instructions for removing and replacing drag links on IVT models.
Procedure for removing and replacing the tie rod on IVT models.
Steps for removing/replacing the inboard steering gear or king pin on IVT models.
Guide for removing and replacing the pivot bar on IVT models.
Outlines the chapter's four sections and general precautions.
Introduces the I-series Cub Cadet Rev-Tek system and RMC Module.
Describes the key switch operation and troubleshooting scenarios.
Explains the function and operation of the PTO switch.
Details the mounting and function of the brake switch.
Describes the reverse safety switch and its ground path.
Explains the seat safety switch and its role in safety circuits.
Locates and explains the function of the starter solenoid.
Explains how the lighting circuit operates and its power source.
Locates the 20A fuse and its connection to power systems.
Discusses AC vs. DC systems and basic electrical concepts.
Explains Ohm's Law relating voltage, current, and resistance.
Describes voltage drops and their relationship to source voltage.
Explains the three main types of electrical circuit wiring: Series, Parallel, Series/parallel.
Discusses causes and effects of increased resistance in circuits.
Lists essential and useful tools for diagnosing electrical systems.
Introduces the Digital Multi-meter as a primary diagnostic tool.
Emphasizes the importance of reading wiring diagrams for troubleshooting.
Describes the usefulness of fused jumper wires for testing.
Explains continuity lights and their limitations compared to DMMs.
Discusses the use of jumper cables for diagnostics and jump-starting.
Covers battery precautions, handling, and general information.
Outlines methods for checking battery condition: visual, electrolyte, operational.
Lists four primary methods for testing batteries.
Details the adjustable load testing procedure for batteries.
Describes the fixed load testing method and its limitations for mower batteries.
Explains capacitance testers as a preferred battery testing method.
Details how to perform a battery discharge test to find voltage leaks.
General troubleshooting approach and checking simple items first.
Explains how to perform voltage drop tests on positive and negative sides.
Methods for testing switches using continuity and voltage.
Explains what a diode is and how to test it with a DMM.
Procedure for removing and installing the mower deck.
Instructions for cleaning debris from the mower deck.
Discusses blade condition, sharpening, balancing, and types.
Step-by-step guide for removing and sharpening mower blades.
Explains the function and replacement of the PTO belt.
Procedure for servicing the timing belt on timed decks.
Details replacing spindle pulleys and nuts.
Step-by-step instructions for replacing a blade spindle.
Explains deck leveling for optimal cut quality.
Adjusting deck for proper side-to-side levelness.
How to adjust gauge wheels to prevent deck scalping.
Adjusting rear rollers for proper deck height.
Procedure for replacing bushings in the deck lift shaft assembly.
Steps for removing and replacing the deck lift shaft assembly.
Explains the function of deck lift links and cable routing.
Recommended lubrication points and intervals for the tractor.
Lists recommended maintenance intervals for engine components.
Covers checking, cleaning, gapping, and replacing spark plugs.
Procedure for checking and cleaning air filters and pre-cleaners.
Step-by-step instructions for changing engine oil.
Procedure for replacing the engine oil filter.
Important information about fuel and servicing the fuel system.
Instructions for replacing the fuel filter.
Guidance on cleaning air-cooled engines for optimal cooling.