Service
Page 7-5
NOTE: Steps 6 - 10 are for replacing a belt that connects from a cam or frame sand-
wich clamp to top weight clamp.
6. Before attaching belt to top weight clamp, attach other end of belt to the sandwich clamp
as stated in steps 2 and 3. NOTE: For Rotary Calf machines, clamp and route belt as
shown in the belt routing diagram for the Rotary Calf. Also see step 2F on page 7-4.
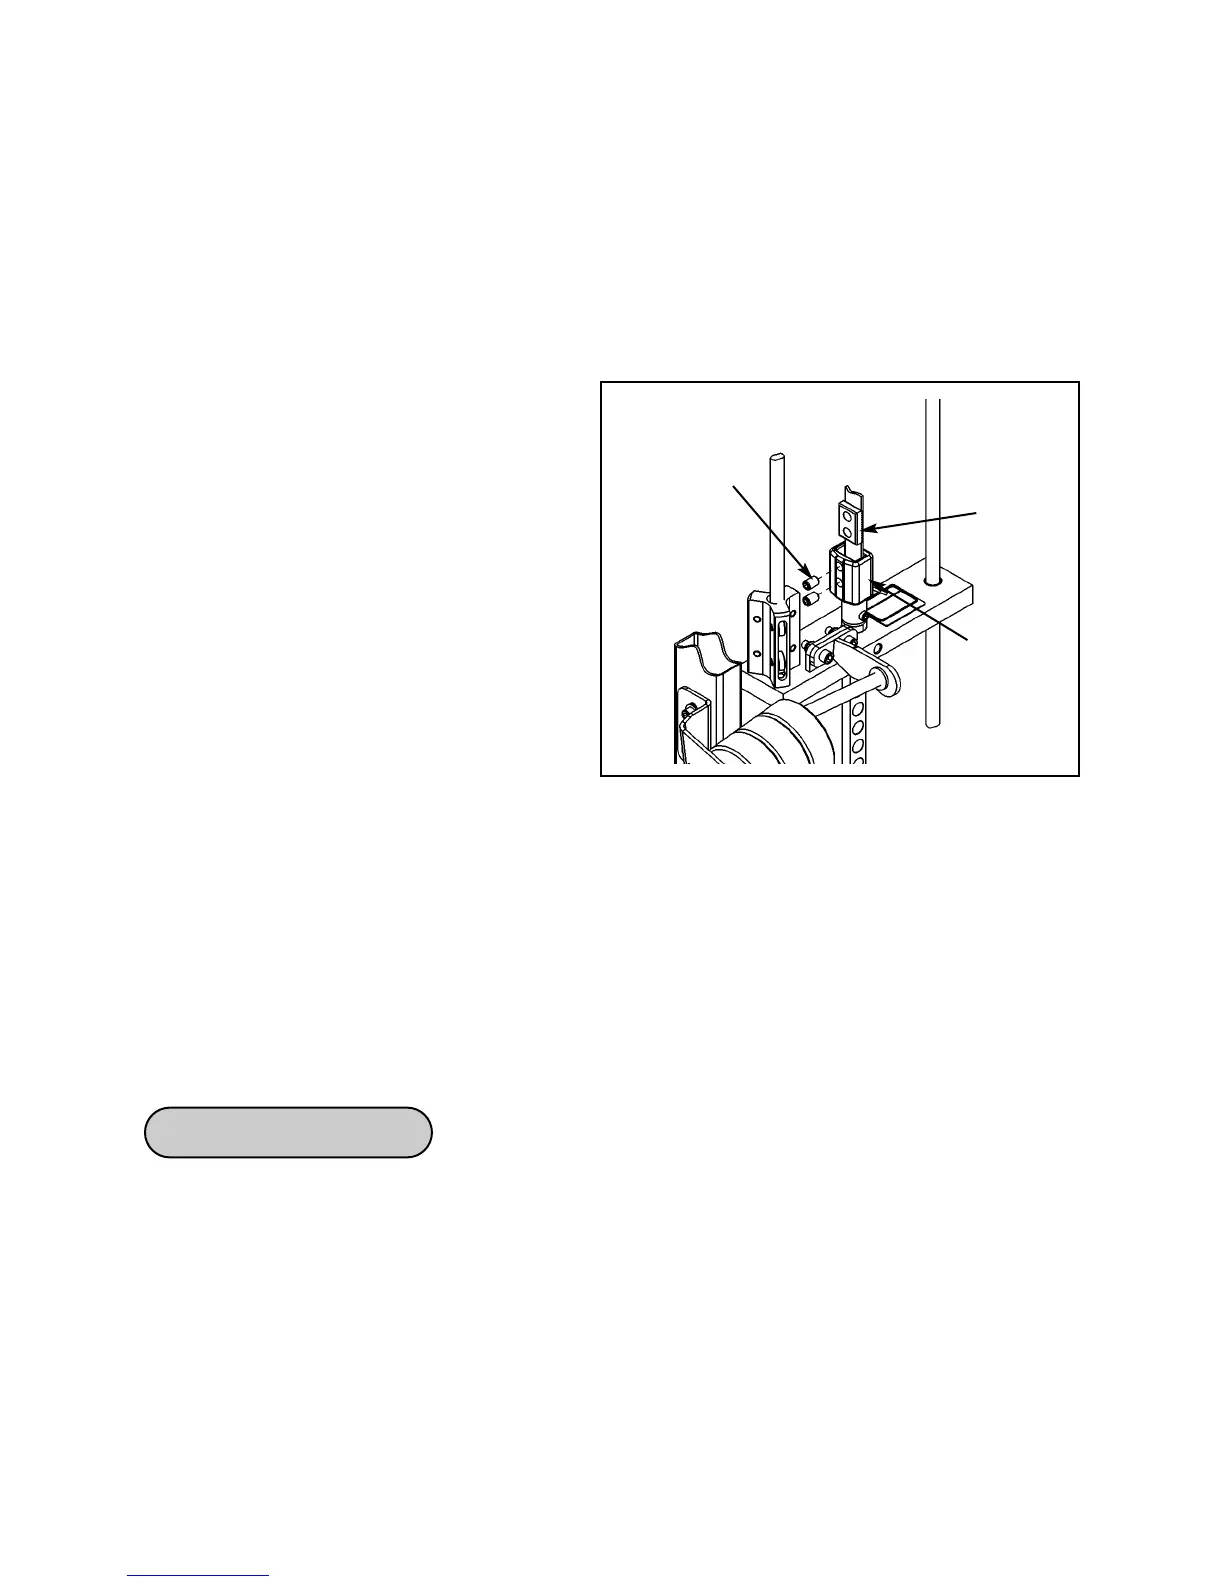
7. Attach belt to top weight:
A. Slide belt through slot in belt clamp.
NOTE: The belt must be inserted
into the slot that is located directly
over the stem.
B. While holding belt (and keeping it
straight), insert the belt clamp insert,
leaving 1 to 2 inches of belt beyond
the clamp as shown in the diagram at
right.
8. While keeping belt straight, insert each
SHCS into the belt clamp and belt clamp
insert, and then adjust belt (to remove
slack) so that the top plate is just resting
on the second weight. Securely tighten
each SHCS after belt is properly adjusted. NOTE: The torque specification for
tightening each screw is 400 inch pounds.
9. Place weight stack selector pin in each plate to verify proper installation.
10. Lift top weight up and down and verify that the belt lies flat and that it is not riding
up on the pulley flange.
Cybex VR2 Owner’s Manual
Replace worn grips.
1. Remove grip by carefully cutting it using a utility knife.
2. Spray handle with solution of warm water and mild detergent and soak grip in
same solution.
3. Slide grip onto bar.
Grip Replacement
Installing Belt Clamp Insert
Belt clamp
Set screw
Belt
clamp
insert