EN / CZone® DDS User & Installation Manual
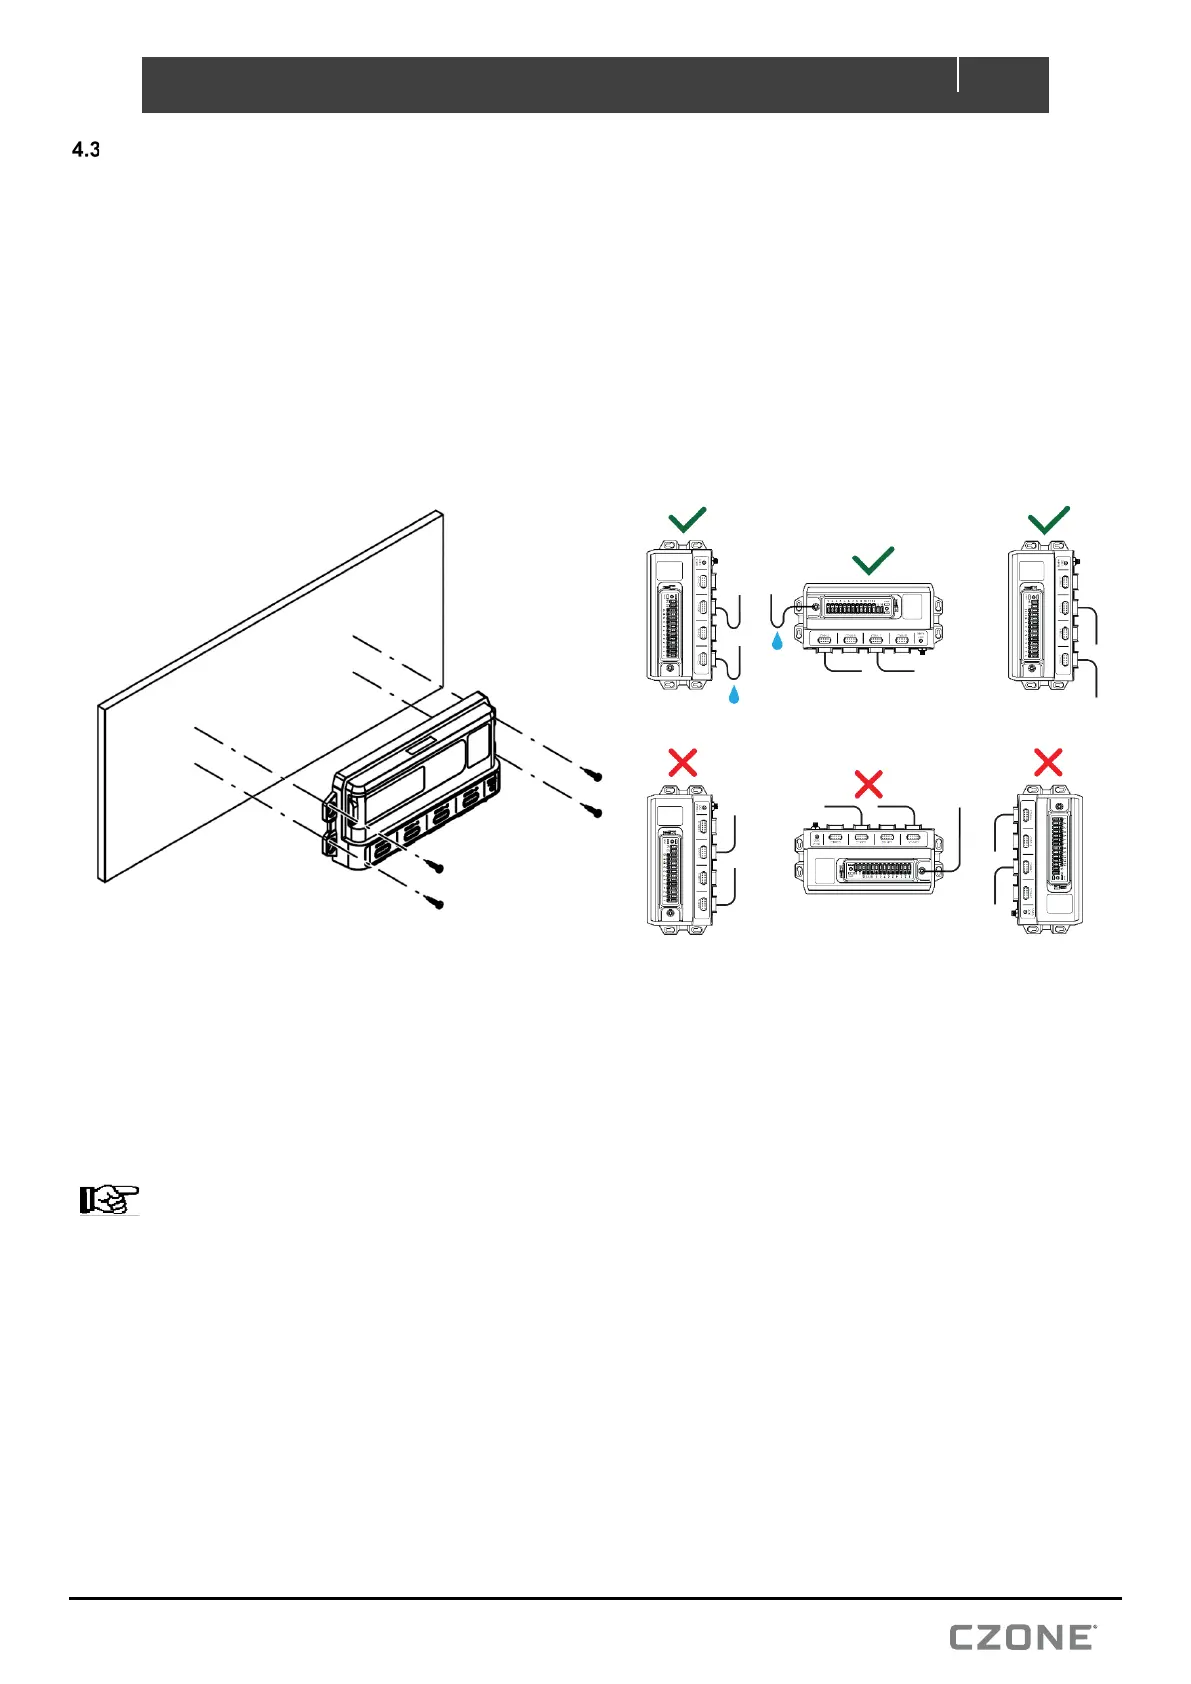
MOUNTING GUIDELINES
Do Not:
• Mount any part where it can be used as a hand hold.
• Mount any part where it might be submerged or exposed to moisture.
• Mount in a way so that moisture or condensation water can follow the cables into the device.
Do:
• Consider the overall width and height requirements.
• Leave sufficient clearance to connect all relevant cables.
• Check that it is possible to route cables to the intended mounting location.
1. Place the DDS on a solid flat surface. Mark the lower screw locations.
2. Remove the DDS and partially install lower screws using 10G (5mm) self-tapping screws or bolts.
3. Slot the DDS on to the bottom screws and install upper retaining screws.
4. Torque down each mounting screw, 6Nm (53.1in/lbs.) max.
5. Ensure enough space is left below the DDS to easily install cable connectors and access for maintenance.
NOTE – If mounting vertically is required, the main positive stud of the DDS must remain orientated downwards
with connections made to the right-hand side of the module.
Figure 7. Mounting