10D-Link DAP-1320 User Manual
Section 2 - Installation
Step 6 - To connect your wireless clients to the DAP-1320, You can
use the Wi-Fi Network Name (SSID) and the Wi-Fi Password
located on your Wi-Fi Conguration Card. Or use WPS (Wi-Fi
Protected Setup). Refer to “Connecting to Wireless Clients
Using WPS” on page 37.
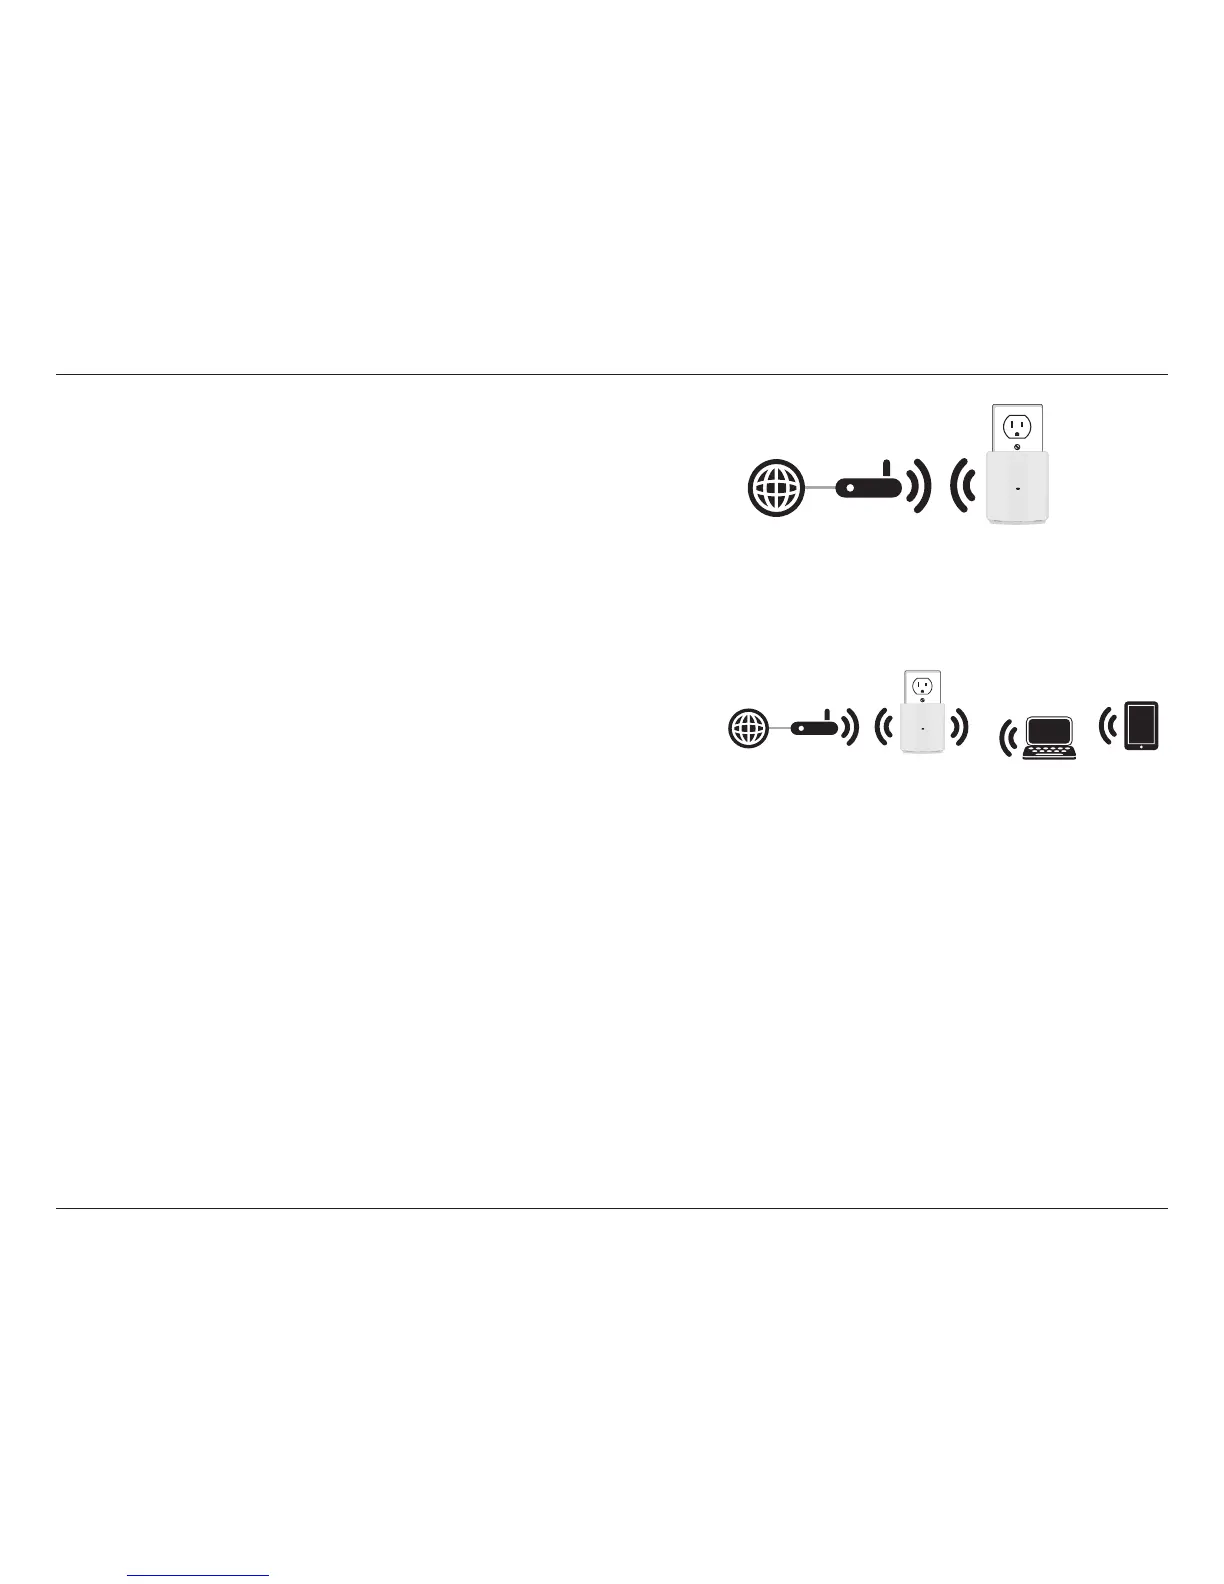
Step 4 - Your router or access point and DAP-1320 will be securely
connected when the LED light turns solid green.
Note: If your devices are not connected, try moving your DAP-1320 closer
to your wireless router or access point and repeat steps 2 and 3.
Note: For your wireless client to connect to the DAP-1320, you must use the same Wi-Fi Network Name (SSID) and Wi-Fi Password
as your DAP-1320 that is located on the Wi-Fi Conguration Card. If you would like to change your Wi-Fi Network Name (SSID) and
Wi-Fi Password refer to “Extended Wi-Fi Settings” on page 25.
Step 5 - You can now unplug and move the DAP-1320 to a location
between your wireless router and the area that you need to
extend wireless coverage to.