EasyManuals Logo

D-Link DGS-1510 Series Hardware Installation Guide

D-Link DGS-1510 Series
64 pages
To Next Page IconTo Next Page
To Previous Page IconTo Previous Page
Page #19 background imageLoading...
Page #19 background image
DGS-1510 Series Gigabit Ethernet SmartPro Switch Hardware Installation Guide
19
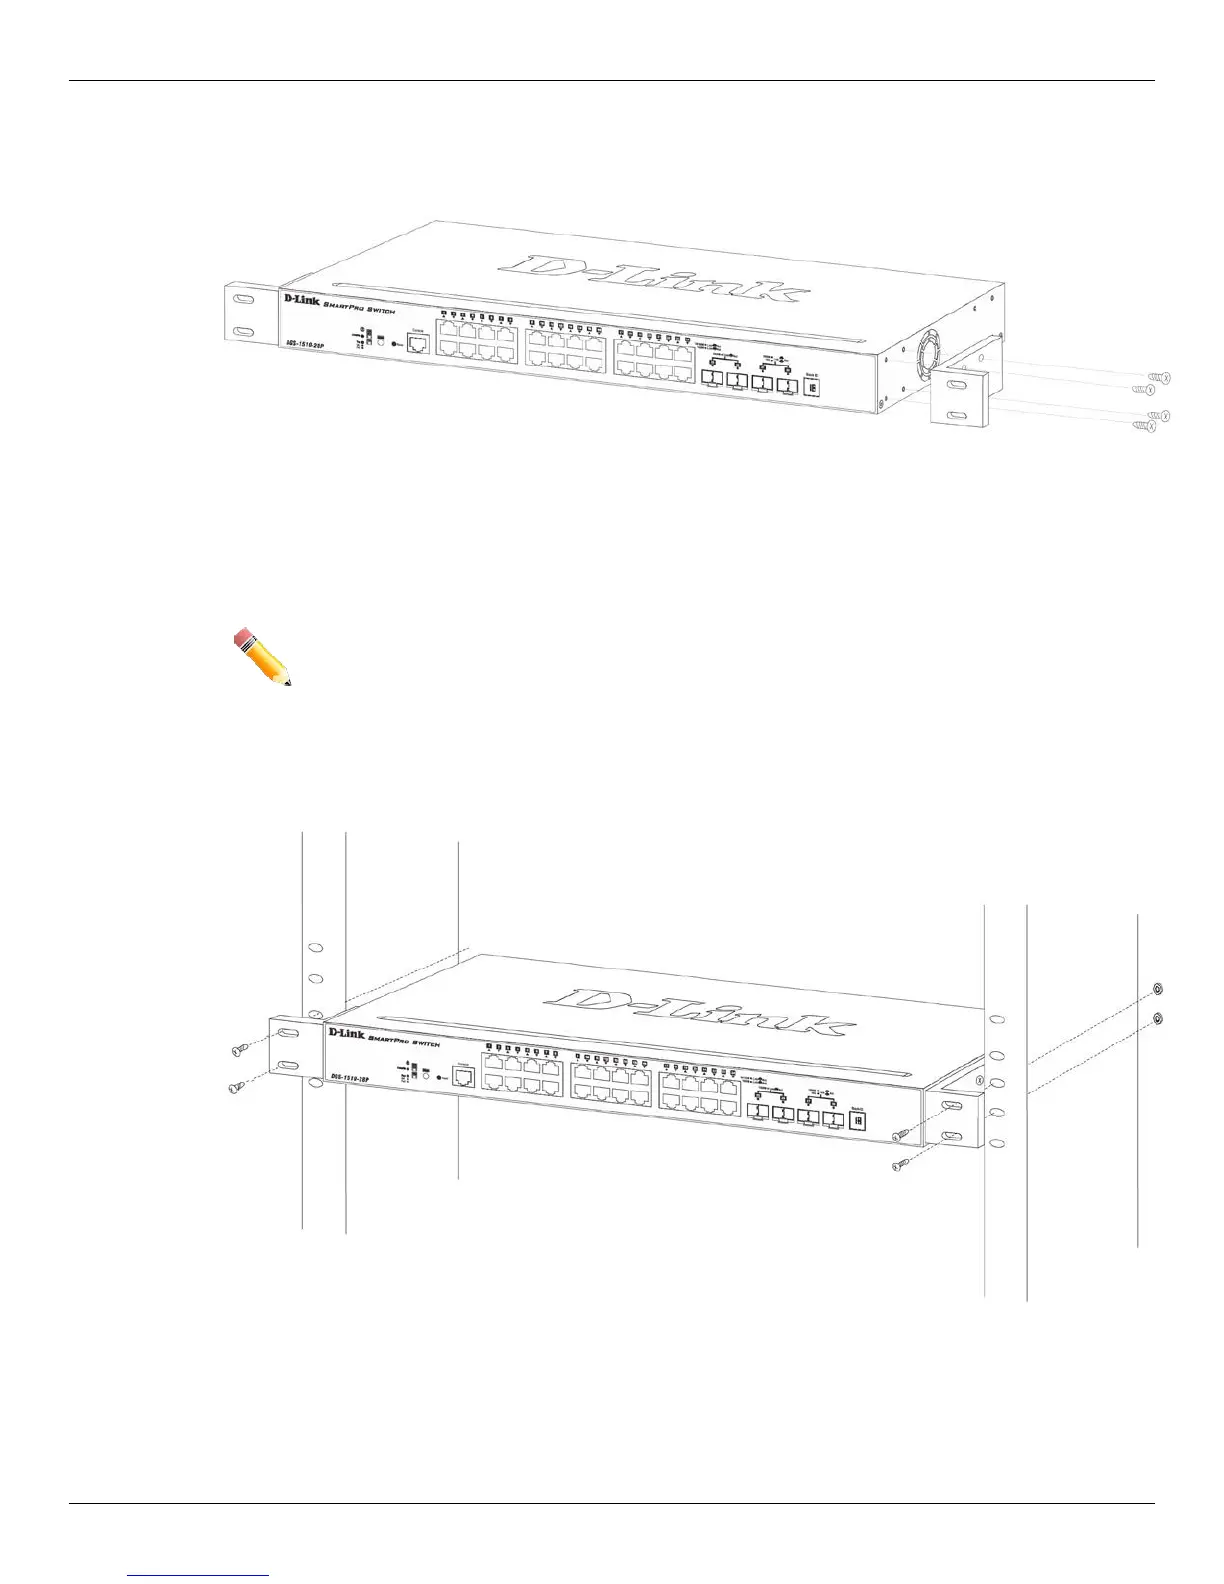
Attaching Brackets to a Switch for Rack Mounting
The Switch is mounted to a standard 19" rack using mounting brackets. Use the following diagrams as a
guide.
Figure 2–2 Attach mounting brackets to the Switch
Fasten the mounting brackets to the Switch using the screws provided. With the brackets attached
securely, the Switch can be mounted in a standard rack, as shown below.
NOTE: Please review the Installation Guidelines above before installing the Switch in a
rack. Make sure there is adequate space around the Switch to allow for proper air flow,
ventilation and cooling.
Installing the Switch in a Standard 19" Rack
Figure 2–3 Mount the Switch in a rack

Table of Contents

Other manuals for D-Link DGS-1510 Series

Questions and Answers:

Question and Answer IconNeed help?

Do you have a question about the D-Link DGS-1510 Series and is the answer not in the manual?

D-Link DGS-1510 Series Specifications

General IconGeneral
LayerLayer 2+
IGMP SnoopingYes
Static RoutingYes
Humidity10% to 90% non-condensing
SeriesDGS-1510
TypeSmart Managed Switch
VLAN SupportYes
QoSYes
ManagementWeb-based, CLI, SNMP
Power SupplyInternal
MAC Address Table16K entries
802.3ad Link AggregationYes
Spanning Tree Protocol (STP)Yes, STP/RSTP/MSTP
Jumbo Frame SupportYes, up to 9KB
Power ConsumptionVaries by model
DimensionsVaries by model
WeightVaries by model
Operating Temperature0°C to 40°C
Storage Temperature-40°C to 70°C
Standards ComplianceIEEE 802.3, IEEE 802.3u, IEEE 802.3ab, IEEE 802.3x, IEEE 802.3ad, IEEE 802.1D, IEEE 802.1w, IEEE 802.1s, IEEE 802.1Q, IEEE 802.1p

Related product manuals