206
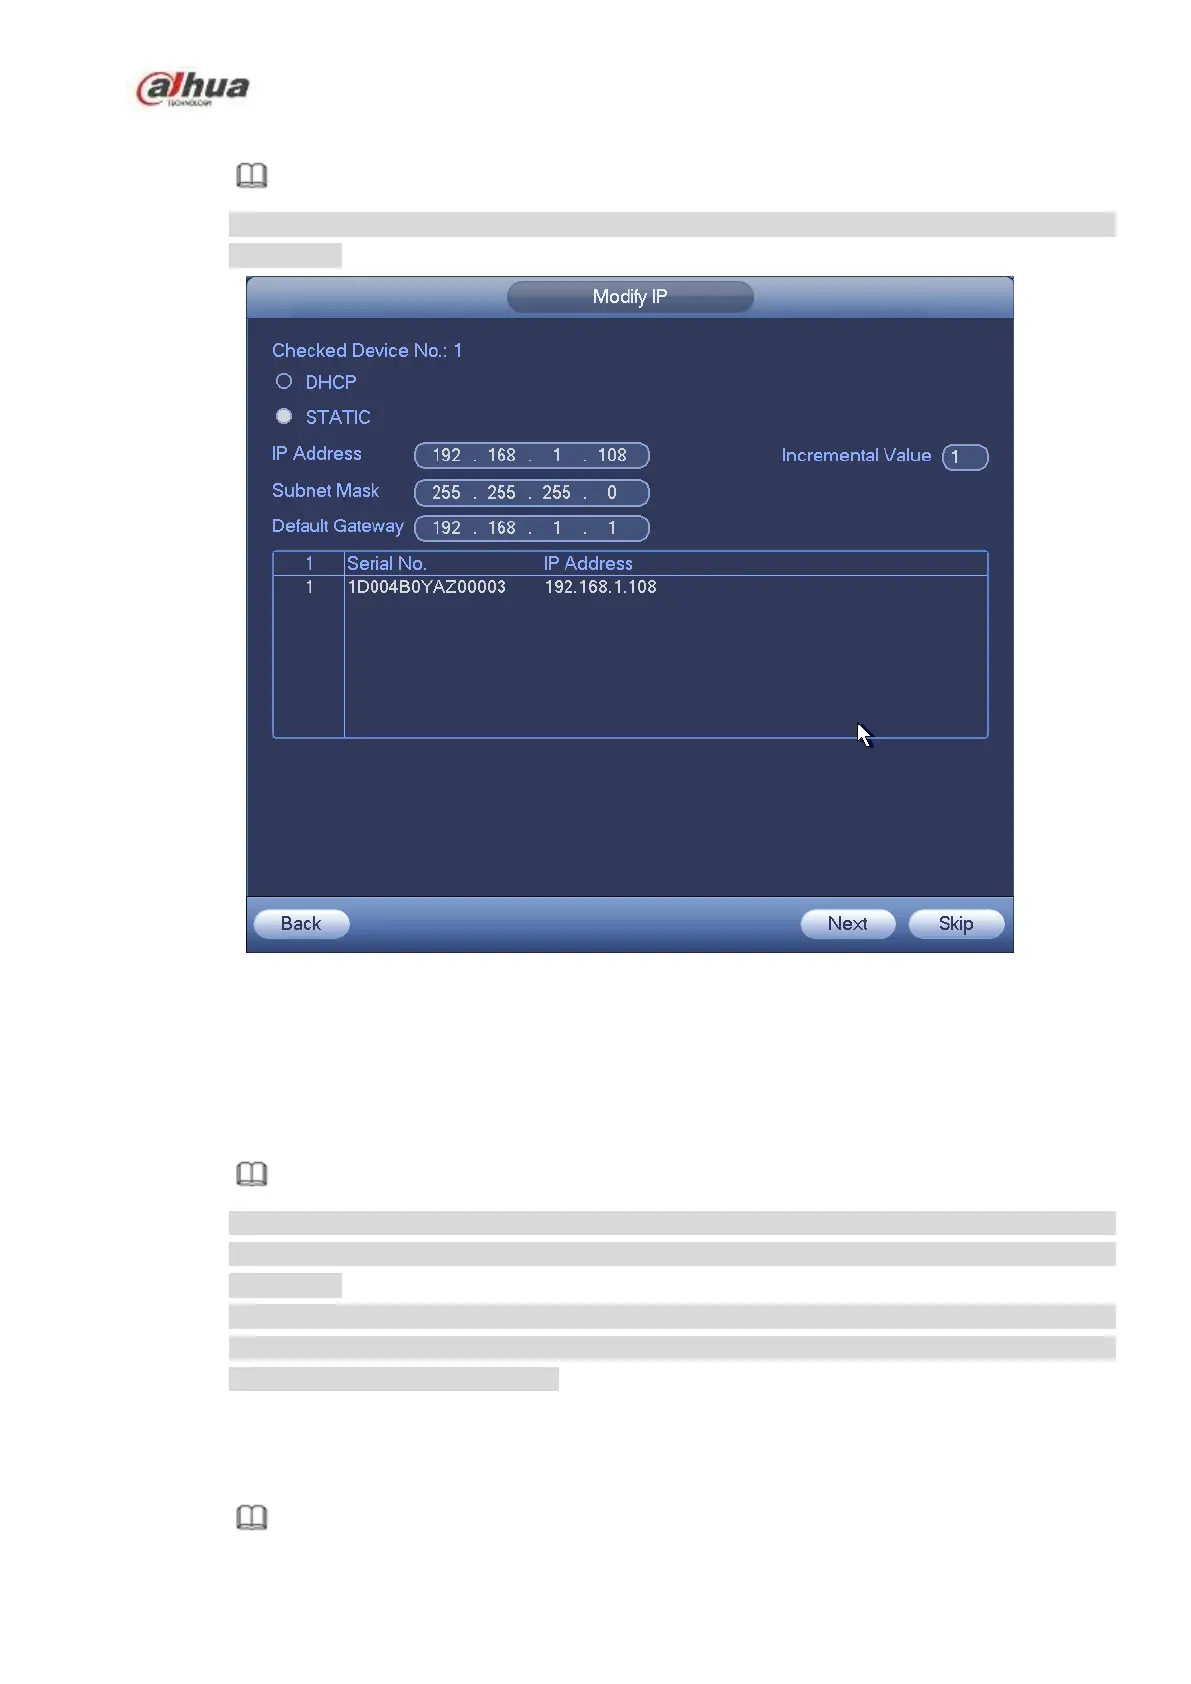
Enter change IP interface. See Figure 4-42.
Note
Check the box before several cameras, change the IP addresses of several cameras at the
same time.
Figure 4-42
Step 2 Select IP mode.
Check DHCP, there is no need to input IP address, subnet mask, and default gateway. Device
automatically allocates the IP address to the camera.
Check Static, and then input IP address, subnet mask, default gateway and incremental value.
Note
If it is to change several devices IP addresses at the same time, please input incremental value.
Device can add the fourth address of the IP address one by one to automatically allocate the IP
addresses.
If there is IP conflict when changing static IP address, device pops up IP conflict dialogue box. If
batch change IP address, device automatically skips the conflicted IP and begin the allocation
according to the incremental value
Step 3 Input remote device user name and password.
Step 4 Click OK button to save settings.
After the changing operation, search again, device displays new IP address.
Note

 Loading...