5 Piping installation
Installation manual
18
EBSH/X(B)11+16P50D
Daikin Altherma 3 R ECH₂O
4P759878-1 – 2024.01
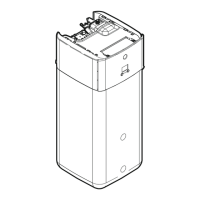
2 Connect the shut-off valves using the flat gaskets (accessory
bag) to the space heating/cooling water pipes of the indoor unit.
3 Connect the space heating/cooling field piping to the shut-off
valves using a sealing.
Do NOT exceed the maximum tightening torque (Thread size 1",
25-30 N•m). To avoid damage, apply the necessary countertorque
with a suitable tool.
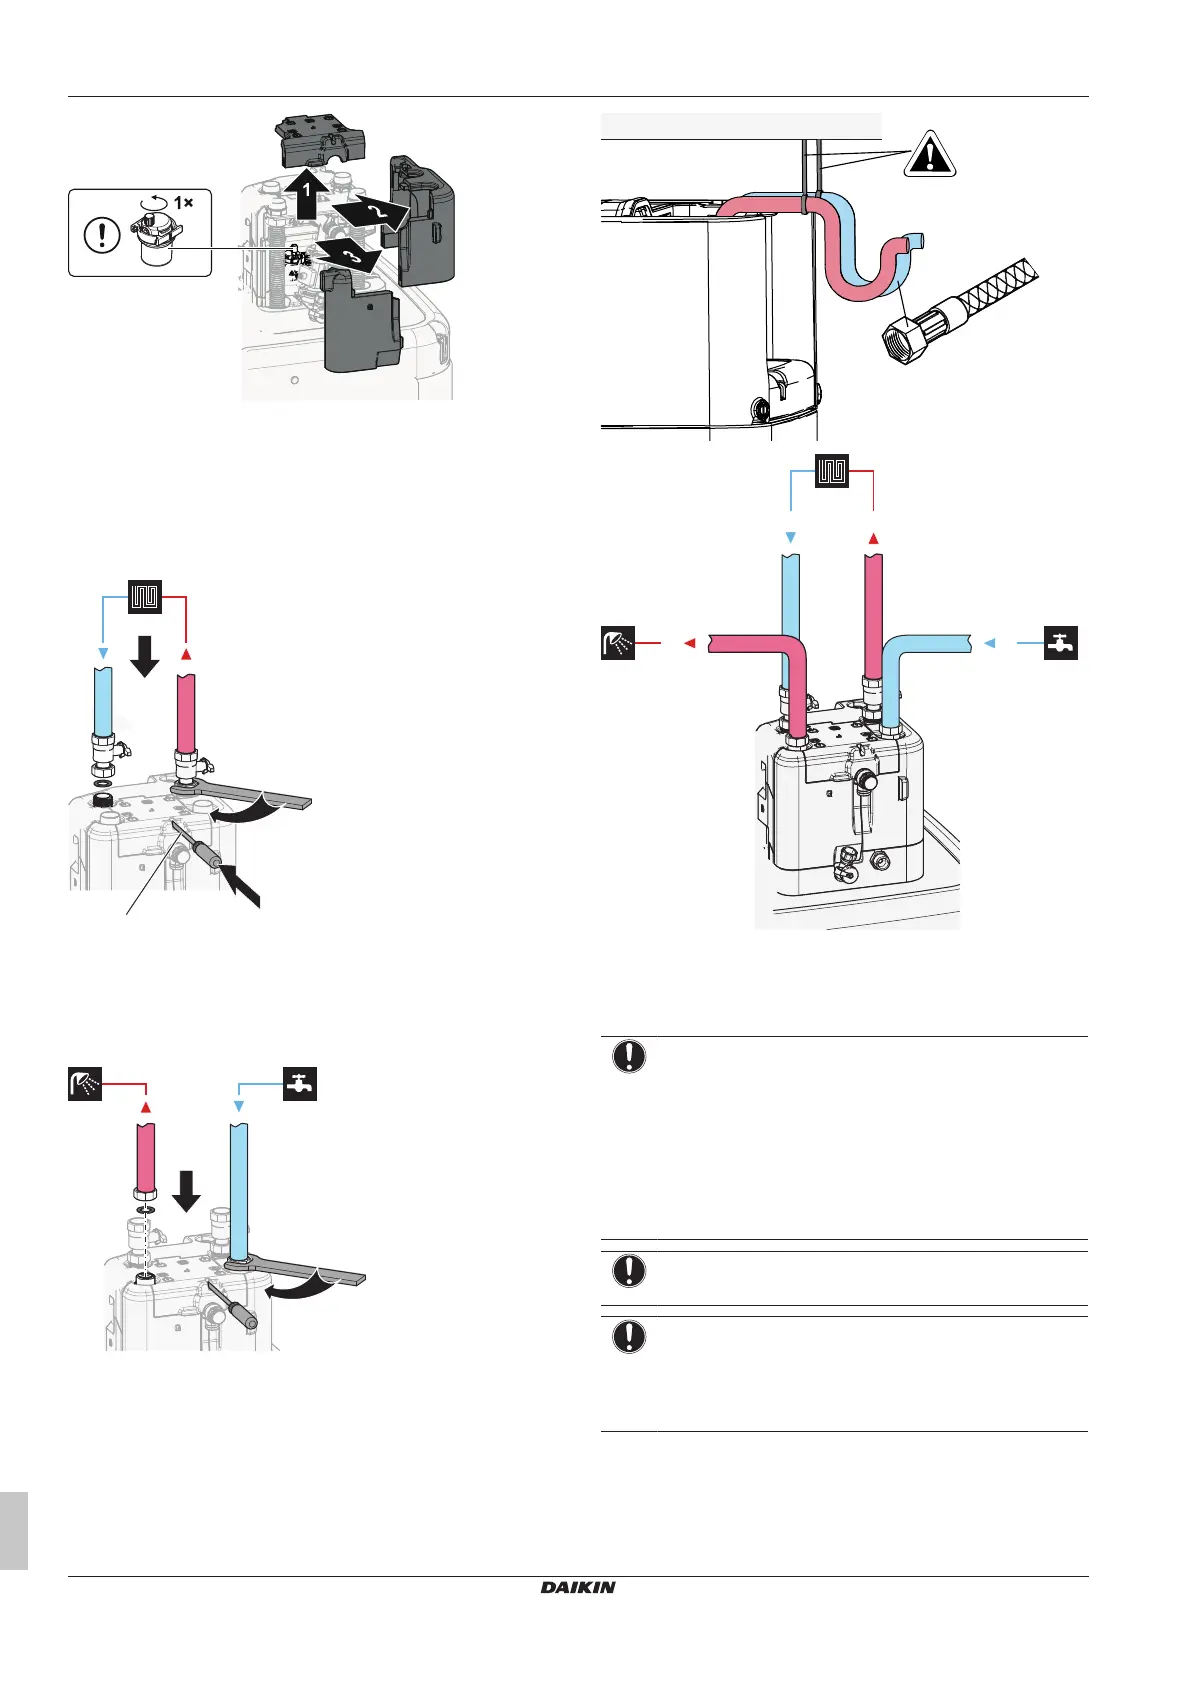
4 Connect the domestic hot water in and out pipes to the indoor
unit.
Do NOT exceed the maximum tightening torque (Thread size 1",
25-30 N•m). To avoid damage, apply the necessary countertorque
with a suitable tool.
5 Support the water piping.
For rearward facing connections: Support hydraulic lines suitably
according to the spatial conditions. This is valid for all water pipes.
a Space heating/cooling water OUT (screw connection, 1")
b Space heating/cooling water IN (screw connection, 1")
c Domestic hot water OUT (screw connection, 1")
d Domestic cold water IN (cold water supply)(screw
connection, 1")
NOTICE
▪ It is recommended to install shut-off valves on the
space heating/cooling water in and out connections, as
well as on the domestic cold water in and domestic hot
water out connections. These shut-off valves are field
supplied.
▪ However, make sure there is no valve between the
pressure relief valve (field supply) and the DHW
tank.
NOTICE
Install air purge valves at all local high points.
NOTICE
A pressure relief valve (field supply) with an opening
pressure of maximum 10 bar (=1 MPa) must be installed
on the domestic cold water inlet connection in accordance
with the applicable legislation.